128
Chapter 6: Working with Data
3.
In the Bindings panel (Window > Bindings), click the Plus (+) button.
The Add Binding - Step 1 dialog box appears.
Tip:
You can also open the Add Binding dialog box by right-clicking the component in Design
view or its tag in Code view, and then selecting Create New Binding from the context menu.
4.
Select the second option (“Data Will Flow From”) and then select the property to supply the
data.
For example, if you want the source of the data to be the values entered by users in the selected
TextInput component, select the text:String property.
5.
Click Next to specify the destination of the data.
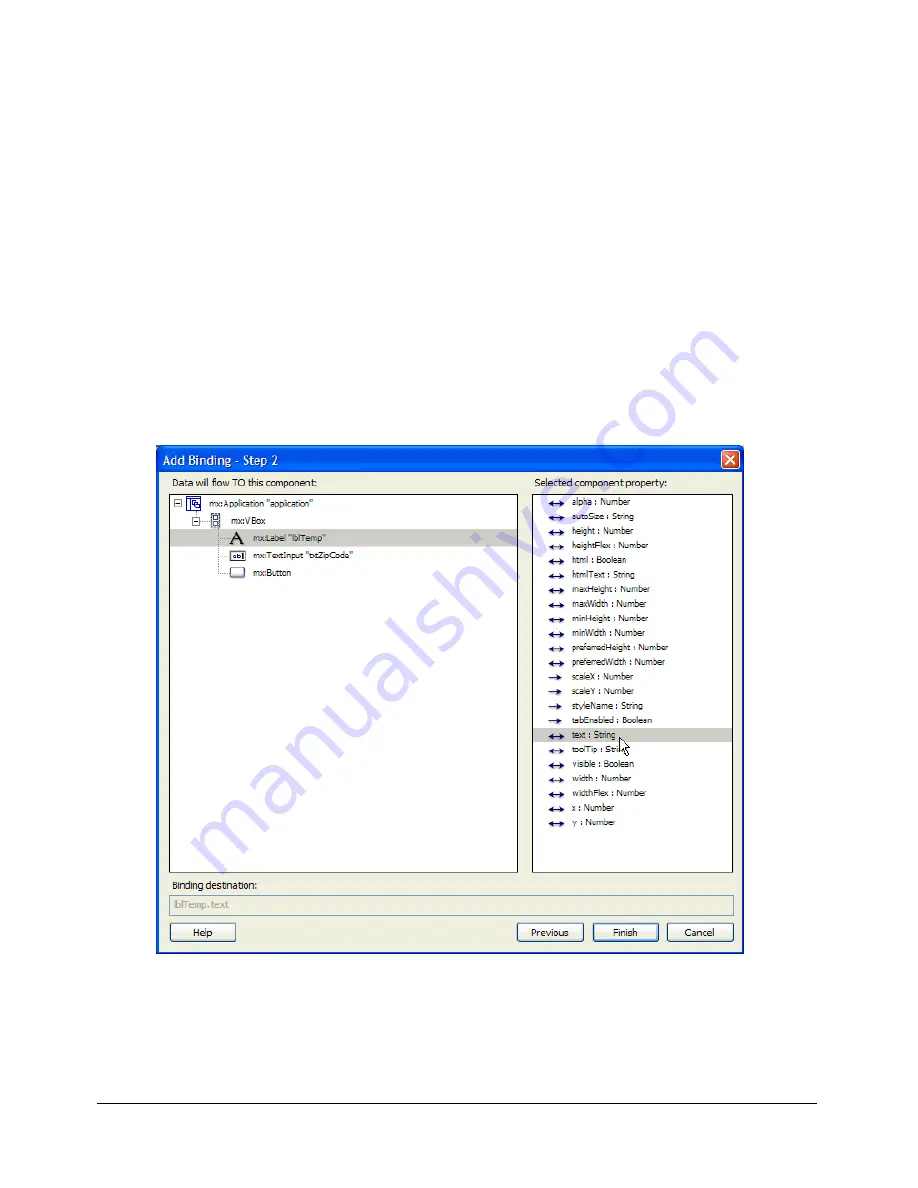
The Add Binding - Step 2 dialog box appears.
6.
Select the component and property that will accept the data.
For example, if you have a Label component that you want to use to display the value entered
in a TextInput component, select the Label component in the left pane and then select the
text:String property in the right pane.
7.
Click Finish to create the binding.
If the source of the binding doesn’t have an ID, you will be prompted to set one.
The new binding appears in the Bindings panel.
Summary of Contents for FLEX BUILDER-USING FLEX BUILDER
Page 1: ...Using Flex Builder...
Page 116: ...116 Chapter 4 Building a Flex User Interface Visually...
Page 144: ...144 Chapter 6 Working with Data...
Page 154: ...154 Appendix A Basic Flex Concepts...


