System Startup 1 - 5
Quick Start Guide
1
System Startup
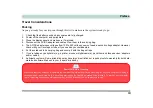
1. Remove all packing materials.
2. Place the computer on a stable surface.
3. Securely attach any peripherals you want to use with the notebook (e.g. keyboard
and mouse) to their ports.
4. Attach the AC/DC adapter to the DC-In jack at the rear of the computer, then plug
the AC power cord into an outlet, and connect the AC power cord to the AC/DC
adapter.
5. Move the LCD latches at the front of the computer outwards towards the sides of the
computer to release the top cover.
6. Raise the lid/LCD to a comfortable viewing angle, and press the power button.
7. Adjust the LCD panel to a comfortable viewing angle.
Figure 1 - 1 - AC/DC Adapter In
Shutdown
Note that you should
always shut your com-
puter down by choos-
ing the
Shut Down
command from the
Lock Button Menu
in
Windows Vista
. This
will help prevent hard
disk or system prob-
lems.
Summary of Contents for 17W29U
Page 1: ......
Page 2: ......
Page 38: ...Quick Start Guide 1 18 1 ...
Page 100: ...Upgrading The Computer 6 14 6 ...
Page 114: ...Modules 7 14 PC Camera Module 7 Figure 7 12 Audio Setup for PC Camera Right click ...
Page 148: ...Interface Ports Jacks A 6 A ...
Page 160: ...Nvidia Video Driver Controls B 12 B ...
Page 212: ...Windows XP Information D 46 D ...

