Macurco
TM
Macurco RD-24 Manual
REV
–
1.0.0
[34-8708-4770-1]
10
|
P a g e
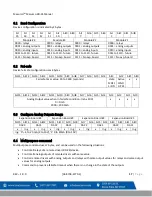
Switch 5
Switch 4
Description
OFF
OFF
Default Parity EVEN (Default Value)
OFF
ON
Parity is ODD
ON
OFF
Parity is NONE
ON
ON
Do not change
Table 4-2
–
Parity Configuration
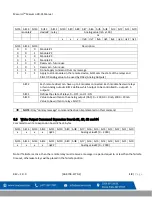
Set the switches to the desired value and then set switch 1 to ON and then OFF, and the new settings will be saved
in EEPROM.
The result of saving operation is displayed on STATUS LED. Alternating GREEN/OFF every 200 milliseconds indicates
saving new settings passed and alternating RED/OFF every 200 milliseconds indicates that saving new settings failed.
Once the new settings have passed, disconnect power from the unit, set the address for the device using the
address switches and apply power back to unit.
4.2.3
Configuration Refresh
Upon initial installation, or when the user would like to change the RD-24 configuration (move, swap, or change
expansion board type or locations), the following process must be followed. Before making any changes, power off
the RD-24. Next, make the preferred changes to the RD-24 configuration. After, set the dip switch address to 255 and
power on the RD-24 for at least 3 seconds. The LED below the dip switch should blink green rapidly. After at least 3
seconds, power off the RD-24. Using the dip switch, change the address back to its original setting, or a number
between 193 and 200. Power on the RD-24. Last, navigate in the DVP-1200 menu CONFIGURE SYSTEM
→
MANUAL
CONFIGURE
→
CONFIG. RLYS,SIGNALS,SENSORS,REM. DEV.
→
REMOTE DEVICES. Select the Remote Device and delete
it from the DVP-1200. If the RD-24 is still powered on, the DVP-1200 will automatically find it back and update the
configuration. If the DVP-1200 does not find the device after 60 seconds, power cycle the panel and check again.
4.3
Configuration
4.3.1.1
Configure RELAY(S)
Menu path: Main Menu-->CONFIGURE SYSTEM -->MANUAL CONFIGURE -->CONFIGURE ZONES -->ADD/EDIT ZONES--
>RELAY(S): -->
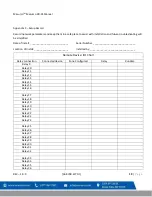
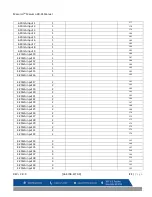
NOTE: Programming Configure Relays - The panel has 8 onboard relays so remote relays start at 9. Reference the
Remote Device: I/O Chart at the end of this manual.
To add relays to a zone or delete relays assigned from a zone, select “RELAY(S):” from the zone configuration me
nu
and press ENTER. Then, select ADD RELAY or DELETE RELAY as shown below. The bottom box of the display will show
any relays assigned to the zone and will get updated as you make changes.


