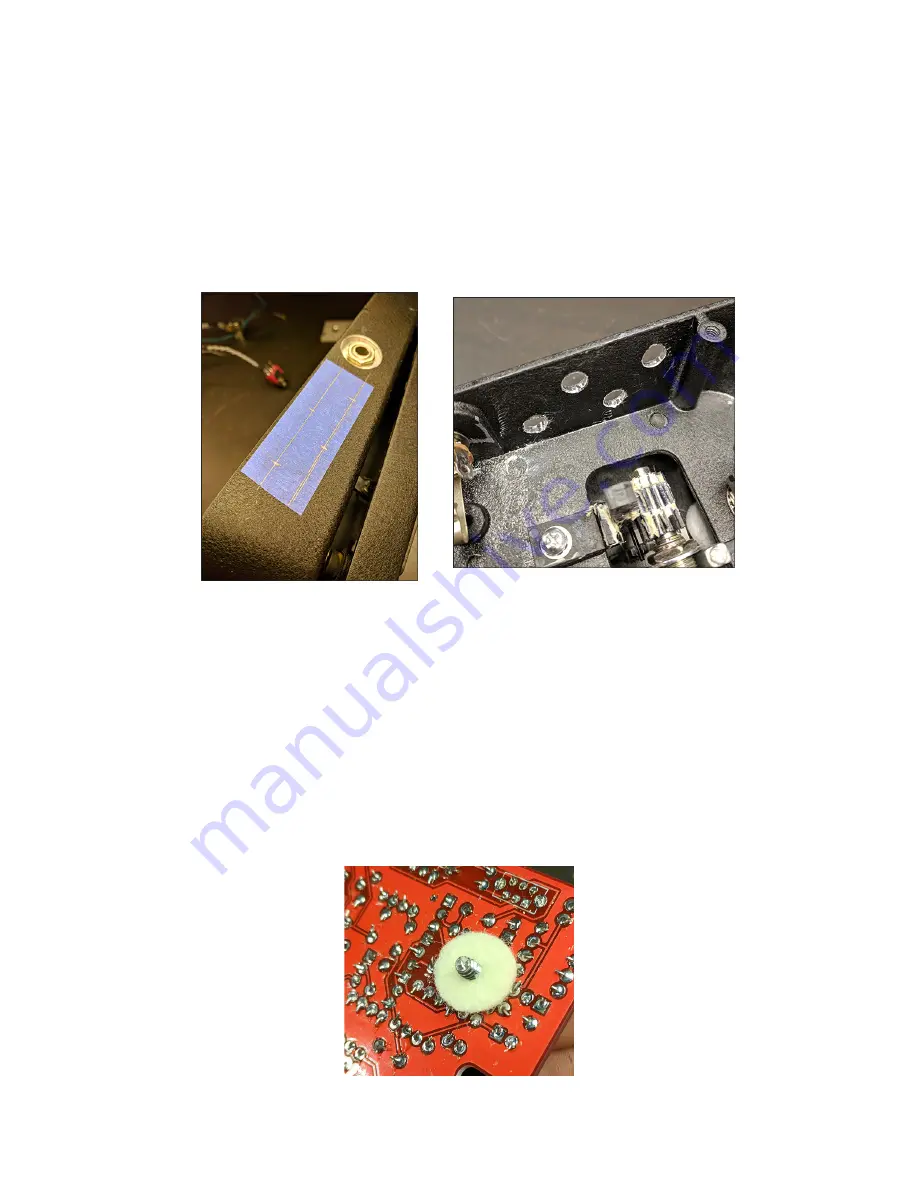
About Wah shells
Drilling Wah shells is very hard to do. They are generally made with heavy-duty die-cast and are much harder to drill than
most of our plunky aluminum enclosures. However, a stepped drill bit will do the job. Just go slow when drilling and use a
bit of force when needed.
Tools that will make the job go easier:
Stepped drill bit, Xacto knife, wire cutter and a deburring tool.
There is no drill diagram for the Harbinger Two. You need to work it out on you own. I used painter’s tape to mark out four
drill locations (two pots and two switches). I set them between the post and jack on the enclosure and spaced them about
1” apart on each row. I decided to stagger the top and bottom rows to make accessing the controls easier.
It took about 15 minutes to drill the holes (PS I also had to drill out a larger hole for the DC jack since none of my jacks fit
the existing hole). I used a drill press and even with that I had to use some forceful downward pressure to punch through.
After drilling, I had a lot of burrs that required clean up. Using my Xacto knife, an old pair of wire cutters I didn’t care about
and deburring tool I was able to get reasonably clean holes
Moral of the story: take your time and expect to do some real work here! It doesn’t have to be pretty.
Mounting
I left as much space as possible around the screw mounts to prevent any shorts from soldered pads to the enclosure. As
a bit of extra insurance, I recommend adding some kind of stand-off. What you use isn’t important so long as it creates a
barrier between the bottom of the PCB and screw posts. Tape, wadded up paper, whatever. I used a couple felts I had that
are for guitar strap buttons.


