EN
86
EN
87
Intended use
The appliance is intended for distribu-
tion of dry air in private interiors). The
appliance is not intended for commer-
cial use.
Any other use or modification to the
appliance is considered as improp-
er use and could cause considerable
dangers.
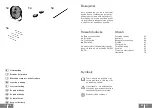
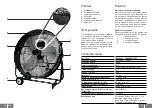
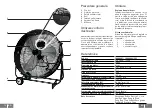
Overview
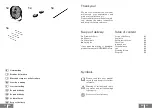
1
Control
2
Protective grille
3
Fan blades
4
Wheels
5
Supply cord
6
Fixing screws
7
Handles
Use
Adjusting the Air Flow
Tilt the ventilator upwards or down-
wards into the required angle. Fix the
position by tightening the fixing screws
6
firmly. The ventilator can be used in
combination with air conditioning. If
the ventilator is tilted upwards, the air
at ground level is aspirated and subse-
quently distributed into the room.
Ventilator Speed
The ventilator speed can be adjusted
on the control
1
on the backside of the
ventilator:
1
= low speed
2
= medium speed
3
= high speed
0
= ventilator off
Art. no
10604861 / 10604862 (CH)
Nominal voltage
220-240 V~ / 50 Hz
Rated power
124 W
Ventilator diameter
61 cm
Speed settings
Low - Med - Hi - Off
Protection Class
/ I
Degree of protection
IPX0
Weight
10.5 kg
Maximum fan flow rate (F)
111.72 m
3
/min
Fan power input (P)
119.1 W
Service value (SV)
0.94 (m
3
/min)/W
Maximum air velocity (c)
3.381 m/s
Measurement standard for SV
EN IEC 60879:2019
Standby power consumption (Q)
38.112 kWh/a
Fan sound power level (L
WA
)
73.5 dB(A)
Contact for information
Zhongshan Reffon Electric Co., Ltd.
Heping Village, Dongfu Road,
Dongfeng Town 528425 Zhongshan
People´s Republic China
Technical data
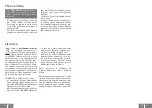
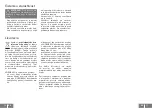
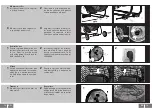
Insert the power supply cord
5
into a suitable wall socket. For
Switzerland, only use the venti-
lator 10604862.
Storage
After use pull the supply cord
5
out of the wall socket and wind
the cable onto the holder on the
backside.
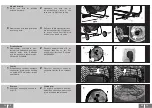
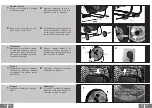
Mount the wheels
4
onto the re-
spective ends of the wheel axle.
Air flow
Tilt the ventilator to adjust
the air flow upwards or down-
wards. Fix the position by tigh-
tening the fixing screws
6
firm-
ly.
Speed
Set the required speed by pres-
sing the corresponding button
on the control
1
on the backside
of the ventilator.
To switch off the ventilator,
press the button
0
on the con-
trol
1
.
Transport
Pick up the ventilator by the
handles
7
only.
Mounting the wheels
Insert the wheel axle to the
wheel mount on the frame.
Secure the wheels
4
with the
two remaining split pins. Make
sure the ends of all six split pins
are bent apart.
Fix the wheel axle by sticking
four of the split pins through
the respective holes in the axle.
1
3
1
1
1
2
4
2
2
2

