23
OPERATING INSTRUCTIONS:
BATTERY CHARGING (CONT’D)
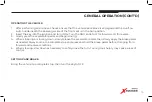
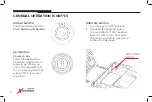
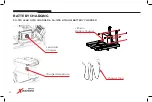
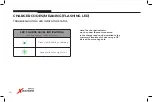
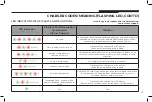
1. First, tightly connect the charger output plug or ring terminals to the battery pack, then firmly connect
the AC plug with the AC outlet. Once connected, the red charger light will begin to flash. The green light
turns on after it finishes charging. Then you can disconnect the plug between the charger and the AC
outlet.
2. Before using the charger, make sure the AC voltage and frequency are in the range specified. Match
the charger and battery pack: There is applied battery specifications on the “Basic Parameters” label on
the charger side. Please confirm the battery type (flooded lead-acid batteries, sealed maintenance-free
batteries, lithium batteries, nickel metal hydride batteries, nickel-cadmium battery, etc.), the battery
capacity (AH) and battery pack rated voltage (V) match those on the “Basic Parameters” label. If they do
not match, it is likely to charge less or over charge and could cause permanent damage to the battery
pack.
3. The AC input wire is at the rear of the charger. L, N and ground are marked on the input line plug.
Please distinguish them correctly. L, N, and ground on the AC plug should correspond with those of
the socket outlet. The ground wire on the AC input socket should be connected firmly to the ground
contact, otherwise the shell could be compromised and could easily cause shock or injury. The charging
output line is in front of the charger. You can distinguish the positive and negative of the output lines
by color. The red or brown lines are to battery “+ “and blue or black to battery “ - “ (except with special
requirements of customers). Special connections depend on special charging plugs, sockets and user
special requirements. The polarity of charging sockets should be consistent with the polarity of a charging
plugs polarity, otherwise it cannot charge. Please check before using.

