MADRAX MADLOCKER ™ Assembly Instructions
MADRAX DIVISION
ML1-1 and ML2-2
GRABER MANUFACTURING, INC.
3/30/18
Page 7 of 7
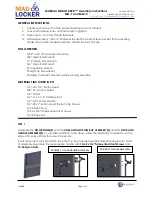
LOCKER CONNECTION INSTRUCTIONS FROM STEP 9
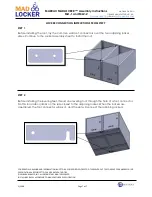
STEP 1
Before installing the roof, lay the common wall roof connectors over the two adjoining locker
sides. Continue to the Locker Assembly sheet to install the roof.
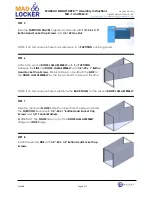
STEP 2
Before installing the leveling feet, thread one leveling foot through the hole of a foot connector.
Do this for all door jambs on the side closest to the adjoining locker. When the lockers are
assembled, the foot connector will pivot, and the slot will connect the adjoining lockers.
CONFIDENTIAL DRAWING AND INFORMATION IS NOT TO BE COPIED OR DISCLOSED TO OTHERS WITHOUT THE CONSENT OF GRABER MFG. INC.
SPECIFICATIONS ARE SUBJECT TO CHANGE WITHOUT NOTICE.
©2018 GRABER MFG. INC. ALL PROPRIETARY RIGHTS RESERVED.
INSTALL BIKE RACKS ACCORDING TO MANUFACTURER'S SPECIFICATION

