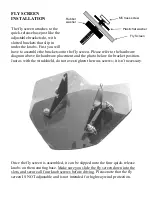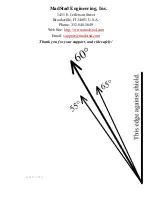
ADJUSTABLE BRACKETS INSTALLATION
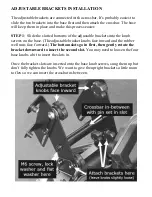
The adjustable brackets are connected with a crossbar. It’s probably easiest to
slide the two brackets into the base first and then attach the crossbar. The base
will keep them in place and make this process easier.
STEP 1
: Slide the slotted bottoms of the adjustable brackets into the knob
screws on the base. (The adjustable bracket knobs face inward and the rubber
well nuts face forward.)
The bottom slots go in first, then gently rotate the
bracket downward to insert the second slot.
You may need to loosen the four
base knobs a bit to insert the slots in.
Once the bracket slots are inserted onto the base knob screws, snug them up but
don’t fully tighten the knobs. We want to give the upright brackets a little room
to flex so we can insert the crossbar in-between.


