-34-
4.10 Cuts with length exceeding 2800 mm
(110 in.)
In the case of performing longitudinal cuts of more
than 2800 mm (110 in.), the system can be reposi-
tioned at the end of the already existing saw kerf
once the first part of the cut has been completed. By
doing so you will extend your cut practically invisible.
To perform a cut extension proceed as follows:
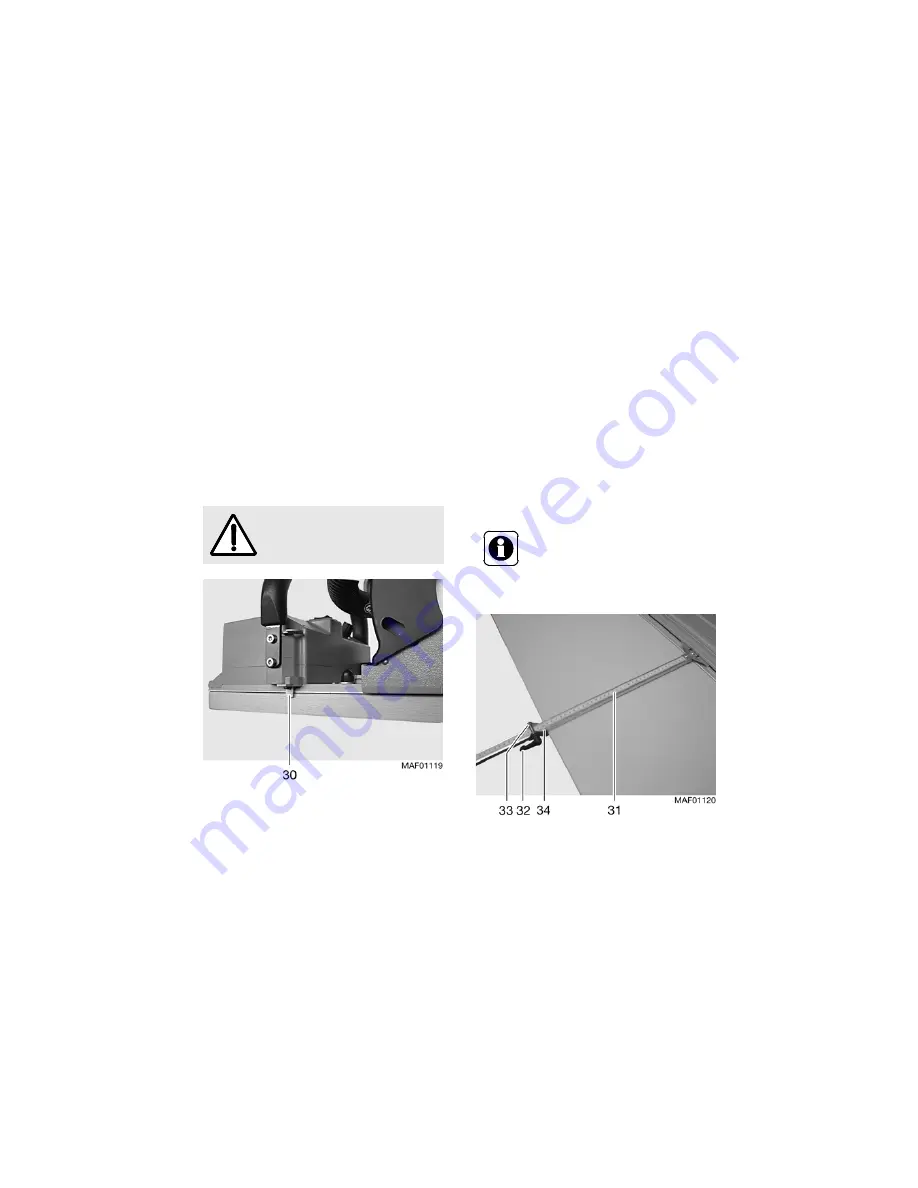
• After the completion of the first cut, press down
pusher plate 30 (Fig. 9) and place the system
together with the pusher plate at the end of the
saw kerf so that the saw assembly, too, is above
the saw kerf.
• Align guide track at the other end for a straight
extension of the cut. This is best done using the
guide plate system available as optional acces-
sory.
• Perform second cut to the end of the workpiece.
Fig. 9
4.11 Parallell cuts with optional accessory
guide plate (series of 2 required)
The guide plate (cutting width plate), available as
optional accessory, makes it possible to cut parallell
to the left edge of the workpiece including the selec-
tion of the desired cutting width. It consists of two
rails with stop plates adjustable between 250 mm
(9 3/4 in.) and 1250 mm (49 in.).
The stop plates are mounted as follows:
• Both cross-fences 31 (Fig. 10) are swivelled and
thus hooked into the groove in the left edge of the
guide track.
• Lossen lever 32 and adjust the desired cutting
width by moving pusher plate 33. The cutting
width is indicated at indicator 34. Subsequently,
retighten lever 32.
• Position the entire system on the workpiece so
that the two pusher fences are face to face with
the left edge of the workpiece. Subsequently, per-
form parallell cut as described in paragraph 4.6.
Fig. 10
Switch off saw blade drive after com-
pletion of the first cut!
To make sure that the cut is exactly par-
allell, position the two cross fences with
sufficient distance between them. Best
would be if both can be adjusted from the
location of the user.


