Fly Series User Manual rev 1.21
10
in
fo@mag-audio
.c
om
Tel./F
ax:
+
38 044 277
-4
7-89
www
.mag-audio.com
5.1.3 Fly 6 / Fly 6L flying angle reference
Flying socket number
1
2
3
4
5
6
7
1 cabinet
+ 21°
+ 12,5°
+ 2,5°
- 7,5°
- 16°
- 24°
- 29°
2 cabinets
+ 20,5°
+ 14°
+ 8°
+ 2°
- 4°
- 9,5°
- 15°
3 cabinets
+ 24,5°
+ 19,5°
+ 14°
+ 9 °
+ 4°
- 0,5°
- 4,5°
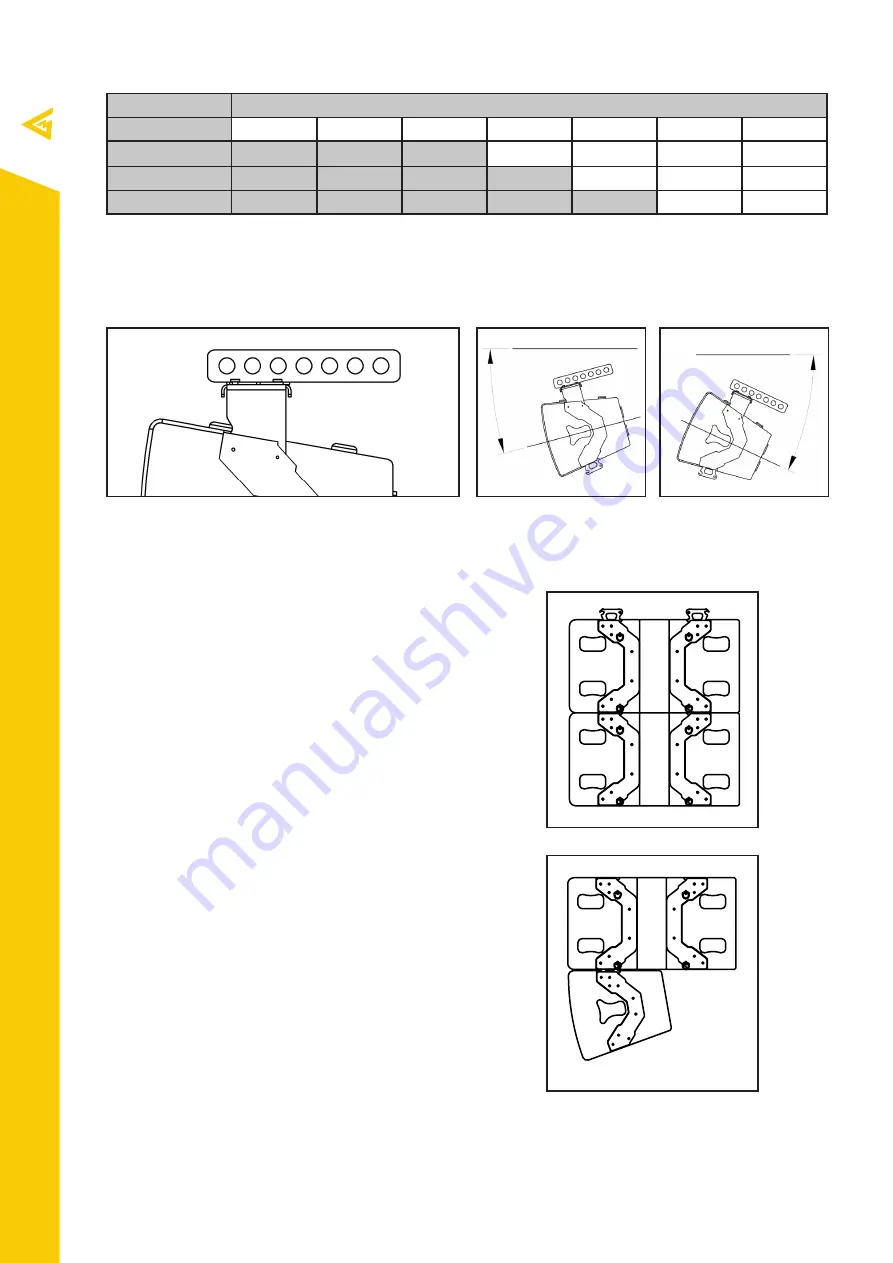
Fly 6 / Fly 6L with FL-01 and
FL-02
flying socket number reference
“ - “ angle
“ + “ angle
Single, two or three Fly 6 / Fly 6L cabinets are able to be flown via FL-01 and FL-02 accessories. Table
above states the angle between horizontal plane and vertical axis of the top-most cabinet. Positive
angle means cabinets are “looking up“, negative angle means cabinets are “looking down“.
1
2 3 4 5 6 7
5.1.4. Attaching two Fly Sub 12 / Fly Sub 12L
- On the lower Fly Sub 12 / Fly Sub 12L system
release quick lock pins, pull the integrated link up,
and secure it with the quick lock pins.
- Position the lower Fly Sub 12 / Fly Sub 12L system
so its integrated link finds support in the upper
cabinet’s hardware.
- Secure connection with a quick lock pins.
Refer to the instruction on the system’s hardware
for more detailed walkthrough
5.1.5. Attaching Fly 6 / Fly 6L to Fly Sub 12 /
Fly Sub 12L
- On the lower Fly 6 / Fly 6L system release quick
lock pins, pull the integrated link up, and secure it
with the quick lock pins.
- Position the lower Fly 6 / Fly 6L system so its
integrated link finds support in the upper cabinet’s
hardware.
- Secure connection with a quick lock pins.
Refer to the instruction on the system’s hardware
for more detailed walkthrough


