©
Install_CelmerSL100P - All specification and suggested dimension is for reference only- subject to change without further notice.
6
Installing the gear rack
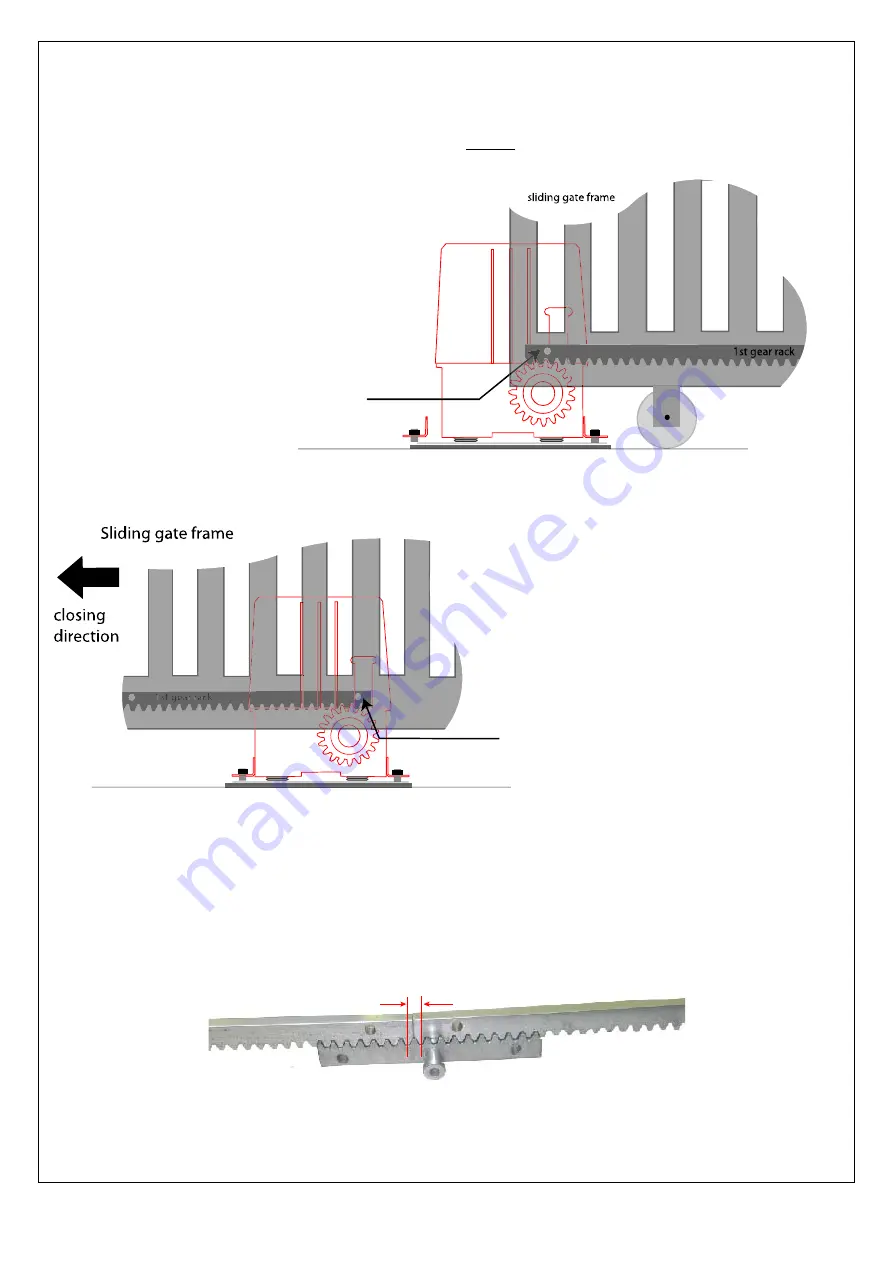
Gear rack mounting location must be parallel to the pinion gear horizontal axis after the operator motor is fully
mounted at that specific installation site. Using alignment liquid level ruler or simply following the gate frame is not an
accurate method. The gear rack location must be determined relative to the pinion gear location. The following is the
method suggested. Release the motor clutch for free rotation during installation.
Now the gear rack horizontal axis should be aligned to be parallel to the pinion gear axis. With minima effort try to
slide the gate back and forth within the gear rack length and make sure the movement is smooth and even.
Repeat the same installation procedure for all subsequent gear racks that are needed to reach the position of
complete closing. Use a section of rack of about 150 mm to ensure that the teeth-to-teeth distance of subsequent
gear rack is spaced correctly - see illustration below.
After installing all the required gear racks, manually check if the gate can open completely and the movements of the
gate is smooth and even. Full weld all the spacer to the gate frame. Tighten the motor clutch back. IMPORTANT: Do
not weld the rack section to the spacers or to each other. Do not apply grease or other lubricant to the pinion and rack.
Slide the gate open by hand. Place the first section
of the rack on the pinion, aligning it with the first
spacer. The pinion gear teeth should fit into the
gear rack teeth with almost no spacing.
Secure the gear rack to gate using a clamp.
Spot weld the first spacer to the gate frame.
Slide the gate towards its closed position until
the third spacer of gear rack is on top of the
pinion gear.
Secure the position of the bolt and spacer to
gate through gear rack's last screw hole.
Spot weld the second and third spacer to the
gate frame
Correct teeth-to-teeth distance at the joint


