


Page 7 of 10
Assembly Instructions
Step 3:
● Insert the end with "D-ring" of Purple coded two
leg poles into plastic mold C and C1.
● Insert the end with "D-ring" of Blue coded two
leg poles into plastic mold D and D1.
(Fig. 11).
● Insert the other of remain leg poles into plastic
mold E.
(Fig. 12).
● Hook the plastic clips that sewn into tent wall to
Leg pole.
(Fig.13)
● Insert the pin of pin-ring that sewn on tent floor
into the other end of Leg pole.
(Fig.14)
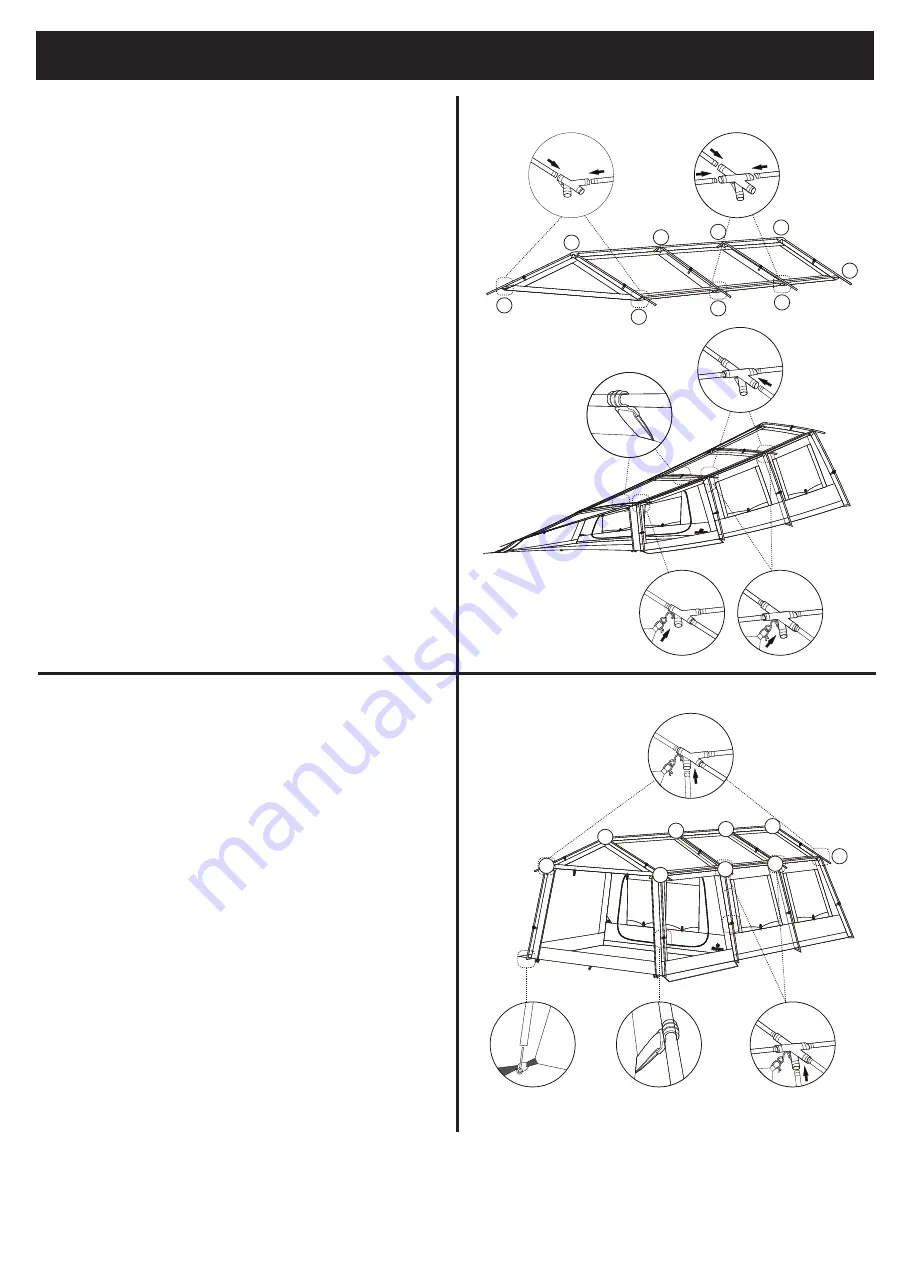
Step 2:
● Insert the other end of roof poles into the holes
(Green Coded) of plastic mold C and D on Beam
pole 2.
(Fig.5)
● Insert the other end of the remain roof poles into
the holes(Green Coded) of plastic mold E on
Beam pole 2.
(Fig.6)
● Insert the other end of roof poles into the holes
(Green Coded) of plastic mold C1 and D1 on
Beam pole 2.
● Hook the plastic clips that sewn into tent roof to
roof poles.
(Fig.7)
● Insert 8 red coded short eave poles into the
plastic mold holes.
(Fig.8)
● Hang the S-shaped iron hook on top of the
plastic.
(Fig.9)(Fig.10)
FIGURE 7
FIGURE 8
FIGURE 9
FIGURE 5
FIGURE 6
FIGURE 13
FIGURE 12
FIGURE 14
FIGURE 10
C
D
B
B
A2
D1
A1
E
E
C
D
B
B
A2
D1
A1
E
E
FIGURE 11


