Assembly Instructions
Page 5 of 8
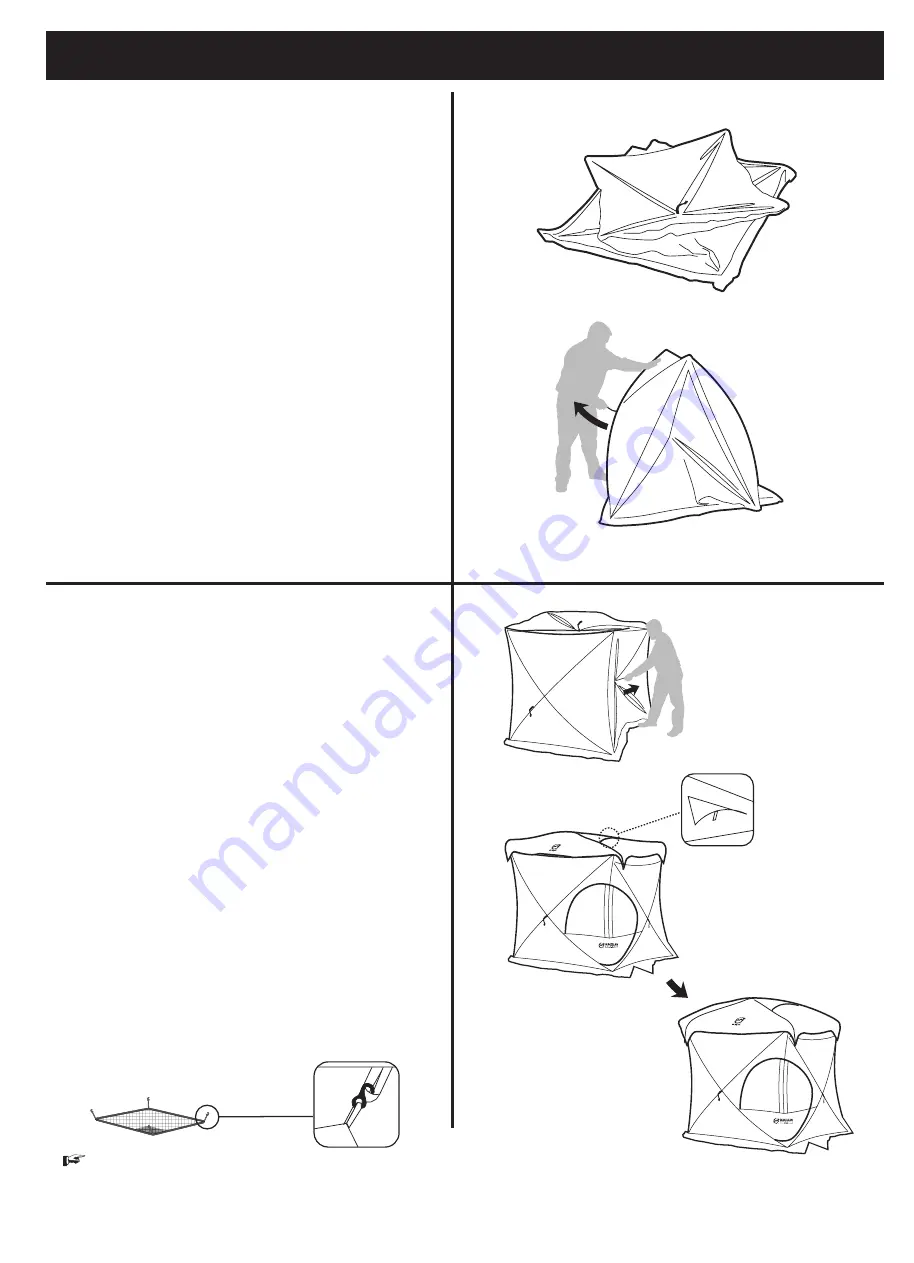
FIGURE 1
FIGURE 2
FIGU
FIGURE 5
RE 3
ROOF
W
AL
L
W
AL
L
FIGURE 4
Step 1:
CAUTION
:
Avoid pinch points when opening
or closing the tent frame.
● Remove tent from expandable carry bag.
Remove the tie strap from around the tent.
● Lay the tent flat on the ground and check that
there is no material twisted or overlapping the
ends of any poles. Do not force tent when
folding or unfolding. watch for the entanglement
of poles.
(Fig.1)
● Grab the webbed ring sewn to the steel ring at
the center of the wall and pull outward until the
wall is partially open.
(Fig.2)
NOTE: The (2) side walls should be popped
open first after laying flat.
Step 2:
● Proceed by walking around entire tent and
pulling on each wall webbed loop to pop out
each wall until all sides are popped out.
(Fig.3)
● Spread out the rainfly,
find the vent, open the
vent with struts
.
(Fig.4)
● Find the side with logo as the front. Two people
each pull the rainfly any part, and then drag it
over the top of the tent.
(Fig.5)
NOTE: Ensure to add the rainfly bef
OPEN ROOF
ore pushing
open the top.
● Continue to open the roof by walking inside the
tent and pushing up each roof
.
● Attach Lighted Gear loft by attaching the plastic
S-hooks to the fabric loops sewn on the
roof of the tent.
(Fig.6)
FIGURE 6
TIP: Gear loft is for storing light weight
items only.


