background image

21

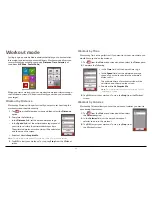
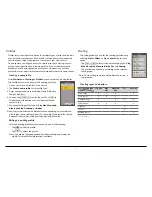
Workout by HR Zone

Workout by HR Zone is available for selected models only. Select a profile 
with paired heart rate monitor before you start this workout.

1. 

Tap 

 from the 

Main menu


screen and then select the 

HR Zone


option.

2. 

Complete the following: 

• 

In the 

Zone

 field, select the proper heart rate range 

for the workout. The default setting is 

Zone 2

 (121 - 

138 BPM).

• 

Select 

Time 

mode ( 

 ) or 

Distance 

mode


 ).


The route will be generated according to your 
selection.

• 

Enable or disable 

Surprise Me

.

Note:

 For more information about Surprise Me, see the “Surprise 

Me" section.

3. 

Tap 

GO

 to start your workout. To stop, tap 

Stop

 from the 

Workout


screen.

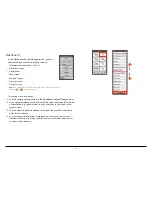
Workout by Power Zone

Workout by Power Zone is available for selected models only. Connect the 
power meter (not provided) to the device before you start this workout.

1. 

Tap 

 from the 

Main menu


screen and then select the 

Power Zone


option.

2. 

Complete the following: 

• 

In the 

Zone

 field, select the desired power range for 

the workout. (Default setting is 

Zone 2

 (166 - 225 W).

• 

Select 

Time 

mode ( 

 ) or 

Distance 

mode


 ).


The route will be generated accordingly.

• 

Enable or disable 

Surprise Me

.

Note:

 For more information about Surprise Me, see the “Surprise 

Me" section.

3. 

Tap 

GO

 to start your workout. To stop, tap 

Stop

 from 

the 

Workout

 screen.

Indoor training mode

Indoor training mode is available for selected models only. Configure a 
profile as “Indoor” and pair the appropriate sensors before you start indoor 
training.

1. 

Create the Indoor profile from 

Main menu > Settings > Profiles > 

Create new profile

.

2. 

When done, tap 

 .

3. 

The 

 icon will appear on the title bar indicating the Indoor training 

mode has been enabled.

4. 

When an Indoor profile is selected, you can go to Settings>Sensors 
and pair your compatible indoor trainer.

Note:

 Once you enable the Indoor training mode, the GPS functions of the device 

are disabled, and the routing/navigating features (including 

Navigate

 and 

Surprise 

Me

) are unavailable.

Summary of Contents for CYCLO 315 Series

Page 1: ...User Manual CYCLO 315 505 Series...

Page 2: ...reens and presentations generated by the actual product All such differences are minor and the actual product will deliver the described functionality as presented in this User Manual in all material...

Page 3: ...ing data on the device Using MagellanCyclo 22 Sharing your route with friends in the trip 23 Using WiFi wireless local area network 23 Pairing with your smartphone Receiving incoming calls 25 Receivin...

Page 4: ...o use your device on a bike ensure you use the specific bike mount kit that came with your device Magellan may provide optional accessories for specific models Please visit the Cyclo website www magel...

Page 5: ...he battery when it is nearly discharged When recharging make sure that the battery is fully charged Doing so can extend the battery life If you will not use the product for a long period of time over...

Page 6: ...om using your device DO NOT delete any files that are pre installed on the device Deleting the files can cause the device to crash Magellan is not responsible for product quality caused by file deleti...

Page 7: ...ber pads allowing you to attach the bike mount to your bike securely 1 Select the rubber pad that best fits the handle bars on your bike and then attach it using the two plastic straps 2 Align the lat...

Page 8: ...he sensing area on the sensors 3 When done you can pair the sensor with your device by tapping Main menu Settings Sensors Cadence Speed Note the sensors sleep when not in use to conserve battery power...

Page 9: ...se e g by using a coin to close the cover Speed Cadence Sensor Battery Heart Rate Monitor Battery Putting on the heart rate monitor The heart rate monitor is used for selected models only Note Please...

Page 10: ...h the screen with your finger You can perform the following actions Tap Quick touch the screen once to open menus or select onscreen button option Drag While navigating on the map tap and hold on the...

Page 11: ...ending on your model when a phone is connected you will be notified of missed calls and new text messages of your smartphone from your Cyclo device The System icons Various System icons on the title b...

Page 12: ...are required to enter text such as when searching for a street name Search results will be listed in matching order with the closest matches appearing on the screen The Keyboard screen can display wi...

Page 13: ...ecording the route the recorded track will be displayed as red on the map During recording you can stop pause it by tapping and then selecting the Stop Pause option when prompted otherwise select Canc...

Page 14: ...left or right using your finger to scroll through the Navigate wizard screens and select the desired navigation function 3 When searching is complete the Searching Result screen displays the informati...

Page 15: ...ct a country b city postal code c street d house number Searching for a POI POI Point of Interest is a named site feature landmark or public venue which can be selected as a destination POIs are group...

Page 16: ...er to display more entries if available in the list Note Tap the Sort by button at the bottom of the screen to change the sorting order of the entries by time by name Tracks Tracks are the recorded ro...

Page 17: ...h profile will have its own directory under Dodge Tracks 3 Do one of the following To install the track to your device copy paste the gpx file to Mgn_data Dodge Tracks Don t put it in any of the profi...

Page 18: ...current location Tap from the Main menu screen and then you can plan the routes randomly by selecting the following five functions Loop Address POI Favorite and Point on map When you choose any of th...

Page 19: ...ur current location A to B Address POI Favorite or Point on map The device will generate up to three routes from your current location to the following destination type Address POI Favorite or Point o...

Page 20: ...or more information about Surprise Me see the Surprise Me section 3 Tap GO to start your workout To stop tap Stop from the Workout screen Workout by Time Workout by Time is the perfect tool if you wan...

Page 21: ...wer Zone option 2 Complete the following In the Zone field select the desired power range for the workout Default setting is Zone 2 166 225 W Select Time mode or Distance mode The route will be genera...

Page 22: ...Active Speed and Active Time However depending on your Cyclo model certain items may not be available Note The Odometer displays all the training data existing on the device from first use whether th...

Page 23: ...g you will be prompted to stop navigating before receiving a route Must cancel existing route before accepting a new route Note The Shake Share function of the device is disabled by default Using WiFi...

Page 24: ...o automatically Please note that you need to register your device on MagellanCyclo com before using WiFi to synchronize data Note You may see the landing page shown on the browser during connecting Fo...

Page 25: ...lo device to communicate with your phone For iPhone turn on the Bluetooth function in the iPhone settings and select the Cyclo device from a list of Bluetooth devices For Android phones open CycloSmar...

Page 26: ...vice Note Depending on your Cyclo model certain setting options may not be available There are various customization options available to enhance your navigation and cycling experience With the Settin...

Page 27: ...can select the profile Type as City bike Mountain bike Race bike Running or Indoor Note The system will create different routes depending on your selected profile type not including Indoor For exampl...

Page 28: ...o change the screen layout 1 Tap the corresponding button in the Dashboard Layout Change screen 2 The number displayed at the bottom of the screen indicates the number of data fields e g speed distanc...

Page 29: ...ensor of that type most recently paired 3 Tap Pair new sensor to start pairing the sensor Once the connection is made The sensor ID will be displayed in the Connected Sensor ID field On the main scree...

Page 30: ...een Brightness Drag the slider to the left to decrease the screen brightness or to the right to increase the screen brightness Note You can also decrease increase the screen brightness by tapping Note...

Page 31: ...nstructions Enable or disable the sound while getting instructions HR Zone Alerts Enable or disable the alert sound by HR Zone during your workout Power Zone Alerts Enable or disable the alert sound b...

Page 32: ...unction allows you to calibrate the built in compass of the device To calibrate the compass 1 Tap Enable 2 Move away from any sources of interference such as microwave oven and magnetic devices 3 Tap...

Page 33: ...Magellan will ensure trouble free operation and reduce the risk of damage to your Cyclo Keep your Cyclo away from excessive moisture and extreme temperatures Avoid exposing your Cyclo to direct sunlig...

Page 34: ...th turned on before trying to establish a connection Make sure that the cable is securely plugged into the USB port on your computer and on your Cyclo Connect the USB cable directly to your computer d...

Page 35: ...udes observing all traffic rules and regulations in order to avoid accidents personal injury or property damage IPX7 The IEC 60529 IPX7 is a European system of test specification standards for classif...

Page 36: ...ific conditions for Short Range Devices SRD operating on frequencies between 9 kHz and 40 GHz EN 301 489 17 Electronic compatibility and Radio spectrum Matters ERM Electromagnetic Compatibility EMC st...

Page 37: ...erned by this Agreement and may be subject to additional payments and other conditions You may copy Software or any supporting and accompanying documentation Documentation for backup or archive purpos...

Page 38: ...display or present the Software in public The Software is the confidential information of Magellan its suppliers and licensors You are not allowed to disclose the Software to third parties The removal...

Page 39: ...IAL CONSEQUENTIAL PUNITIVE OR INCIDENTAL DAMAGES OF ANY KIND OR LOSS OF INFORMATION OR DATA ARISING FROM OR IN CONNECTION WITH THE USE OR PERFORMANCE OF THE PRODUCT SOFTWARE AND DOCUMENTATION THIS LIM...

Reviews: