background image

Calibrate Barometer/Altimeter (eXplorist 610/710) ........................................................................40

Calibrating the Barometer/Altimeter .............................................................................................40

Alarms ................................................................................................................................................40

Setting the Off Course Alarm ........................................................................................................40
Toggling Arrival Alarm ...................................................................................................................40

Defining the Arrival Alarm

 .............................................................................................................41

Setting the Waypoint Proximity Alarm .........................................................................................41

Night Mode ........................................................................................................................................41

Setting Night Mode Use .................................................................................................................41

Button Functions ..............................................................................................................................41

Assigning Button Functions .........................................................................................................41

Compass ............................................................................................................................................41

Assigning Compass Graphic ........................................................................................................41
Calibrating the Compass (eXplorist 610/710) ..............................................................................41

Background .......................................................................................................................................41
Satellite ..............................................................................................................................................41

Viewing the Satellite Status Screen ..............................................................................................41

GPS ....................................................................................................................................................41

Turning the GPS Receiver On/Off .................................................................................................41

Navigation .........................................................................................................................................41

Setting Primary Coordinate System .............................................................................................41
Setting Primary Coordinate Type ..................................................................................................42
Setting Primary Coordinate Accuracy ..........................................................................................42
Setting Primary Coordinate Datum ...............................................................................................42
Setting Secondary Coordinate System ........................................................................................42
Setting Secondary Coordinate Type .............................................................................................42
Setting Secondary Coordinate Accuracy .....................................................................................42
Setting Secondary Coordinate Datum ..........................................................................................42
Selecting North Reference ............................................................................................................42
Setting Altimeter Source ................................................................................................................42

Memory ..............................................................................................................................................42
Use SD Card for External Storage ................................................................................................42
Clear Memory from Device ............................................................................................................42
Summary of Contents for eXplorist 510

Page 1: ......

Page 2: ...Revisions Initial Release A 10 15 2010 Initial release with basic functions ...

Page 3: ...oid the warranty No part of this guide may be reproduced or transmitted in any form or by any means electronic or mechanical including photocopying and recording for any purpose other than the purchaser s personal use without the prior written permission of MiTAC Digital Corporation Federal Communication Commission Interference Statement This equipment has been tested and found to comply with the ...

Page 4: ...ity to operate this equipment The Magellan eXplorist must be installed and operated at a distance no closer then 8 inches 20 cm from the user This Class B digital device meets all requirements of the Canadian Interference Causing Equipment Regulations IC statement Operation is subject to the following two conditions This device may not cause interference This device must accept any interference in...

Page 5: ...Maximum normal use temperature is 66 C 2010 MiTAC International Corporation The Magellan logo Magellan eXplorist and OneTouch are registered trademarks of MiTAC International Corporation 112 0012 001 A ...

Page 6: ...ng Active Suspend Timer 2 Setting Power OFF Timer 2 Setting Backlight Brightness 3 Setting Backlight Timer 3 Installing micro SD Card 3 Magellan eXplorist Menus 3 Four Corner Menu 3 Accessing the Four Corner Menu 4 Dashboard 4 Accessing the Dashboard 4 OneTouch Menu 4 Accessing the OneTouch Menu 4 Main Menu 4 Accessing the Main Menu 4 Options Menu 5 Accessing the Map Options Menu 5 Moving Around t...

Page 7: ...tomizing the Data Fields 7 Displaying a Compass on the Map Screen 7 Navigation Lines 8 Hiding Showing Active Track 8 Clearing Active Track 8 Starting a New Track 8 Viewing Track Summary 8 Viewing an Overview of the Active Track 8 Backtrack 8 Creating a Backtrack Route 8 Pan Mode 9 Accessing Pan Mode 9 Creating a Waypoint in Pan Mode 9 Creating a Route in Pan Mode 9 Maps 9 Accessing Loaded Maps 9 ...

Page 8: ... Customizing Data Fields 13 Setting the Number of Fields Displayed 13 Changing Displayed Data 13 OneTouch Menu 15 Basics of the OneTouch Menu 15 Accessing the OneTouch Menu 15 Assigning a Location as a Destination 15 Assigning a Commonly Used Function 15 Assigning a Search 15 Preloaded OneTouch Buttons 16 Setting a Route to Home Camp or Car 16 Reassigning Your Current Location to Home Camp or Car ...

Page 9: ...he Map 18 Go to a Waypoint While Viewing on the Map 18 Marking a Waypoint as a Favorite 18 Waypoints and the Map Screen 18 Creating a Waypoint while Panning 18 Saving Your Current Location as a Waypoint 19 Waypoint Projection 19 Projecting a Waypoint 19 Geocaches 21 Installing Geocaches Send to GPS 21 Installing Geocaches with Send to GPS List Page 21 Installing Geocaches with Send to GPS Detail P...

Page 10: ...Map 25 Go to a Geocache While Viewing on the Map 25 Marking a Geocache as a Favorite 25 Adding a Geocache 25 Saving Your Current Location as a Geocache Waypoint 25 Geocache Summary 25 Accessing the Geocache Summary 25 Points of Interest POI 27 Accessing POIs 27 Finding a POI by Category 27 Finding a POI Using Search by Name 28 Creating a Route to a POI 28 Viewing POI Details 28 Media 29 The Media ...

Page 11: ...s 31 Modify Settings for Recordings 31 eXplorist Tools 33 The Tools Menu 33 Accessing the Tools Menu 33 Settings 33 Accessing Receiver Settings 33 Profiles 33 Setting Profiles 33 Choosing a Profile 33 Resetting All Profiles 33 Track Summary 33 Viewing Track Summary 33 Geocache Summary 33 Viewing Geocache Summary 33 Waypoint Projection 34 Projecting a Waypoint 34 Best Fishing Hunting Times 34 Using...

Page 12: ... Capture 35 Owner Information 35 Setting Owner Information 35 Settings 37 The Settings Menu 37 Accessing the Settings Menu 37 Settings 37 Brightness and Volume 37 Adjusting Brightness 37 Setting the Backlight Timer 37 Adjusting Volume 37 Muting the Volume 37 Setting Alerts to Vibrate 37 Turning Button Sounds On Off 37 Power 37 Setting Active Suspend Timer 37 Setting Power Off Timer 38 Selecting Ba...

Page 13: ...opo Lines On Off 39 Setting Shaded Relief Level 39 Setting Geocache Waypoints Display Criteria 39 Setting Waypoint Display Style 39 Toggling POI Waypoints On Off 39 Selecting Current Location Icon 39 Toggling Auto Zoom On Off 39 Toggling Media Points On Off 39 Map Draw Mode 39 Units Units of Measure 39 Setting Distance Units of Measure 39 Setting Speed Units of Measure 40 Setting Elevation Units o...

Page 14: ...ass eXplorist 610 710 41 Background 41 Satellite 41 Viewing the Satellite Status Screen 41 GPS 41 Turning the GPS Receiver On Off 41 Navigation 41 Setting Primary Coordinate System 41 Setting Primary Coordinate Type 42 Setting Primary Coordinate Accuracy 42 Setting Primary Coordinate Datum 42 Setting Secondary Coordinate System 42 Setting Secondary Coordinate Type 42 Setting Secondary Coordinate A...

Page 15: ...D Card 43 Connectivity 43 Setting Receiver Connectivity 43 Diagnostics 43 Running the Audio Test 43 Running the Video Test 43 Language 43 Selecting Language 43 Product Information 43 Viewing the Receiver Serial Number 43 Viewing the SW Version EULA or Copyright Information 43 ...

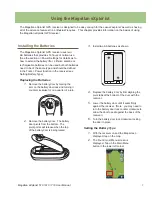
Page 16: ...Setting Battery Type Replacing the Batteries 1 Remove the battery door by raising the arm on the battery door lock and turning it counter clockwise for one quarter of a turn 2 Remove the battery door The battery door pivots from the bottom The pivot points will release when the top of the battery door is being raised 3 Install two AA batteries as shown 4 Replace the battery door by first aligning ...

Page 17: ...Tap Settings 5 Tap Power 6 Tap Power OFF Timer A drop down menu is displayed 7 Tap on the duration that the receiver will automatically power off when the display is not touched 3 Tap the Tool icon at the bottom of the display 4 Tap Settings 5 Tap Power 6 Tap Battery Type A drop down menu is displayed 7 Tap on the type of battery installed Alkaline Rechargeables or Lithium 8 Use the Back Arrow to ...

Page 18: ...p Settings 5 Tap Brightness Volume 6 Tap on the Brightness slider to set the desired backlight brightness Setting Backlight Timer This option sets the time duration that the backlight will turn off if the displayed is not touched Touch the display to restore the backlight 1 With the receiver on and the Map screen displayed tap on the map 2 The Four Corner Menu screen is displayed Tap on the Main M...

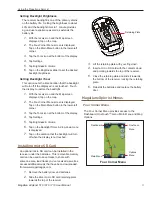
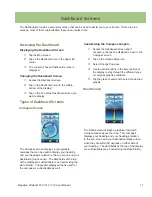
Page 19: ...the visible map Note Tap the map area do not slide your finger or stylus across the map area Sliding across the map brings up the Map Pan screen discussed in the chapter on the Map screen Dashboard The Dashboard is an optional navigation screen that can be used in conjunction with the Map screen There are eight different dashboard styles that can be selected See the chapter on the Dashboard screen...

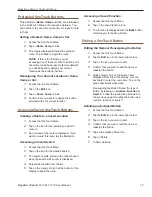
Page 20: ...e back button Options Menu The Options Menu can be found on many screens in the lower right corner of the display This menu provides quick access to the most commonly used functions associated with the screen being displayed However the only exception to the rule for the location of the Options Menu is for the Map screen where it is accessed from the Four Corner Menu screen Accessing the Map Optio...

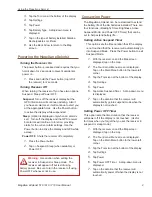
Page 21: ...ght portion of the map NOTE If you are in a route the map scale can change automatically to a scale that best displays the route You can turn autoscale off in Tools Settings Map Options Setting the Number of Data Fields 1 Tap the Map screen to bring up the Four Corner Menu screen 2 Tap on the Options Menu icon in the lower right corner 3 Select Edit of Fields 4 Use the displayed up and down arrows...

Page 22: ...k Route 1 Tap the Map screen to bring up the Four Corner Menu screen 2 Tap on the Options Menu icon in the lower right corner 3 Select Backtrack Navigation Lines Navigation lines are displayed on the map providing you with route destination indicators and active track Active Track Displays a history of your travels when you are routing to a destination Active Track Displays a history of your trave...

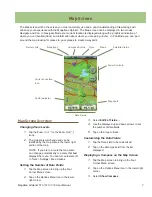
Page 23: ...t of the map name 6 Tap on the map name to get more detailed information about the map that is installed Pan Mode Accessing Pan Mode 1 Slide your finger across the map area 2 The Map screen goes into pan mode with a Back button and an Options Menu icon at the bottom 3 Keep moving your finger across the map to display a point that you would like to create a route to or a waypoint Using the Zoom In ...

Page 24: ... s relation to the sun moon and your destination black arrow The data fields at the top of the display are customizable see Customizing the Data Fields The graphic displayed that is used for the compass is customizable as well Customizing the Compass Graphic 1 Access the Dashboard screen and if necessary change the displayed screen to the Compass screen 2 Tap on the Options Menu icon 3 Select Chan...

Page 25: ...ion on that point Strip Compass Screen The Strip Compass screen displays a strip compass similar to the Road screen but the Strip Compass screen provides more room for additional data fields This compass displays your heading and your heading s relation to the sun moon and your destination black arrow when they are within 50 degrees on either side of your heading The orange arrows under the strip ...

Page 26: ...ximum number of fields available for the viewed dashboard screen 6 Tap the down arrow to decrease the number of displayed fields Note the number of displayed fields can be set to 0 except for the Data Only screen which has a minimum of 1 7 Tap on the Dashboard screen to exit Edit of Fields Changing Displayed Data 1 Access the Dashboard screen you want to change the data displayed 2 Tap on any of t...

Page 27: ...e destination that will be displayed in the OneTouch Menu or accept the name as it presently is assigned 7 The shortcut is saved and the OneTouch Menu is displayed with the new destination added Assigning a Commonly Used Function 1 Access the OneTouch Menu 2 Tap on any available Assign button 3 Tap on the Function button 4 Select one of the functions displayed 5 The shortcut is saved and the OneTo...

Page 28: ...Preloaded OneTouch Buttons Three buttons Home Camp and Car are preloaded to the OneTouch Menu and cannot be deleted You can set them to your current location or create a route to them Setting a Route to Home Camp or Car 1 Access the OneTouch Menu 2 Tap on Home Camp or Car 3 The map is displayed showing the planned route Tap on Go to begin the route NOTE If this is the first time you are accessing ...

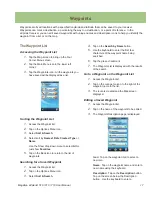
Page 29: ... the Show drop down menu to select All or just show Favorites 5 Tap on the Back icon to return to the list of waypoints Searching for a Saved Waypoint 1 Access the Waypoint list 2 Tap on the Options Menu icon 3 Select Sort Search 4 Tap on the Search by Name button 5 Use the keyboard to enter the first few characters of the waypoint name being searched 6 Tap the green checkmark 7 The Waypoint List ...

Page 30: ...n the name of the waypoint to be routed to 3 Tap on the View on Map icon at the bottom of the display 4 Tap on the orange Go icon to begin the route Marking a Waypoint as a Favorite 1 Access the Waypoint list 2 Tap on the name of the waypoint to be added to your Favorites list 3 Tap on the Options Menu icon 4 Select Favorite 5 The Waypoint Description page is displayed with a yellow star added to ...

Page 31: ...r current location Projecting a Waypoint 1 Tap on the Map screen 2 Tap on the Main Menu icon in the lower left corner 3 Tap on the Waypoints icon 4 From the Waypoint List tap on the Options Menu button in the lower right corner 5 Tap on Add Waypoint 6 Tap on Projection 7 Tap on the Bearing field Use the keypad to enter the degrees that the projected waypoint is from your current position 8 Tap on ...

Page 32: ...ue attributes for each geocache access to members only cache listings Pocket Query generation and a number of other advanced features A basic membership is all you need to go geocaching but the features of the eXplorist receiver are further enhanced with premium access Installing Geocaches Send to GPS Installing Geocaches with Send to GPS List Page 1 Go to www geocaching com on your browser 2 Use ...

Page 33: ...m users 4 Select the Send to GPS button 5 Select the Magellan tab in the Send to GPS window 6 The Send to GPS function first detects if you have the Magellan Communicator installed If not the message Magellan Communicator not found appears Select the click here link to install the Magellan Communicator The Magellan Communicator only needs to be installed the first time a connection is made between...

Page 34: ...mmunicate between geocaching com and your Magellan GPS receiver You can install the plug in by using the steps above or by going to the Magellan web site as explained here Direct installation of the Magellan Communicator from www magellangps com 1 Go to www magellangps com and click on the Products tab 2 Select Maps Software 3 In the software section select Magellan Communicator 4 On the Magellan ...

Page 35: ...ng media item to add to the geocache Options Tap on the Options button Use the Profile drop down menu to select the profile desired for this geocache Tap on Settings to change the values for the profile Note Other items are available on the Geocache Description page but they can only be viewed Adding Editing Deleting a Field Note 1 Access the Geocache list 2 Tap on a geocache from the list 3 Tap o...

Page 36: ...ly is a summary of the average time spent in finding a geocache Accessing the Geocache Summary 1 Tap on the Map screen 2 From the Four Corner Menu screen tap on the Options Menu icon 3 Select Geocache Summary 4 Select Add a Field Note Edit My Last Field Note or Delete My Last Log 5 Use the keyboard to add or edit the field note If you are deleting a field note you will need to confirm the deletion...

Page 37: ... 3 Tap the POI icon 4 Scroll though the list of categories and tap on a category that defines the POI you are looking for This example describes looking for the nearest hospital emergency room Scroll down to find the category Emergency Services 5 Some POI categories have a subcategory If the category chosen does scroll to find the subcategory for the POI you are searching Select the Hospital subca...

Page 38: ... POI you are searching for 6 A list of POIs is displayed beginning with the characters entered in step 5 Note that this search is not case sensitive Creating a Route to a POI 1 Access the list of POIs by category or searching by name 2 Tap on the orange Go button on the right side of the POI button Viewing POI Details 1 Access the list of POIs by category or searching by name 2 Tap on the left sid...

Page 39: ...de of the eXplorist 3 Aim the camera lens on the back of the eXplorist towards the area that you want to photograph 4 Tap the camera icon at the bottom of the display quickly The picture will focus Alternately you can press the bottom button on the eXplorist Alternately you can touch and hold the camera button and it will automatically focus and take the photograph 5 A dashed green box will appear...

Page 40: ...Tap on the Photos icon 3 Tap on the Options Menu icon and select Side Show 4 The photos will be displayed in order until you tap the screen Accessing Saved Voice Memos 1 Access the Media Menu 2 Tap on the Voice Memos icon 3 Tap on the Voice Memo to listen to 4 Tap on the Play icon at the bottom of the display 5 Use the fast forward and fast rewind buttons to move through the recording 6 While list...

Page 41: ...e desired settings Modify Settings for Videos 1 Access the Media Menu 2 Tap on the Tools icon in the lower right corner 3 Use the Mode drop down menu and select Video 4 Use the Size Display Sort by and Save Video On drop down menus to set the desired settings Modify Settings for Recordings 1 Access the Media Menu 2 Tap on the Tools icon in the lower right corner 3 Use the Mode drop down menu and s...

Page 42: ...ap on the Settings button See the chapter on Settings for details Profiles Profiles allows the user to set basic settings for five different navigation types Hiking Geocaching Marine Vehicle and Pedestrian Setting Profiles 1 Access the Tools Menu 2 Tap on the Profiles button 3 Tap on the profile name to modify 4 Use the buttons to set the desired settings for Units Map Options Tracks Sensors and A...

Page 43: ...nt location Using Sun Moon Times 1 Access the Tools Menu 2 Tap on the Sun Moon button Tap on the calendar and the arrows to the left and right of the month to select a day to view Geofencing Select the map object to create an imaginary fence around and be alerted when you are within the perimeter of the boundary or on the boundary Setting Up Geofencing 1 Access the Tools Menu 2 Tap on the Geofenci...

Page 44: ...elp file to view Play Product Demo Accessing the Product Demo 1 Access the Tools Menu 2 Tap on the Play Product Demo button 3 Confirm that the receiver is in the Demo mode 4 A video will be played demonstrating the Magellan eXplorist Stopping the Product Demo 1 Tap on the product demo video 2 Access the Tools Menu 3 Tap on the Stop Product Demo button 4 Confirm that the receiver is no longer in th...

Page 45: ...lected 1 Access the Settings Menu 2 Tap on the Brightness Volume button 3 Tap the Backlight Timer drop down menu and select the duration that the backlight will remain on without a screen touch Adjusting Volume 1 Access the Settings Menu 2 Tap on the Brightness Volume button 3 Use the Volume slider to increase or decrease the speaker volume Muting the Volume 1 Access the Settings Menu 2 Tap on the...

Page 46: ... or Sunday Selecting the Time Zone Auto or Manual 1 Access the Settings Menu 2 Tap on the Date Time button 3 Tap the Time Zone DST drop down menu and select Auto or Manual If Manual is selected you need to tap the Set Time Zone button and enter your present time zone Map Options Setting Map View 2D or 3D 1 Access the Settings Menu 2 Tap on the Map Options button 3 Tap the Map View drop down menu a...

Page 47: ...ts of Measure Setting Distance Units of Measure 1 Access the Settings Menu 2 Tap on the Map Options button 2 Tap on the Map Options button 3 Tap the Origin Destination Line drop down menu and select if the line will be displayed on the map when a route is active Toggling Track Lines On Off 1 Access the Settings Menu 2 Tap on the Map Options button 3 Tap the Show Tracks drop down menu and select if...

Page 48: ...menu and select if the arrival alarm will sound when you have reached your destination 3 Tap the Distance drop down menu and select the desired units of measure Setting Speed Units of Measure 1 Access the Settings Menu 2 Tap on the Map Options button 3 Tap the Speed drop down menu and select the desired units of measure Setting Elevation Units of Measure 1 Access the Settings Menu 2 Tap on the Map...

Page 49: ...down menu and select the desired coordinate system Defining the Arrival Alarm 1 Access the Settings Menu 2 Tap on the Alarms button 3 Tap the Arrival Distance drop down menu and select the distance from your destination that the arrival alarm will sound Setting the Waypoint Proximity Alarm 1 Access the Settings Menu 2 Tap on the Alarms button 3 Tap the Waypoint Proximity drop down menu and define ...

Page 50: ...ation button 3 Tap on the Restore Factory Default button 4 Confirm that you want to restore the factory defaults Setting Primary Coordinate Type 1 Access the Settings Menu 2 Tap on the Navigation button 3 Tap the Primary Coordinate Type drop down menu and select the desired measurement Setting Primary Coordinate Accuracy 1 Access the Settings Menu 2 Tap on the Navigation button 3 Tap the Primary C...

Page 51: ...1 Access the Settings Menu 2 Tap on the Connectivity button 3 Tap the Mode drop down menu and select the desired connectivity mode Diagnostics Running the Audio Test 1 Access the Settings Menu 2 Tap on the Diagnostics button 3 Tap the Audio Test button Running the Video Test 1 Access the Settings Menu 2 Tap on the Diagnostics button 3 Tap the Video Test button Language Selecting Language 1 Access ...

Reviews: