Page 1: ...s Care Cleaning 17 20 Self Clean Oven Cleaning Procedures Maintenance 21 22 Oven Window Oven Light Troubleshooting 23 24 Warranty Service 25 Guide de utilisateur 26 Gu_a del Usaario 54 Form No A 06 04...
Page 2: ...be properly installed and grounded by a qualified technician Do not attempt to adjust repair service or replace any par of your appliance unless it is specifically recommended in this guide Aft other...
Page 3: ...rack or oven bottom Misuse could result in risk of electric shock fire or damage to the appliance Use foil only as directed in this guide Ceeking Safety Never heat an unopened food container in the o...
Page 4: ...ard Make sure drip bowls are in place as absence of these bowls during cooking could damage wiring Protec_ve Liners Do not use aluminum foil to line surface unit drip bowls or oven bottoms except as s...
Page 5: ...e of the listed substances including carbon monoxide Exposure to these substances can be minimized by properly venting the oven to the outdoors by opening the windows and or door in the room where the...
Page 6: ...wn meat heat oil for deep fat frying or sauteing Maintain fast boil for large amounts of liquids BEFORECOOKING AFTER COOKING Always place a pan on the surface unit before you turn it Make sure surface...
Page 7: ...an dement is on it will cycle on and off to maintain the heat setting Coil elements are self cleaning Do not immerse in water To remove When cool raise ele ment Carefully pull out and away from recept...
Page 8: ...ck 1 Pressthe Clock pad The clock time cannot be set if the control is pro grammed for a bake broil or timing operation 2 Set the correct time of day using the A or V pads If the A or V pad is not pre...
Page 9: ...change oven temperature during cooking press the Bake pad then press the A or _ pad until the desired temperature is displayed 3 Place food in the oven Check food for aloneness at the minimum cooking...
Page 10: ...en and turn the Oven Temp knob to OFF Setting the ControJ for Broiling 1 For best results use a broiling pan Place the broiler pan on recommended rack position see chart on page 15 2 Turn Oven Temp kn...
Page 11: ...ound if a programming error occurs Note Four seconds after pressing the A or V pad the time or temperature will automatically be entered If more than 30 seconds elapse between touching a function pad...
Page 12: ...ocked If the oven is currently in use the controls cannot be locked The current time of day will remain in the display when the controls are locked To lock Press and hold the CANCEL and Cook Hold pads...
Page 13: ...in the display 2 Select the oven temperature The oven tempera ture can be set from 170 to 550 Pressor press and hold the A or _ pad Press the A pad to increase the temperature Press the V pad to decr...
Page 14: ...o set Keep Warm 1 Pressthe Keep Warm pad I EE WAIRM WARM flashes 000 appears in the display Select the Keep Warm temperature The Keep Warm temperature can be set from 145 to 190 Pressor press and hold...
Page 15: ...emperature set the temperature 25 higher or lower than your recipe recommends then bake The results of the test should give you an idea of how much to adjust the temperature TO adjust the oven tempera...
Page 16: ...times to increase and browning to be slightly lighter if appliance is installed on a 208 volt circuit HJis used for most broiling Use LO broil when broiling longer cooking foods The lower temperature...
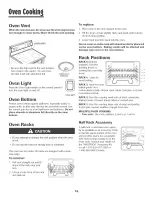
Page 17: ...ons RACK 5 highest position_ Used for toasting bread or broiling thin non fatty foods RACK 4 Used for most broiling RACK 3 Used for most baked goods on a 5 __4 3 __2 1 cookie sheet or jelly roll pan l...
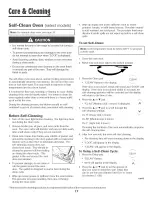
Page 18: ...door frame area outside of gasket and around the opening in the door gasket with a nonabrasive cleaner such as Bon Ami or detergent and water The self cleaning process does not clean these areas They...
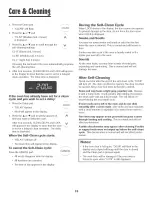
Page 19: ...You may see some smoke and smell an odor the first few times the oven is cleaned This is normal and will lessen in time Smoke may also occur if the oven is heavily soiled or if a broiler pan was left...
Page 20: ...th first DO NOTspray directly on controlpad and display area Remove knobs in the OFFposition by pulling forward Wash rinse and dry Do not use abrasive cleaning agents as they may scratch the finish Tu...
Page 21: ...oth Rinse and dry To polish and help prevent fingerprints follow with Stainless Steel Magic Spray Part No 20000008 Moderate Heavy Soil J Wipe with one of the following Bon Ami Smart Cleanser or Soft S...
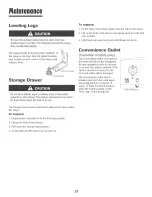
Page 22: ...acks are in place Scratching hitting jarring or stressing the glass may weaken its structure causing an increased risk of breakage at a later date i Disc0nnect p0wei to range be 0re replacing l ht bu...
Page 23: ...models only The convenience outlet is located on the lower left side of the backguard Be sure appliance cords do not rest on or near the surface dement If the surface element is turned on the cord an...
Page 24: ...y between a new oven and an old one As ovens age the oven temperature often drifts and may become hotter or cooler See page 14 for instructions on adjusting the oven temperature select models NOTE It...
Page 25: ...ar in the display press Cancel pad If BAKE or LOCK continue to flash disconnect power to the appliance Wait a few minutes and then reconnect power If the flashing still continues disconnect power to t...
Page 26: ...any control 2 Warranties are void if the original serial numbers have been removed altered or cannot be readily determined 3 Light bulbs 4 Products purchased for commercial or industrial use 5 The cos...
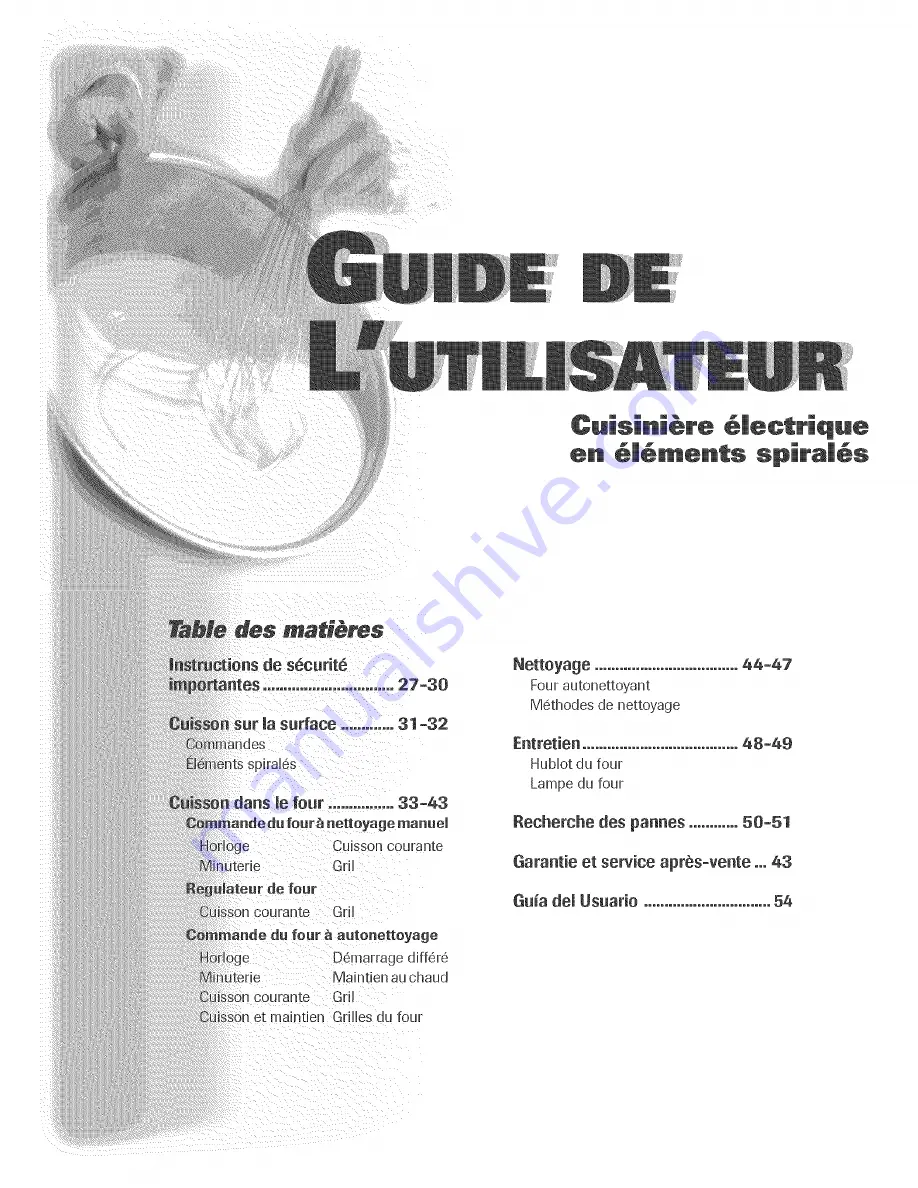
Page 27: ...uran e GriI Four courante GriI du feur _ autonettoyage oge D6marrage diff6r6 erie Maintien au chaud n courante Gril maintien Grilles du four Netteyage 44 47 Four autonettoyant M6thodes de nettoyage En...
Page 28: ...pour eliminer bs risques d incendie choc ebctrique dommages materiels et corporeb que pourrait susciter une utilisation incorrecte de Fappare Utiliser Fappareil uniquement pour bs fonctions prevues d...
Page 29: ...ou autre composant de i appareii Famiiiarisation avec apparei NE JAMAmS utiiiser un appareii comme escabeau pour atteindre es armoires se trouvant au dessus Le mauvais emploi de porte d appareii comm...
Page 30: ...ille suffisante pour que le contenu ne risque pas de deborder Ceci est particulierement important pour un ustensile rempli d huile de friture Verifier que la taille de I ustensile est suffisante pour...
Page 31: ...e par consequent eviter de toucher ia surface de cuisson durant i autonettoyage Avertissement et avis important pour la s curit La Ioi californienne _Safe Drinking Water and Toxic Enforce ment Act de...
Page 32: ...ien de 1 6bullitionrapided une grandequantit6de liquide AVANT A OWSSON o Placer toujours ustensfle sur 616ment avant d alimenter I k_ment Pour 6v ter que la culsmle ene subisse des domn ages ne jamals...
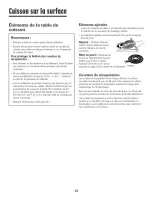
Page 33: ...ent Voirpage48 EI6ments spiral6s o Lorsqu un6tdmentestutiIis6 il est ailment8par intermittencepour le maintiende la puissancede chauffaged6sir6e dans de I eau _pOSe SouleverI 616ment refroidi Tirer pr...
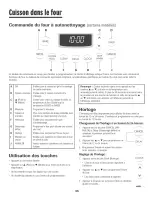
Page 34: ...a fonction seraannuBe et I afficheurreviendra_ I affJchage precedent R6gJage de Phorioge 1 Appuyer sur JatoucheCDck Horloge L hodogenepeut pas 6tre regBe si lefour estdei_ programme pourune operationd...
Page 35: ...affichee pendanttrois secondes Pourchanger latemperaturedu four pendant lacuisson appuyersur latouche Bake puis sur latouche A ou V iusqu _ ce que latemperaturedesireesoitaffich PlacerIa nourriture d...
Page 36: ...Temp O emp6rature du our _ Japosition OFF Arr6t R6glage du four pour cuissou au gril 1 Pourobtenir les meilleursr6sultats utiliser un ustensilecon_u pour lacuissonau griL PlacerIa I6chefrite_ la posit...
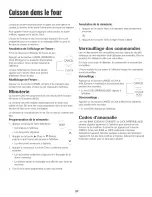
Page 37: ...s saulminuterie et horIoge UtiJisation des touches o Appuyersur latouche desiree o Appuyersur Plus ou V Moins pour entrer la dur ou la temperature o Un hip retentit IorsqueI on appuiesur une touche o...
Page 38: ...rheurejuste paraisse_ rafficheur Losdeux pointscontinuent _ clignoter 3 Appuyer _ nouveausur latouche Timerou attendrequatre secondes A Les deux points continuent _ clignoter et le d ompte de la dur...
Page 39: ...nne la temperaturedesiree o Si I on oublied arreter Iefour iI s arreteraautomatiquementapr 12heures Si I ondesired activercette fonction voir page41 o Pourdes conseilssupplementaires sur Ia cuissoncou...
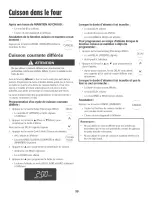
Page 40: ...COOK o LesrootsBAKE CUiSSON COLIBANTE et HOLD HOLD MAiNTiEN clignotent 4 Appuyer sur A pour programmerla temperaturedecuisson o 00 00et le mot HOLDclignotent o Lemot BAKEresteallure 5 Appuyer sur A po...
Page 41: ...LER 2 Retirerla nourrituredu four Remarques sur la fonction maintien au chaud o Pourobtenir des quaIitesalimentaireset nutdtivesoptimaIes les alimentscuits au four nedoivent pasetre gardesau chaud plu...
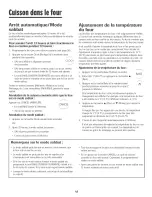
Page 42: ...5 C 25 F plus eleveeou plus bassoque la temperatureindiqueedarts la recette puis faire cuire Ia pr aration Losresultatsdu _test _ de cuissondoiventdonner uneideedu nombrede degresduquel la temperature...
Page 43: ...on o Pr6voirdesdur s decuisson augriI plus Iongueset un rissolagek g_rementmoinsdot6 si I appareilfonctionne sur un circuit de 208volts o LegriI au reglageHI Elev estutilis_ pour la majorit6des op6rat...
Page 44: ...mme d aluminiam Ceci modifierait lesr_sultatsdecaisson aufour et me fonddufour pourrait subir des dommages Positions des grilles Grille 5 positionIa pIus haute Pourcuisson breveau griI pain grill6 ou...
Page 45: ...ilagea la positiondeverrouillage CLEA 3 Appuyer sur la toucheCban Nettoyage Lemot CLEAN NETTOYAGE clignotea I afficheur Si Ia porte n estpas ferm deships retentissentet ie mot DOOR PORTE parak _ raffi...
Page 46: ...d autonettoyage Lorsquele mot LOCKparak _ I afficheur la porte ne peut 6tre ouverte Pour6viterd endommagerla porte ne pasla forcer pour I ouvrJrIorsquele motLOCKest affich6 Fum6e et odeurs La premJ6re...
Page 47: ...ide puis faire secher Ne pasutiliserun agentde nettoyageabrasifsusceptiblede rayerla finition oOnpeut utiliserunproduit de nettoyageduverre pulverised abordsur un chiffon NE PASprejeter le preduit dir...
Page 48: ...iier saiet_ idg_re EssuyeravecI un desproduitssuivants eausavonneuse vinaigre blanc eau produit de nettoyagepourverre et surface Formuia409 _ou un produit semblablepour verre avecun linge soupleet une...
Page 49: ...a porte du four d une cuisini6reneuve ceciest normal cet effet disparaitprogressivement Hub or du four certains mode es Pour prot6ger e hub or de a porte du four 1 Ne pasutil ser de produitsnettoyants...
Page 50: ...pousserdoucementiusqu _ a position de a premierebut6e 3 Soubver _ nouveaule tiroir et le pousseren placepour le fermer Prise de courant auxiliaire mod61es canadiens seulement La prisede courant auxiIi...
Page 51: ...evadentsouvententre un four neuf et lefour qu il remplace On observesouventune derivedu regIagedetemperatured unfour _ mesurequ il vieillit il peut devenirplus chaud ou moinschaud Voir page41 les inst...
Page 52: ...araitb I afficheur appuyersur latouche Cancel AnnulerD Si Ie mot BAKEou LOCKcontinueb c noter d6brancherI appareiLAttendre quelquesminutes puis rebrancherI appareiLSi lemot continueb c noter d6branche...
Page 53: ...antiesnepeuvent6tre honoreessi les numerosde seried origine ont ete enleves modifiesou nesent pas facilementlisibles 3 Ampoules 4 Appareils achetesaux fins d usagecommercialou industrieL 5 Lesfrais de...
Page 54: ...lares _cin_ ride en el Homo 80 70 Con eles del Homo de Lira eza ManuaJ R_ _j Hornear _ lporizador Asar Ped _ del Home Ho lear Asar Cen eles del Homo Autolimpiante Horneado Diferido Cuidado y Limpieza...
Page 55: ...ue aparecen en esta guia no est_in destinadas a cubrir todas Bs posibbs circunstancias y situaciones que puedan ocurrir Se debe ejercer sentido comuJn precauci6n y cuidado cuando instab realice manten...
Page 56: ...tras piezas del artefacto lnstrucciones Generales NUNCA use un electrodom6stico como un peldaHiopara aicanzar los armanos superiores El uso incorrecto de las puertas del ebctrodom6stico tales como pis...
Page 57: ...e materiabs infiamabbs o derrames si el utensilio es tocado accidentalmente o alcanzado por niffos pequeffos Asegurese de que el utensilio sea Io suficientemente grande como para contener en forma deb...
Page 58: ...sta induyendo mon6xido de carbono La exposici6n a estas sustancias puede ser reducida a un minimo ventilando el homo al exterior en forma adecuada abriendo las ventanas y o la puerta en la habitaci6n...
Page 59: ...antenerun hervor r ido ara cant dades grandesde I quidos ANTESDE COCmNAR DESPUESDE COCINAR SLempre coloque un utensfllo en el elemento superior antes de Asegurese oe que los ebmemos superiores esten a...
Page 60: ...ntose enciende pasapor ciclos de encendidoy apagadopara mantenerel ajustede calor seleccionado Los elementostubularessonautotimpiables No los sumeriaen agua Para sacar Cuandoestdfifo levanteel etement...
Page 61: ...y el indicadorvisuaivolver_al despiiegueanterior Programaci6n del ReHoj 1 Optima latecia Clock Lahoradel reloj no se puedeprogramarsi el control ha sido programadoparahornearo asar o parausar eltempor...
Page 62: ...ecla Bake y luego atecia A o _ hasta quese despiieguelatemperaturadeseada 3 CoJoque eJaJimentoel en horno VerifiqueeJprogresode Ja cocciOncuando hayatranscurrido e tiempo m nimo recomendado 4 Ai t6rmi...
Page 63: ...Asado a la ParriHa moddos sdectos 1 Paraobtenermejoresresultados use un utensiIiod se ado especiaImenteparaasar a Ia parrilla Coloquela asaderaen Ia posici6nde la parrilla recomendado 07erIa tabla en...
Page 64: ...tener caliente enet homoel alimento cocinado Cancela todaslasfunciones aexcepci6n dettemporizador y etreloj Use de las Teclas Optimalatecla deseada OptimaA o V paraprogramareltiempo o Ia temperatura S...
Page 65: ...ecla A o V hastaquee tiempo correcto parezcaen el indicadorvisua Losdos puntoscontinOandestellando 3 Oprimanuevamentelatecla Timer o esperecuatm segundos Losdos puntoscontint_andesteJlando y comienza...
Page 66: ...ratura deseada SioMda apagare horno se apagar4autom4ticamentedespues de transcurrir 12horas Si deseadesactivarestacaracteristica vea a p4gina68 ParasugerenciasadicionaJes sobre horneadoy asado consult...
Page 67: ...se umina en e indicadorvisual COOl BAKE y HOLD deste an HOLD 4 Oprima A paraprogramarlatemperaturade horneado 00 00 y HOLD destellan BAKE permaneceihminado 5 Oprima A paraprogramareltiempo de hornead...
Page 68: ...tireel alimentodel horno Notas sobre Keep Warm o ParamantenerIa catidad6ptimade los alimentos los alimentoscocinadosen el hornodebenser mantenidos calientespor no m_sde 1a 2 horas o Paraevitarque losa...
Page 69: ...atemperaturade homo a 15 C 25 F m_salta o m_sbajaque latemperatura indicada en sus recetas luego hornee Los resuItadosde la prueba puedendarIeuna ideade cu_ntoajustar atemperatura Ajuste de a temperat...
Page 70: ...parriila o Los tiemposde asara Iaparrilla aumentar_ny et doradoser8 m_sclaro si se instalaelelectrodomesticoen un circuito de 208voltios o HH se usapara Ia mayor ade Iosasadosa Ia parrilla Use LO broi...
Page 71: ...e afentar_n mos resumtadosdem homeado y se puede da_ar ma parte inferior dem homo Posicior es de a ParriHa PAflfl LA 5 0a posiciOn m_saita Se usapara tostar pan o asara a parriJIaaJimentos _ deigadosn...
Page 72: ...ntilada para eJJminar los olores normalesasociadoscon la limpieza Antes de la Auto impieza 1 Apague Ia Iuzdei homo antesde la Iimpieza La luz del horno puedefundirse duranteel cicio de limpiez 2 Retir...
Page 73: ...Paraevitardafio a la puerta nofuerce la puertapara abdrtacuando Ia palabra LOCK est_desplegadaen el indicadorvisual Humo y OIores Ustedpuedevet humoy sentirolor Iasprimerasvecesque el homo es limpiado...
Page 74: ...olLock Bloqueodeloscontroles parala limpieza ver p4gina64 Limpieconun paBohOmedo y seque No useagentesdelimpiezaabrasives puespuedenrayarlasuperficie Sepuedenusar Jmpiavidrios si se rodan ene pafiopri...
Page 75: ...iosuave limpiecon limpiadorde acero CameoStainless Steel Cleaner Enjuague inmediatamente y seque Parseliminarlasestr asy restaurar el lustre usedespu6s rociadorpars acero inoxidable Stainless SteelMag...
Page 76: ...estufa nuevapuedesentirse esponiosa cuandose cierra Estoes normaly disminuir_con el USO Ventana deJ Homo modelos seJectos Para proteger la ventana de la puerta dei homo 1 No useagentesde limpiezaabras...
Page 77: ...ndetope 3 LevanteIagavetanuevamentey empqela hastaque quede completamentecerrad Tomacorriente para Emeetrodo sticos Peque os Modelos Canadienses solamente Eltomacorrienteparaelectrodom ticospequeiios...
Page 78: ...selectss BIOTA Noserecomienda aiustarIatemperatura si hatenidoproblemasconsolounas dssrecetas Consulteelfsllets La CocinaF_cil pars mayorinformaci6nsobre Issutensiliosde hsrnear Los smimentosno se sss...
Page 79: ...or oun problema Si BAKE o LOCK aparecenen elindicadorvisual oprimaIa tecla CANCEL Si BAKE o LOCK continOan destellando desconecteJaenerg ael6ctricaalelectrodom stico Espereunospocosminutesyvuelvaareco...
Page 80: ...les 2 Lasgarant asquedan nuIassi ios ntimerosde serieoriginaleshan sido retirados alteradoso no sonf_cilmente legibles 3 Focos 4 Productoscompradospara uso comercialo industrial 5 Elcostodel servicioo...