background image


    EN 

OPERATING YOUR APPLIANCE 


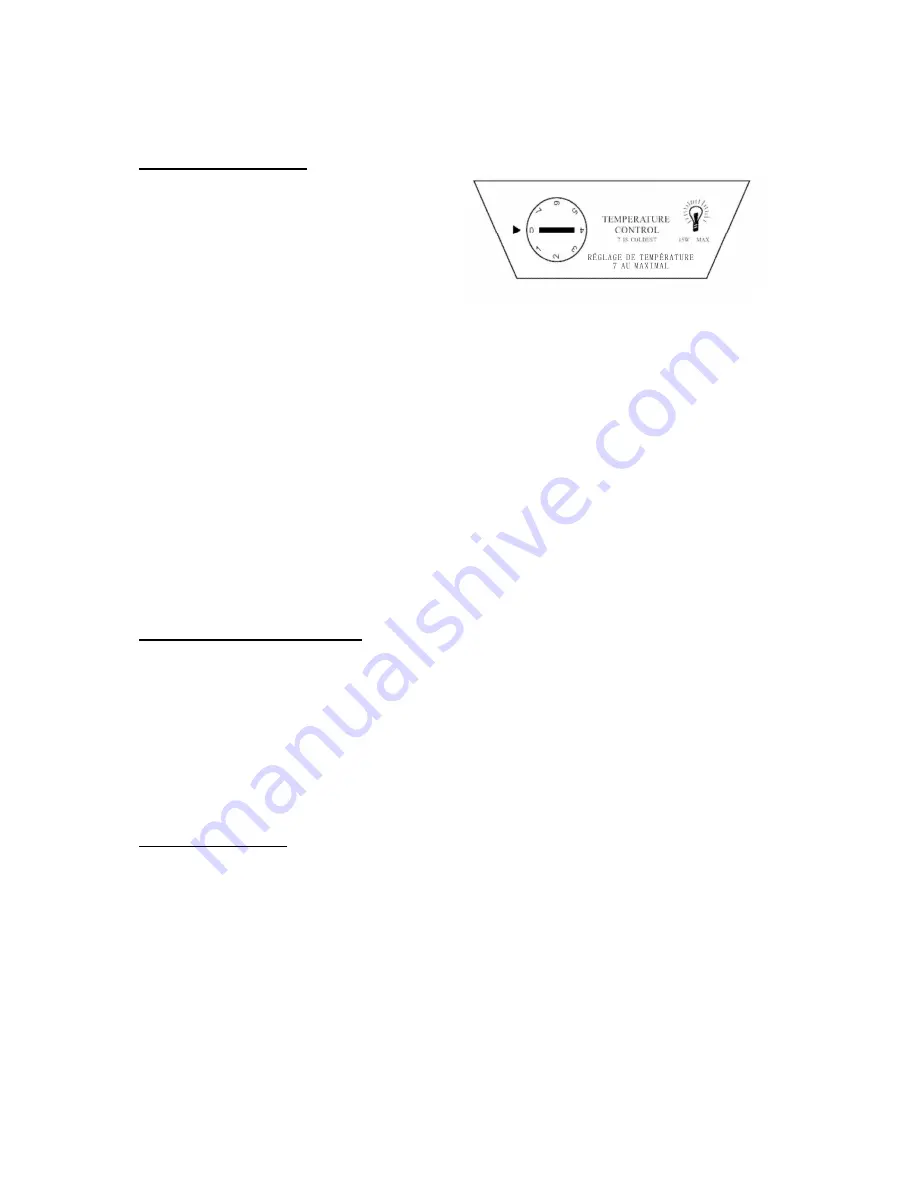
Temperature Control 


Your  beverage  cooler  has  one  control  for 
regulating the temperature. The temperature 
control  is  located  on  the  top  center  of  the 
beverage cooler compartment.


The first time you turn the unit on, adjust the 
temperature control knob to “7” and run for at 
least  2  hours  before  putting  beverages 
inside. This will ensure the cabinet is thoroughly chilled before beverages is stored.   


The range of the beverage cooler temperature control is from position "1" the warmest to "7" the 
coldest.  Adjust the temperature control to the setting that best suits your needs.  


To turn off the beverage cooler, please turn the temperature control knob to “0”.  Please note that 
turning  the  temperature  control  knob  to  “0”  position  stops  the  cooling  cycle,  but  does  not 
disconnect the power supply to the beverage cooler. 


WARNING: Do not set the temperature control to setting of “7” position for longer than 8 hours. 


If the unit is unplugged or loses power; you must wait 3 to 5 minutes before restarting the unit. If you 
attempt to restart before this time delay, the beverage cooler will not start. 


Change in ambient temperature will affect the internal temperature of the beverage 
cooler. 


If you choose to change the thermostat setting, adjust thermostat control by one 
increment at a time.  Allow several hours for temperature to stabilize between 
adjustments. 


Changing The Interior Light 


Before removing the interior light, turn off the beverage cooler first and then unplug the unit from the 
wall outlet.  Failure to do so could result in electrical shock or personal injury. 


Use Phillips screwdriver to take out the screw holding the transparent light cover. 


Remove the transparent light cover gently. 


Pull out the existing light bulb by unscrewing it counter-clockwise. 


Insert new light bulb (E12, max. 15W) by screwing it in clockwise. 


Replace the transparent light cover and tighten screw. 


Automatic Defrost 


There is no need for manual defrosting of this beverage cooler due to automatic defrosting function.   


The  ice  build-up  on  the  inner  back  wall  during  compressor  operation  will  be  automatically 
defrosted once the compressor cycle is off. 


Defrost water will drain out passing through the drain outlet in the inner back wall into a drain pan 
located above the compressor, from where it evaporates. 


Summary of Contents for MCBC470BF

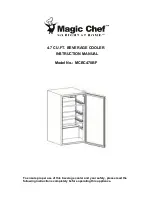
Page 1: ...7 CU FT BEVERAGE COOLER INSTRUCTION MANUAL Model No MCBC470BF To ensure proper use of this beverage cooler and your safety please read the following instructions completely before operating this appliance ...

Page 2: ...egistering your product include the following 1 Registering your product will allow us to contact you regarding a safety notification or product update 2 In the event that warranty service is required registering your product w allow for more efficient warranty service processing 3 In the event of an insurance loss registering your product could act as your proof of purchase Once again thank you f...

Page 3: ...LER 4 INSTALLING YOUR BEVERAGE COOLER 4 ELECTRICAL CONNECTION 5 OPERATING YOUR APPLIANCE TEMPERATURE CONTROL 6 CHANGING THE INTERIOR LIGHT 6 AUTOMATIC DEFROST 6 CHANGING THE REVERSIBLE DOOR 7 CARE AND MAINTENANCE CLEANING YOUR APPLIANCE 8 VACATION TIME 8 MOVING YOUR APPLIANCE 8 ENERGY SAVING TIPS 8 TROUBLESHOOTING GUIDE 9 BEVERAGE COOLER WARRANTY 10 ...

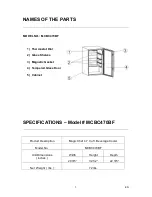
Page 4: ...al 2 Glass Shelves 3 Magnetic Gasket 4 Tempered Glass Door 5 Cabinet SPECIFICATIONS Model MCBC470BF Product Description Magic Chef 4 7 Cu ft Beverage Cooler Model No MCBC470BF Unit Dimensions inches Width Height Depth 20 3 5 32 1 2 22 3 5 Net Weight lbs 72 lbs ...

Page 5: ...pproximately 4 hours This will reduce the possibility of a malfunction in the cooling system from improper handling during transportation Clean the interior surface with lukewarm water using a soft cloth Cleaning instruction on page 7 Installing Your Beverage Cooler This beverage cooler is designed to be free standing only and should not be recessed or built in Allow 5 inches of space between the ...

Page 6: ...t exposed or dangling to prevent accidental injury Never unplug the beverage cooler by pulling the power cord Always grip the plug firmly and pull straight out from the receptacle Do not use an extension cord with this appliance If the power cord is too short have a qualified electrician or service technician install an outlet near the appliance Use of an extension cord can negatively affect the p...

Page 7: ...before this time delay the beverage cooler will not start Change in ambient temperature will affect the internal temperature of the beverage cooler If you choose to change the thermostat setting adjust thermostat control by one increment at a time Allow several hours for temperature to stabilize between adjustments Changing The Interior Light Before removing the interior light turn off the beverag...

Page 8: ...r reversal process 1 Remove the top hinge assembly and keep them for later use 2 Remove the bottom hinge assembly and keep them for later use 3 Remove the plug buttons from the upper left holes and transfer them to the uncovered holes on the right side Be sure to press the plug buttons firmly into the hole 4 Re install the top hinge assembly previously removed in step 1 on the opposite side 5 Re i...

Page 9: ...Remove all the contents Clean the appliance Leave the lid open slightly to avoid possible formation of condensation mold or odors Short vacations Leave the beverage cooler operating during vacations of less than three weeks Long vacations If the beverage cooler will not be used for several months remove all content and unplug the power cord Clean and dry the interior thoroughly To prevent odor and...

Page 10: ...riod of time 4 hours are required for the beverage cooler to cool down completely Temperature inside the beverage cooler is too cold Temperature control is set too cold Turn the control to a warmer setting and allow several hours for the temperature to stabilize Vibrations Check to assure that the beverage cooler is on a level surface The beverage cooler is touching the wall Re level the beverage ...

Page 11: ...d service agents Service calls that do not involve defects in material and workmanship such as instruction on proper use of the product door reversal or improper installation Replacement or resetting of house fuses or circuit breakers Failure of this product if used for other than for its intended purpose Disposal costs for any failed unit not returned to our factory Any delivery costs incurred as...

Page 12: ... INSTRUCTIONS POUR REFROIDISSEUR DE BOISSON 4 7 PI3 Modèle No MCBC470BF Pour bien utiliser cet appareil et assurer la sécurité prière de lire entièrement les instructions suivantes avant d utiliser cet appareil ...

Page 13: ...les avantages suivants 1 L enregistrement de votre produit nous permettra de vous contacter concernant une notice de sécurité ou une mise à jour produit 2 Dans l éventualité où il s avère nécessaire de faire appel au service de garantie l enregistrement de votre produit facilitera le traitement plus efficace auprès du service de garantie 3 Dans l éventualité d un sinistre d assurance l enregistrem...

Page 14: ...EUR DE BOISSON 4 BRANCHEMENTS ÉLECTRIQUES 5 UTILISATION DE VOTRE APPAREIL COMMANDE DE TEMPÉRATURE 6 CHANGEMENT DE LA LAMPE INTERNE 6 DÉGIVRAGE AUTOMATIQUE 6 CHANGEMENT DE LA PORTE RÉVERSIBLE 7 ENTRETIEN ET MAINTENANCE NETTOYAGE DE VOTRE APPAREIL 8 PENDANT LES VACANCES 8 DÉPLACEMENT DE VOTRE APPAREIL 8 CONSEILS POUR FAIRE DES ÉCONOMIES D ÉNERGIE 8 GUIDE DE DÉPANNAGE 9 GARANTIE DES APPAREILS 10 ...

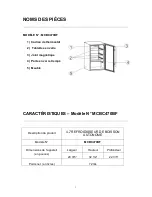
Page 15: ...re 3 Joint magnétique 4 Porte en verre trempé 5 Meuble CARACTÉRISTIQUES Modèle N MCBC470BF Description du produit 4 7 REFROIDISSEUR DE BOISSON AUTONOME Modèle N MCBC470BF Dimensions de l appareil en pouces Largeur Hauteur Profondeur 20 3 5 32 1 2 22 3 5 Poids net en livres 72 lbs ...

Page 16: ...reil Les émanations pourraient créer un risque d incendie ou une explosion Veuillez conserver ces instructions INSTRUCTIONS POUR L INSTALLATION Avant d utiliser votre appareil Retirez l emballage extérieur et intérieur Avant de connecter l appareil à la source électrique laissez le reposer à la verticale pendant environ 4 heures Cela réduira la possibilité d un dysfonctionnement dans le système de...

Page 17: ...l nécessite une prise secteur standard de 115 Volt A C 60Hz avec un troisième ergot de raccordement à la terre Cet appareil n est pas conçu pour être utilisé avec un onduleur Le cordon devrait être sécurisé derrière l appareil et ne devrait pas demeurer exposé ou pendant pour éviter toute blessure accidentelle Ne débranchez jamais l appareil en tirant sur le cordon d alimentation Saisissez toujour...

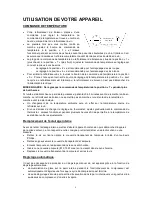
Page 18: ...e patientez 3 à 5 minutes avant de remettre l unité en marche Le refroidisseur de boisson ne se mettra pas en marche si vous tentez de le remettre en marche avant le délai indiqué Un changement de la température ambiante aura un effet sur la température interne du refroidisseur à vin Si vous décidez de changer le réglage du thermostat ajustez graduellement la commande du thermostat Laissez fonctio...

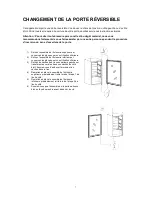
Page 19: ...e l huisserie supérieure et conservez les pièces pour une utilisation ultérieure 2 Retirez l ensemble de l huisserie inférieure et conservez les pièces pour une utilisation ultérieure 3 Retirez les caches des trous supérieurs gauches et transférez les vers les trous non cachés du côté droit Assurez vous d enfoncer fermement les caches dans le trou 4 Remettez en place l ensemble de l huisserie supé...

Page 20: ...la porte légèrement ouverte pour éviter toute formation éventuelle de condensation de moisissure ou d odeurs Séjours courts Laissez l appareil en fonctionnement pendant des vacances de moins de trois semaines Séjours longs Si l appareil va être inutilisé pendant plusieurs mois retirez la totalité du contenu et débranchez le cordon d alimentation Nettoyez et séchez méticuleusement l intérieur Pour ...

Page 21: ...areil a été récemment débranché pendant quelques temps 4 heures sont nécessaires pour que l appareil refroidisse complètement La température à l intérieur de l appareil est trop faible Le paramétrage de température est trop faible Positionnez la commande de réglage sur une température plus élevée puis patientez plusieurs heures pour que la température se stabilise Vibrations Vérifiez que l apparei...

Page 22: ...ortes ou les installations inappropriées Le remplacement ou le réenclenchement des fusibles ou des disjoncteurs domestiques Les pannes de ce produit s il est utilisé à d autres fins que celles pour lesquelles il a été construit Les coûts d évacuation des appareils non renvoyés à notre usine Les coûts de livraison engagés à la suite d une unité qui ne fonctionne pas comme indiqué Les frais pour le ...

Reviews: