

RIVET
SHAFT RIB
LOCKED
30
°
Installation Tips:
Operation Tips:
LOCK
90
°
Contact us : support@magiccos.co
NEVER
try to install the bowl with
handle on the left, it can not be
installed!
Please install the bowl with handle
on the right.
The bowl should be firmly locked to
activate the safety lock system.
You may need to use some strength
to lock it onto the base firmly .
Make sure the bowl handle is at
3
o'clock position
(facing to right at
a 90 degree angle).
The protective cover and safety lock
buckle should be firmly locked as
the left picture to make sure the
safety system is activated.
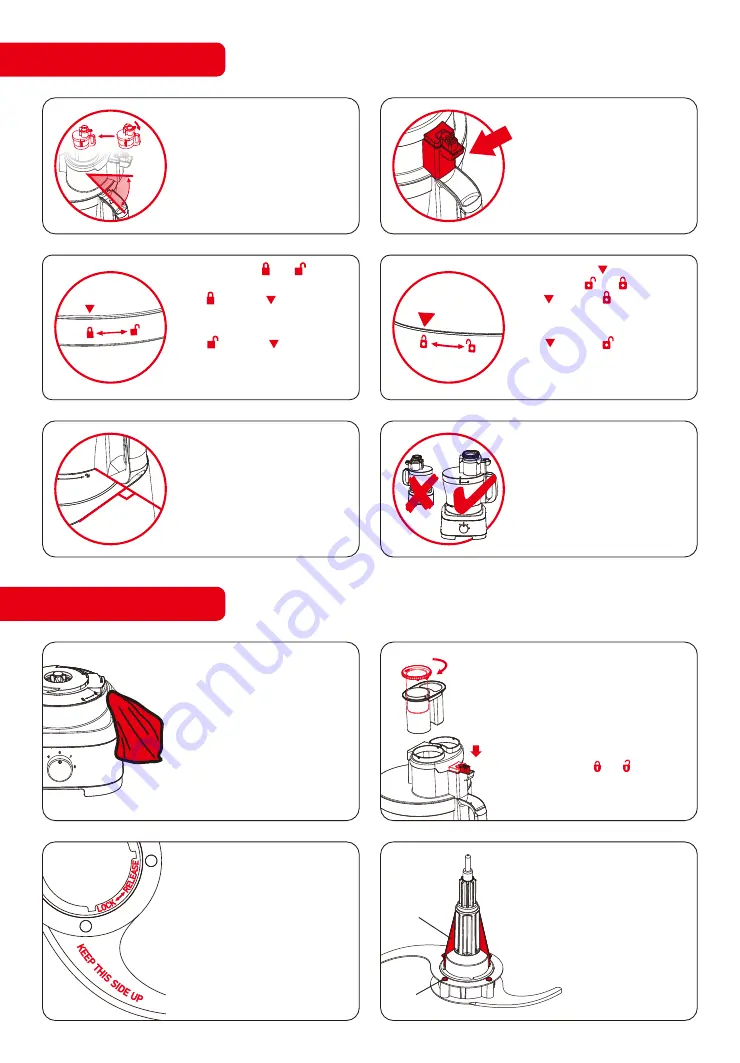
For an easy installation, place the lid
with safety lock buckle at the
2
o'clock position
(with 30 degree
angle between the safety lock buckle
and the handle) as a start position.
Please follow the symbol directions
on the lid and bowl to lock and
unlock the lid.
Please notice the and on the
bowl.
While align with which means
the the lid is locked, hold the lid turn
counter clockwise to release the lid.
While align with which means
the the lid is released, you can lift up
the lid or turn clockwise to lock the
lid.
Please notice the on the bowl
bottom, notice and on the base.
While align with which means
the bowl is locked, hold the bowl turn
counter clockwise to release the bowl.
While align with which means
the bowl is released, you can lift up
the bowl or turn clockwise to lock the
bowl.
Please always make sure the
protection cover and safety lock
buckle are locked in place before
turning on.
You can use the small pusher alone
or the small and big pusher together
as an assembly.
Please mind the and on the small
pusher for locking and releasing the
pushers.
The spray coating on the stainless
steel housing is soft, please use a
soft cloth to clean the surface,
avoid using abrasive cleaners to
clean the base.
Please find the
side of the
UP
chopper blade, the chopper blade
must be correctly installed before
using or else it can not chop
anything and even may hurt the
bowl!
Once the shaft ribs are completely
get through the chopper blade
notches, rotate the drive shaft
clockwise to lock the chopper and
drive shaft assembly.
To ensure a tight installation of the
chopper blade & shaft assembly, the
2 shaft ribs of the drive shaft should
be completely above the 4 rivets on
the chopper blade.
If you put the chopper blade & shaft
assembly into the food processor
bowl, it almost touches the bottom
of the food processor bowl.


