1-800-MAGLINE (624-5463)
Page 49 www.magliner.com
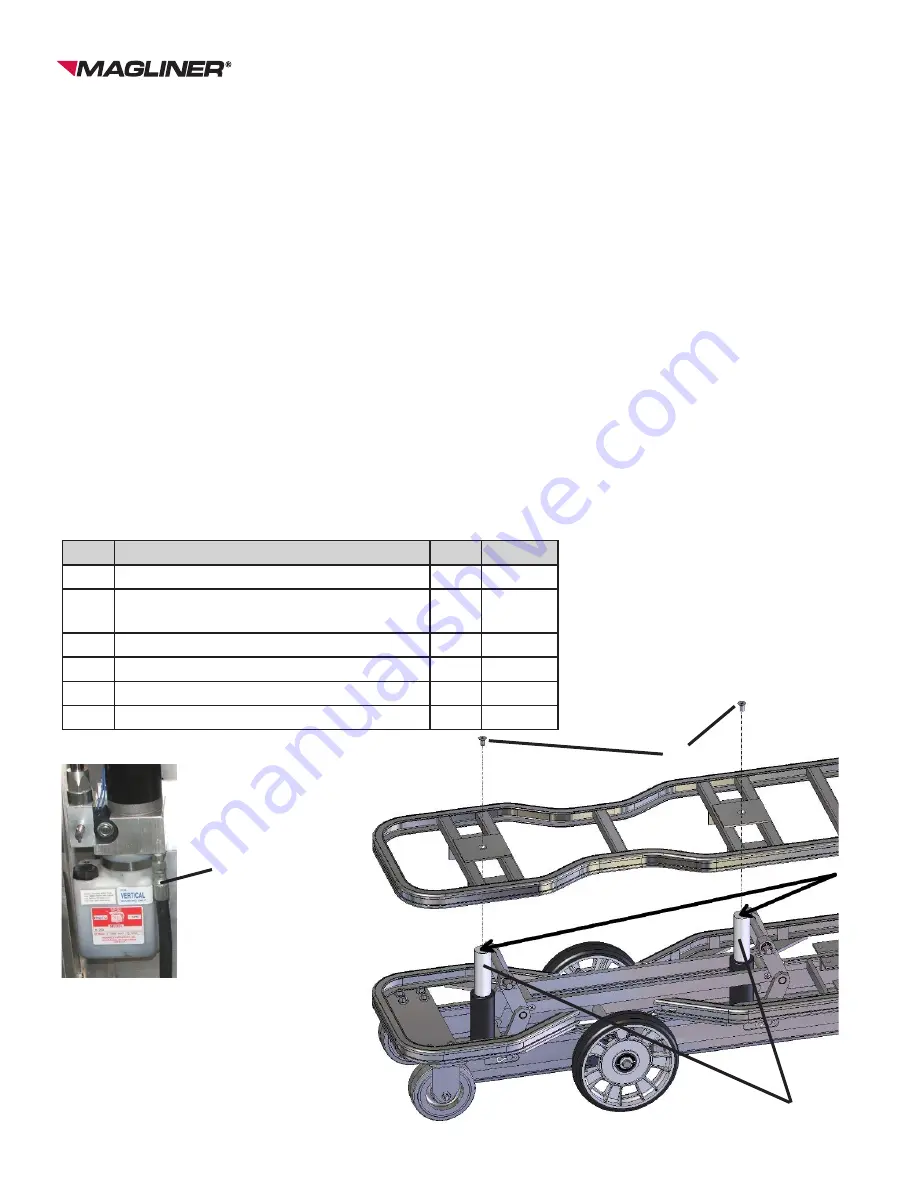
CooLift
®
D
B
C
Item
Description
Qty
Part #
A
Hydraulic pump reservoir
1
59501
B
Hydraulic cylinder assembly with fitting
(includes items C and D)
2
59006
C
Slotted truss head screw 3/8”-16 X 3/4”
2
80396
D
Helical lock washer 3/8” dia x 1/8” thick
2
80754
-
Hydraulic fluid
--
55407
-
Hydraulic fluid additive
2 oz.
55418
A
(Fill to 1/2 inch below
the top when the
deck is at the lowest
position)
9)
Allow air to escape. When fluid begins to collect in the deck screw tapped hole, proceed to the
next step.
10) Tighten the bleed screw 1/4 turn for Rev H cylinders or three complete turns for all other cylinders.
DO NOT ATTEMPT TO FULLY TIGHTEN the bleed screw at this time; it should only be “snug.”
11) Repeat steps 8 through 10 for the back cylinder.
12) Lower the cylinders completely.
13) Repeat steps 7 through 12 as needed until the air is out of the system (usually 2 or 3 repetitions
are all that is needed).
14) Once the cylinders have been bled, fully raise the cylinders.
• The center section of the rod end should be flush with the outside section of the cylinder rod.
• Full system pressure should be on the cylinders.
15) Finish tightening both of the bleed screws to 40 in-lbs torque (for all cylinders).
16) Check for leaks in the hydraulic system.
17)
Clean the excess fluid out of the deck screw tapped hole.
18) Secure the deck back in place using the lock washer and deck screws previously removed.
19)
Lower the deck and recheck the fluid level in the reservoir - refill if necessary.
20) Secure the back panel with the previously removed screws and the #3 Phillips head screwdriver.
21)
Wipe up any hydraulic fluid that may have leaked into the drip pan using the shop towels.
22)
If any hydraulic fluid was spilled onto the flooring surface clean it up by first absorbing it with either
a shop towel or the absorbing material and then mopping the area with floor soap to prevent slips
and falls.


