background image

M A G M A  

24               Chapter 5     Remote Monitoring 

Most SMTP servers will reject the email that Surveillance Pro 2 is trying 
to send if it does not belong to its domain. 

Finalizing Surveillance Pro 2 Configuration 

Once you have filled in all of the needed information, hit the submit 
button for the data to be saved to the Surveillance Pro 2. In order for the 
new settings to take effect, either the power to the chassis needs to be 
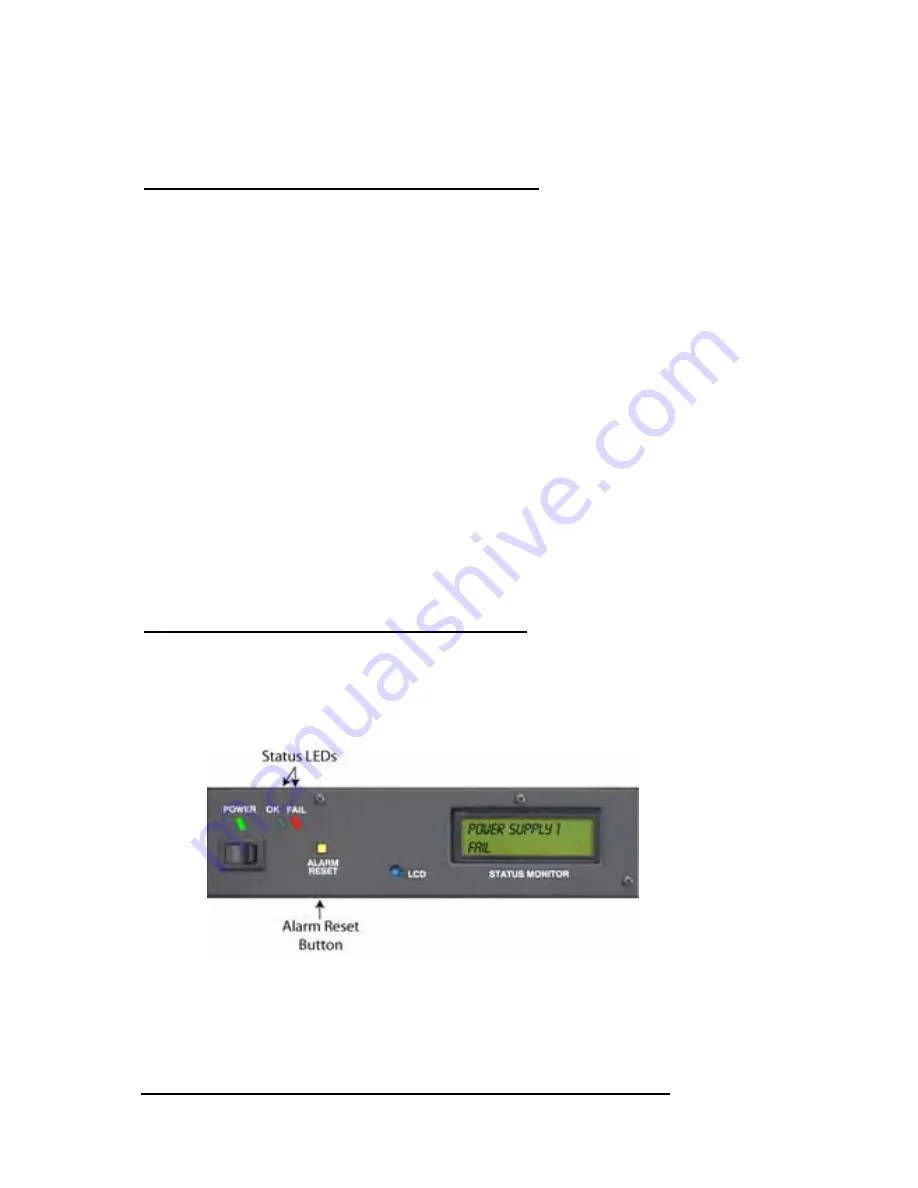
cycled, or the yellow reset button on the chassis monitoring system 
needs to be pressed. 

To test the email configuration, create a fault condition on your chassis. 
This can be accomplished by switching off a power supply. Wait for 15 
seconds after the audible alarm on the chassis sounds. At this point you 
can correct the error and press the yellow reset button. Check the 
recipient’s inbox; you should see an email with the fault you have 
created. 

From: EmailMonitor@yourdomain.com 
Sent: 

Wednesday, November 19 2005 16:36 PM 

To: YourName@yourdomain.com 
Subject: Failure on chassis MAGMA01 
 
Motherboard Mount Fan 2 
FAIL 
 

Removing Faults From Surveillance Pro 2 

The Surveillance Pro 2 system is closely linked with the monitoring 
system built into the P13RR-TEL. As errors are removed from the 
monitoring system, they will also be removed from the Surveillance Pro 
2.  


When the faults with the chassis are corrected, press the yellow 
monitoring reset button on the front of the chassis and the faults will be 
removed. 


Summary of Contents for PCI Expansion System P13RR-TEL

Page 1: ...PCI Expansion System User s Manual 13 Slot PCI to PCI Expansion With Surveillance Pro 2 Remote Monitoring and SNMP Capability Model P13RR TEL...

Page 2: ...nical optical or otherwise in whole or in part without prior written consent from Mobility Electronics Inc Limitation of Liability Information presented by Mobility in this manual is believed to be ac...

Page 3: ...n 6 Applying Power Correctly 6 Starting Up 6 Shutting Down 7 CHAPTER 3 VERIFY INSTALLATION 8 Windows 2000 and XP 8 Mac OS X 9 CHAPTER 4 INSTALL 3 RD PARTY PCI CARDS 11 Remove PCI Expansion Chassis Cov...

Page 4: ...rk 32 Support for 3 rd Party PCI Cards 33 Windows Error Codes 34 CHAPTER 8 HOW TO GET MORE HELP 36 Frequently Asked Questions FAQ 36 Contacting Technical Support 36 MAGMA Debug Utility 37 PCIScope Sof...

Page 5: ...xt CAUTION Used to indicate and prevent the following procedure or step from causing damage to the equipment WARNING Used to indicate and prevent the following step from causing injury DANGER or STOP...

Page 6: ...nents Refer to the installation instructions in this manual for precautions and procedures If you have any questions please contact Mobility Technical Support High voltages are present inside the expa...

Page 7: ...nstructions closely ProtectingAgainstElectrostaticDischarge Electrostatic Discharge ESD Warning Electrostatic Discharge ESD is the enemy of semiconductor devices You should always take precautions to...

Page 8: ...tatic container or packaging Handle all sensitive components at an ESD workstation If possible use anti static floor pads and workbench pads Handle components and boards with care Don t touch the comp...

Page 9: ...losure Black 4U Rack Mount Dimensions 19 W x 7 H x 18 D Weight 35lbs or 15 9kg Standard Cable Length 1 meter PCI Local Bus Specification Revision 2 2 PCI Bridge Architecture Spec Revision 1 1 Intercon...

Page 10: ...13 Short card retainers 2 U S Standard 115V power cord 1 User s Manual 1 Software CD ROM 1 The MAGMA PCI expansion cable uses a 68 pin connector however it is NOT an off the shelf SCSI cable The MAGM...

Page 11: ...r off at the power on off switch does not remove power to components High voltage is still present Before touching anything inside the enclosure move to an ESD station and follow proper ESD procedure...

Page 12: ...anual or system documentation The PCI Host Interface Card includes a voltage switch in the top right corner of the board that may need to be adjusted for proper installation It is an easy process to d...

Page 13: ...I expansion host card and secure it using the captive thumbscrews on the cable Carefully route the cable to the rear side of the expansion chassis and attach it to the 68 pin connector as shown below...

Page 14: ...ed PCI buses in the PCI bus hierarchy to be at a stable state when the host system issues its master power on bus reset In systems that perform automatic PCI bus configuration this will allow the conf...

Page 15: ...y Installation Shutting Down DO NOT TURN OFF THE MAGMA EXPANSION CHASSIS UNTIL YOU HAVE SHUT DOWN YOUR COMPUTER COMPLETELY It can cause a system lockup and loss of any unsaved data When shutting your...

Page 16: ...anager Click on the View Menu and select View Devices by Connection Open ACPI BIOS Open PCI Bus Click the sign several times until your reach the PCI Standard PCI to PCI Bridge When installed correctl...

Page 17: ...lp with Windows installation problems MacOSX When using Mac OS X no additional software or drivers are needed As long as you are using Mac OS X Version 10 2 2 or newer the operating system should auto...

Page 18: ...splayed as shown above you should shut down your system computer first then the expansion chassis and reconnect the cables and the PCI expansion host card to ensure that you have a solid connection Th...

Page 19: ...MAGMA expansion chassis functions exactly as a standard desktop computer chassis Always follow the manufacturer s instructions for installing their card on a desktop computer We will provide reasonab...

Page 20: ...front edge guides on the cover engage the inner lip of the enclosure PCIExpansionInterfaceCard Next check the PCI Expansion Interface Card This card is factory installed in the 1 st PCI slot next to t...

Page 21: ...ansion Interface slot Generally when installing 3 rd Party PCI cards in the MAGMA expansion chassis it should make no difference which PCI slot you place your cards in unless specified by the card man...

Page 22: ...PCI Specification compliance from your card and system vendors Cards and systems should be at least PCI Specification Revision 2 0 compliant or better Compliance in your system motherboard PCI cards a...

Page 23: ...f the Retainer and insert it from the bottom of the bar into an open slot directly above your PCI card When the round tips on the end of the Retainer are inline with the round holes on the bar release...

Page 24: ...y attach one of MAGMA s optional Rack mount slide kits PN RSLIDES XX to allow you to mount the chassis in a computer rack and then simply slide the chassis in and out whenever you need to do work on o...

Page 25: ...re are two methods to access the status of the P13RR TEL critical parameters The first method is to use an Internet browser Simply enter the IP address of the Surveillance Pro 2 and the information wi...

Page 26: ...can be monitored for a particular P13RR TEL chassis To the right of the black text is the status on each monitored parameter If the status text is green the parameter is in an acceptable or pass stat...

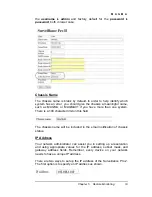
Page 27: ...ave more than one system There is a 100 character limit on this field The chassis name will be included in the email notification of chassis status IP Address Your network administrator can assist you...

Page 28: ...the rear of the chassis there is a decal with the MAC Media Access Control number and chassis manufacturer ID The MAC is used in conjunction with a DHCP server to give the Surveillance Pro 2 its IP a...

Page 29: ...assign DHCP clients with a gateway address simply enter a 0 in the gateway address field Otherwise enter the appropriate value in the field in dotted decimal format an example of dotted decimal notati...

Page 30: ...notifications you must setup the following an SMTP address and a recipient s email address SMTP Address Enter an SMTP server address in dotted decimal format This can be obtained from your internet s...

Page 31: ...DO NOT USE special characters i e symbol characters Using special characters will result in your not being able to access Surveillance Pro 2 s administrative functions The same rules listed for the ad...

Page 32: ...switching off a power supply Wait for 15 seconds after the audible alarm on the chassis sounds At this point you can correct the error and press the yellow reset button Check the recipient s inbox you...

Page 33: ...ms can experience hardware failures Fortunately your investment in a P13RR TEL provides you with the ability to easily repair the system in the event of component failure Two of these components are f...

Page 34: ...lay window sound an alarm update the web access page and if you have configured the SNMP monitoring for email alerts it will also send you an email advising you of the power failure Unlike the hot swa...

Page 35: ...the expansion chassis and then the host computer It may also be necessary to press the yellow alarm reset button to completely clear the fault and restore normal monitoring conditions AdjustingtheDigi...

Page 36: ...ving problems try these simple troubleshooting steps My Computer Can t Find the PCI Expansion System When Nothing Works My PCI Card Doesn t Work The PCI to PCI Expansion System is correctly displayed...

Page 37: ...tional troubleshooting steps Double check the PCI host card to ensure it is inserted correctly in a PCI slot Try moving the PCI host card to a different PCI slot Check for a bad cable or connection Tr...

Page 38: ...MAGMA expansion system and that you have correctly installed your 3 rd Party PCI card s and their associated drivers as required If it powers up OK but nothing works check the computer s Device Manage...

Page 39: ...ut the MAGMA expansion system attached call Mobility Technical Support ii If it still hangs the problem is in the computer and not with the MAGMA expansion system or the 3rd Party PCI cards b If it bo...

Page 40: ...or fail to resolve your problem 1 Shut down the computer followed by the MAGMA expansion chassis 2 Remove the PCI card displaying a problem 3 Replace the problem card with a simple PCI card such as an...

Page 41: ...and if the PCIe to PCI Bridge Connections and the 3 rd Party PCI card s are now correctly visible Support for 3rd Party PCI Cards Mobility will provide reasonable technical support to with 3 rd Party...

Page 42: ...indicates that there is a problem with the 3 rd Party PCI Card driver If necessary contact the PCI Card s manufacturer for updated PNP compatible drivers If all else fails contact Mobility Technical S...

Page 43: ...are not working correctly Reinstall the PCI host card into the computer s PCI slot and recheck all cable connections If the error code remains try another PCI slot If you still have the error call Mob...

Page 44: ...uter Make 9 Computer Model 10 Operating System and Version 11 Make Model of PCI cards in expansion chassis 12 Detailed description of the problem You can also visit our web site at www magma com suppo...

Page 45: ...e follow these instructions 1 Locate a file called dbgview exe on the MAGMA CDROM 2 Double click on the file dbgview exe 3 While the dbgview screen is open locate and double click on a file called dum...

Page 46: ...n purchase an inexpensive license from APSoft for use beyond the evaluation period PCIScope has proven to be extremely useful when verifying and debugging configurations involving the MAGMA PCI Expans...

Page 47: ...Help 39 You should save this data as a file on your computer Please include your name and date as part of the file name with an extension of bpd Then email this file to support magma com if you are e...

Page 48: ...ep the packaging from the original shipment of your MAGMA product However if you return a product to MAGMA for warranty repair replacement or take advantage of the 30 day money back guarantee you will...

Page 49: ...only know how they increment starting from the PCI expansion host card The key point in the figure of the 13 Slot Topology is that the connecting cable between the PCI expansion host card and the 13 S...

Page 50: ...tion the bios finds the Magma host card in a PCI slot The bios configures it and then looks beyond it to find any PCI cards installed in the expansion chassis The bios then configures the cards and al...

Page 51: ...us should be viewed as a Resource Toll road that runs from the computer CPU resource home through the Toll Booths the PCI bridges to the Resource Users PCI Cards As in the case of a real Toll Road the...

Page 52: ...self is negligible nanoseconds and will not produce any visible effect on most systems It is only mentioned here because on a few rare configurations which use some unique PCI cards with special softw...

Page 53: ...sical space This could be the number of available slots on the computer motherboard or a lack of desk or rack space Daisy Chaining Expansion Systems PCI Expansion Host Card Simply place another Host E...

Page 54: ...Expansion System Notice that each Daisy Chained unit appears in the Device Manager in the reverse order of its place in the configuration Combination Configurations Depending on your business requirem...

Page 55: ...d PCI cards Obviously the reverse also remains true for shutting your system down The computer must be shut off BEFORE you attempt to turn off your Expansion System s TroubleshootingAdvancedConfigurat...

Page 56: ...ed the expansion system containing the problem card Remember it may be necessary to identify the PCI Slot that the Host Interface Card is in before you can properly identify the correct expansion chas...

Page 57: ...information contained in the Location field Look for the Error Code in the box in the center of the Properties Window and then go to the Windows Error Code section for information on how to resolve th...

Page 58: ...Rules Operation is subject to the following two conditions 1 this device may not cause harmful interference and 2 this device must accept any interference received including interference that may cau...

Page 59: ......

Page 60: ...Manual P N 09 09907 01 A Mobility California Inc PCI Expansion Products 9918 Via Pasar San Diego CA 92126 USA Phone 858 530 2511 Fax 858 530 2733 Email support magma com www magma com...

Reviews: