In our
ServiceCenter
you will find detailed
manuals
for all Telemotive devices and the
System Client
and some optional features we are offering.
If you do not have an account for the ServiceCenter please contact
1.
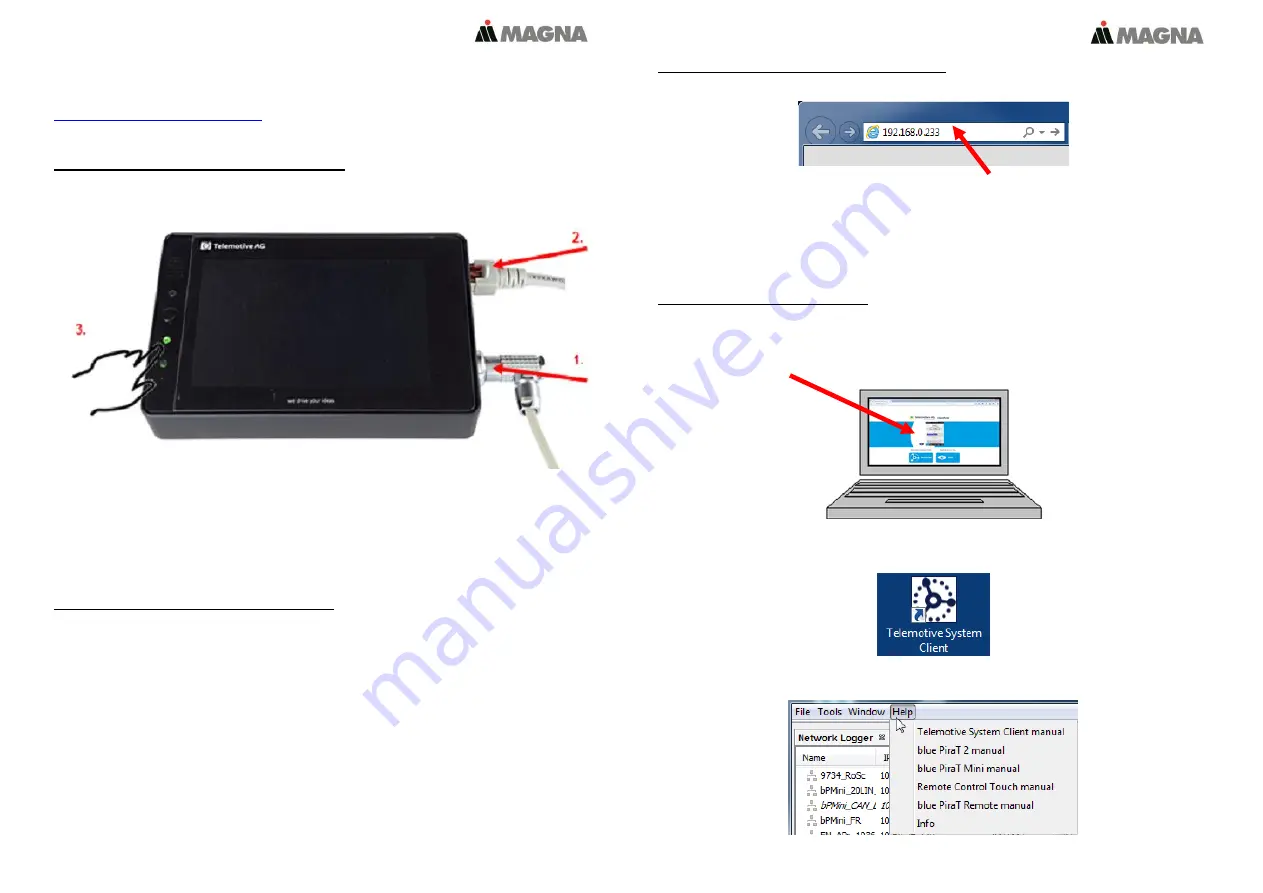
Hook up the Remote Control Touch (RCT)
Step 1:
Connect the
Remote Control Touch
to the vehicle battery or a power supply via the power
harness (
red/Vbat/+/clamp30
and
black/GND/-/clamp31
).
(1.)
Step 2:
Connect one Ethernet port with the Ethernet port of your computer by using a Ethernet cable.
(2.)
Note: By default the device
is configured as DHCP-Server with IP address 192.168.0.233!
2.
Power on/off the Remote Control Touch
Step 3:
Switch on the device by pressing the
[Home]
button and wait until the device is ready.
(3.)
For switching off the device please press the
[Home]
button for about 5 seconds till the
[Active]
LED starts
pulsing.
(3.)
3.
Connecting to the Remote Control Touch
Step 4:
Open your Internet browser, enter the
IP address 192.168.0.233
and press enter.
Note:
Make sure your network settings will be set to
“apply IP address automatically”
The needed Java Runtime Environment is included into the client and must not be installed
separately.
The connection between the device and the computer will be established and the Client portal is shown.
4.
Installing the System Client
Step 5:
Please click on the image to start the download of the client (~ 130 MB) directly from the device.
Then choose
[Save]
to save the file to your local computer.
The installation setup can be started by double klicking on the setup file. Follow the instructions, choose
a destination directory and finalize the installation by pressing
[Install].
Step 6:
After installing successfully you will find the
System Client
icon on your desktop.
Double-click the icon to start the application.
The item
[Help]
offers access to the links to the main manuals.


