background image

Search for a Scene 

1.  Press the SEARCH button on the remote and using the NAVIGATION 

buttons, choose whether you would like to search using title, chapter, 
title time, or chapter time. 

2.  Input the desired title or chapter number using the NUMERIC buttons 

on the remote 

 
Programmed Play (20 Programmable Memories) 

1.  Press the PROGRAM button on the remote during playback to display 

the program menu. 

2.  Using the NAVIGATION buttons on the remote, highlight the first 

memory slot and then type in the track or scene number with the 
NUMERICAL buttons on the remote. 

Ex. For track 3, press “3” 
      For track 21, press “2” then “1” 

3.  Continue these steps until you reach memory slot 10; then press the 

NEXT button on the main unit or remote to program memory slots 11 
through 20. 

4.  To start programmed playback, highlight START on the menu and 

press OK. Press PROGRAM to close the programming menu. 

5.  To clear the menu press the PROGRAM button, select STOP in the 

programming menu, press the OK button. Select EXIT on the 
programming menu and press the OK button again. All memory should 
now be erased. 


Zoom Playback 

Press the ZOOM button on the remote continuously to zoom in on the 
picture by 2, 3, and 4 times, then zoom out by 1/2, 1/3, and 1/4 times. 
Press the ZOOM button once more in 1/4 size to return to normal size. 
Scroll across the picture while zoomed in using the NAVIGATION buttons 
on the remote. 
 

On Screen Display 

When the player is in playback mode, pressing the DISPLAY button on the 
remote will cycle through information that is available to display from the 
disc. (Disc title, chapter number, elapsed disc time, remaining disc time, 
elapsed chapter time, remaining chapter time) 
 

Changing Soundtrack Language (DVD only) 

It is possible to change the soundtrack language only on discs that have 
multiple language soundtracks. 
Press the AUDIO button on the remote during DVD playback, the 
soundtrack will change and the soundtrack number will appear on the 
screen. 


- 10 -

Summary of Contents for MMD1040

Page 1: ...ayer with Stereo Radio Clock INSTRUCTION MANUAL www magnasonic ca Thank you for your purchase of this Magnasonic product Please read this Instruction Manual carefully before using product to ensure proper use Keep this manual in a safe place for future reference ...

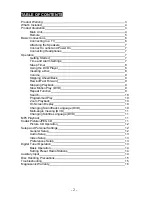
Page 2: ...ast Forward 9 Stopping Playback 9 Slow Motion Play DVD 9 Repeat Function 9 Search 10 Programmed Play 10 Zoom Playback 10 On Screen Display 10 Changing Soundtrack Language DVD 10 Multi angle Viewing DVD 11 Changing Subtitle Language DVD 11 MP3 Playback 11 Kodak Picture JPEG CD 11 Picture CD Operation 12 Setup and Personal Settings 12 General Setup 12 Audio Setup 13 Video Setup 13 Preferences Setup ...

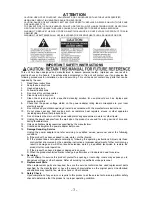
Page 3: ...ves or other apparatus including amplifiers that produce heat 11 Do not immerse the main unit the power adapter or any accessories in water or other liquid 12 Unplug the power adapter from the wall when the product is unused for a long period of time and during thunderstorms 13 Only use attachments accessories specified by the manufacturer 14 Unwind and straighten the power adapter before use 15 D...

Page 4: ...WHAT S INCLUDED DVD CD Player 2 Speakers Remote Control Instruction Manual PRODUCT ILLUSTRATION Main Unit Front Back 4 ...

Page 5: ...PREV TUNE DOWN MINUTE ADJUST button 11 NEXT TUNE UP HOUR ADJUST button 12 MODE EQ CLOCK STORE button 13 PLAY PAUSE RADIO PRESET button 14 STOP BAND MODE button 15 DISC OPEN CLOSE Button 16 7 TFT LCD DISPLAY 17 RIGHT SPEAKER JACK 18 LEFT SPEAKER JACK 19 RIGHT AUX IN JACK VIDEO 20 LEFT AUX IN JACK AUDIO 21 A V OUT JACK 22 AC POWER CORD 23 RADIO ANTENNA Remote Control 5 ...

Page 6: ...26 BUZZER OFF button 27 BATTERY COMPARTMENT BASIC CONNECTIONS Before attempting to connect your DVD player ensure that player and all other electrical equipment are OFF and unplugged Read instructions carefully before attempting to connect DVD player to other appliances Observe color coding to ensure proper connection and performance of product Connecting your DVD player to a Television 1 Connect ...

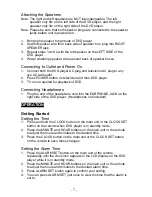
Page 7: ...ayback of DVD Connecting Headphones 1 Plug the end of the headphone cord into the EARPHONE JACK on the right side of the DVD player Headphones not included OPERATION Getting Started Setting the Time 1 Press and hold the CLOCK button on the main unit or the CLOCK SET button on the remote when DVD player is in standby mode 2 Press the MINUTE and HOUR buttons on the main unit or the remote to adjust ...

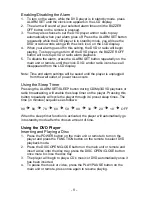
Page 8: ...ttings will be saved until the player is unplugged from the wall outlet or power loss occurs Using the Sleep Timer Pressing the ALARM SET SLEEP button during CD Mp3 DVD playback or radio broadcasting will enable the sleep timer on the player Pressing this button repeatedly will cycle the player through its preset sleep times The time in minutes sequences as follows 90 80 70 60 50 40 30 20 10 OFF W...

Page 9: ...e normal play Stopping Playback Press the STOP button on the main unit or remote during playback Pressing PLAY on the main unit or the remote will resume playback Note When a DVD disc is stopped and the player is turned off the DVD player enters resume mode The player will remember the moment you pressed stop and begin the disc at the same point the next time the player is turned on and playback i...

Page 10: ...enu 5 To clear the menu press the PROGRAM button select STOP in the programming menu press the OK button Select EXIT on the programming menu and press the OK button again All memory should now be erased Zoom Playback Press the ZOOM button on the remote continuously to zoom in on the picture by 2 3 and 4 times then zoom out by 1 2 1 3 and 1 4 times Press the ZOOM button once more in 1 4 size to ret...

Page 11: ...turn to the main menu of the disc and press the TITLE MENU button to play the title MP3 MPEG4 WMA PLAYBACK 1 Press the DISC OPEN CLOSE button on the main unit or the remote and place the CD in the disc tray Close the disk tray buy pressing the DISC OPEN CLOSE button again 2 The CD will begin to play automatically press the PREVIOUS or NEXT buttons to switch between songs KODAK PICTURE CD JPEG CD P...

Page 12: ...IONAL buttons to view blocked parts of the picture SETUP AND PERSONAL SETTINGS The setup menu lets you make personal settings that are saved in the DVD players CPU until otherwise changed All changes made to the setup menu can be done by pressing the SETUP button on the remote use the NAVIGATION and OK buttons on the remote to make your choices To exit the setup menu press the SETUP menu button ag...

Page 13: ...djust the lightness or darkness of the display 2 Contrast Adjusts the contrast ratio of the display 3 Hue Adjusts the colour impression of the display 4 Saturation Adjusts the darkness or colourfulness of the display Preferences Setup TV Type Choose your TV type according to where you reside Options 1 NTSC Choose this option if you live in North America 2 PAL Choose this option if you live in Euro...

Page 14: ...te to select a frequency to store 3 Press the STORE button on the main unit or remote TWICE to store the selected frequency 4 Repeat the process to store the rest of your chosen preset radio stations 5 To recall your selected radio stations press the PRESET button on the main unit or the M Left Right navigation buttons on the remote to cycle though all presets AUXILIARY INPUT Any audio signal can ...

Page 15: ...service center Symptom Check Power does not turn on or suddenly turns off Ensure that the AC cord is securely plugged into an AC wall outlet Turn the power off and then on again Remote control does not work Check that the battery is inserted in the and direction properly The battery may be dead replace it with a new one Ensure you are directing the remote towards the IR sensor on the front of the ...

Page 16: ...l purposes i Any installation setup and or programming charges Should this MAGNASONIC product fail to operate during the warranty period warranty service may be obtained upon delivery of the MAGNASONIC product together with proof of purchase and a copy of this LIMITED WARRANTY statement to an Authorized MAGNASONIC Service Centre In home warranty service may be provided at BlueTronics Group s discr...

Reviews: