5
Press
OK
to select
Set up for home use
. This is the right
choice for enjoying your TV at home. It provides energy saving
options as well as access to all features of the TV.
Note(s)
●
Store mode configures the TV for retail display and is not recommended for
any other use. In store mode, some features of the TV are missing or
limited. To switch from one mode to the other, you have to perform a factory
reset as explained in
Factory reset everything
L
p. 57
, and then repeat
Guided Setup.
Network connection
After you select
Set up for home use
, the TV prompts you to make
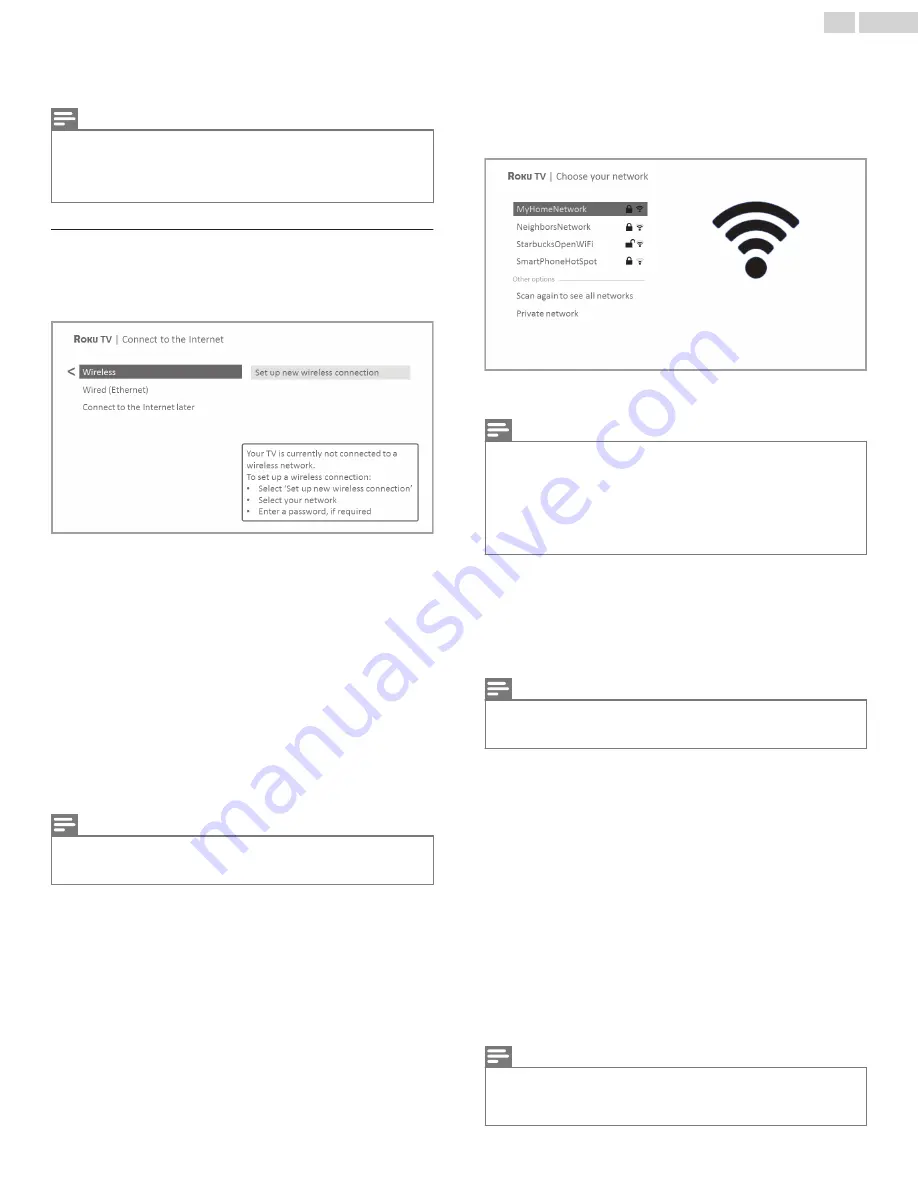
a network connection. If your TV has both wired and wireless
connections, you’ll see the following screen.
6
Only models that display the
Connect to the Internet
screen:
Make a selection:
–
Wireless connection
– Highlight
Set up new wireless
connection
and press
OK
. The TV prompts you through
wireless setup. Skip ahead to the next step for help with
the process.
–
Wired connection
– Highlight
Connect to wired network
and press
OK
. The TV immediately attempts to connect
to your wired network, your local network, and then the
Internet. Go to Step 9 to continue with Guided Setup.
–
Connect to the Internet later
– If you don’t want to connect
to the Internet right now, you can skip this step and use
the TV to watch Antenna TV channels, play games, and
watch DVDs. When you’re ready to connect, it’s easy.
We’ll show you how in
Benefits of connecting
L
p. 21
Note(s)
●
If you decide not to connect, Guided Setup skips ahead to setting up the
devices that you’ve connected to your TV. Jump ahead to
Connect your
devices
L
p. 19
to complete Guided Setup.
7
On models that have wireless only, or models with both wired
and wireless and you’ve selected
Wireless
: The TV scans for
the wireless networks within range and displays them in
order, with the strongest signals first. In addition to your own
wireless signal, the TV might pick up signals from your
neighbors.
Press the
Up
or
Down
arrows to highlight the name of your
wireless network, and then press
OK
to select it.
Note(s)
●
Some networks, such as those often found in dorm rooms, hotels, and
other public places, require you to read and agree to terms, enter a code,
or provide identifying information before letting you connect to the Internet.
If your Roku TV detects that you are connecting to such a network, it
prompts you through the connection process using your compatible
smartphone or tablet to provide the needed information.
For more information, see
Using your TV in a hotel or dorm room
L
p. 33
.
Other options
●
Connect to the Internet later
– If you don’t want to connect
to the Internet right now, you can skip this step and use the
TV to watch Antenna TV channels, play games, and watch
DVDs. When you’re ready to connect, it’s easy. We’ll show
you how in
Benefits of connecting
L
p. 21
.
Note(s)
●
If you decide not to connect, Guided Setup skips ahead to setting up the
devices that you’ve connected to your TV. Jump ahead to
Connect your
devices
L
p. 19
to continue.
●
Scan again / Scan again to see all networks
– The name of
this option depends on the number of wireless networks
within range.
–
Scan again
appears if the list already shows all available
wireless networks within range. If you don’t see your
wireless network name in the list, you might need to
adjust the location of your wireless router or the TV, turn
on your router, or make other changes. When everything
is ready, select
Scan again
to see if your network name
now appears in the list.
–
Scan again to see all networks
appears if there are more
wireless networks than the strongest ones it initially
listed. If you don’t see your wireless network name in the
list, this option displays the complete list. If you still don’t
see your network name, you might have your router
configured to provide wireless service as a “private
network.”
Note(s)
●
Highlighting either of these options displays an informational panel with the
unique media access control (MAC) address of your Roku TV. You will need
the MAC address if your wireless router is configured to use MAC address
filtering.
17
.
English


