background image

– 6 –

EN

SETUP

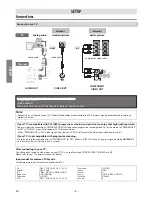
Connection to a TV

Connections

SETUP

GE: INPUT, TV/VCR, 00, 90, 91, 92, 93
Hitachi: INPUT, AUX
JVC: VIDEO, VIDEO1, VIDEO2, VIDEO3
Magnavox: AUX 

CHANNEL

Panasonic: TV/VIDEO
RCA: INPUT, TV/VCR, 00, 90, 91, 92, 93

Samsung: TV/VIDEO
Sanyo: VIDEO
Sharp: 00
Sony: VIDEO1, 

VIDEO2, 

VIDEO3

Toshiba: TV/GAME
Zenith: 

00

Note:

• Connect this unit directly to your TV. If Audio/Video cables are connected to a VCR, pictures may be distorted due to the copy 

protection system.

After connecting to your TV:

You will need to switch to Video Input on your TV. This is usually marked TV/VIDEO, INPUT, SOURCE or AUX.
Please refer to your TV’s owner’s manual for details. 

Input modes for common TV brands:

Listed below are inputs for common brand name TV’s.

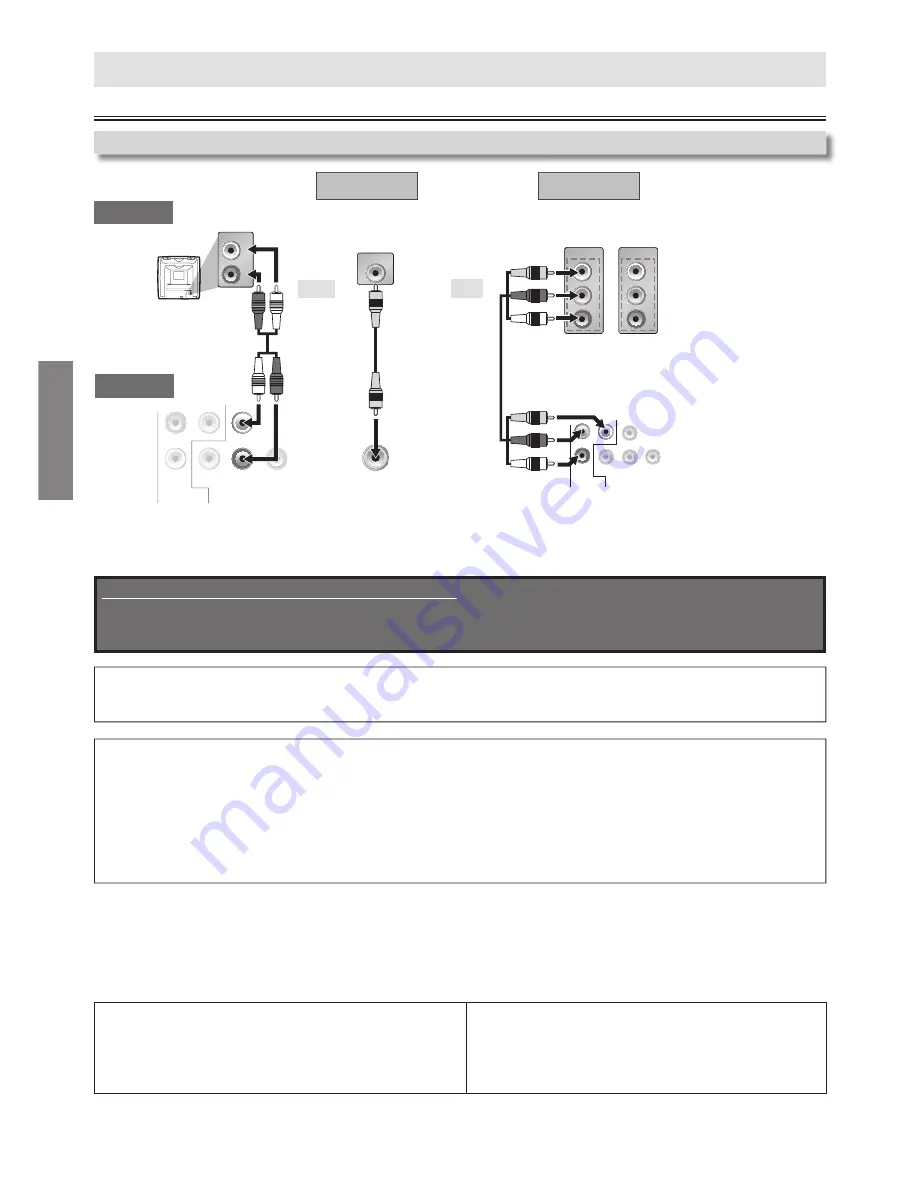
If your TV is compatible with 525 (480) progressive scanning and you want to enjoy that high quality picture;

You must select the connection COMPONENT VIDEO OUT above and progressive scanning mode. To set the mode, set “PROGRESSIVE” 
to “ON” in “DISPLAY” menu. Refer to pages 14-15 for more details. 
•  When “PROGRESSIVE” is “ON”, video signals from the unit’s VIDEO OUT jack will be distorted or not be output at all.

If your TV is not compatible with progressive scanning;

Use this unit in interlace mode and set “PROGRESSIVE” to “OFF” either in “DISPLAY” menu or by pressing and holding 

[

B

(PLAY)]

on the front of the unit for more than 5 seconds.

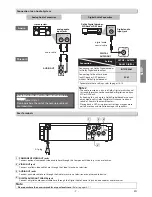
Supplied cables used in this connection are as follows:

• Audio cable (L/R) x 1
• Video cable x 1
Please purchase the rest of the necessary cables at your local store.

analog audio

standard picture

better picture

COAXIAL

   DIGITAL

AUDIO OUT

AUDIO

OUT

VIDEO

OUT

R

L

Y

COMPONENT

 VIDEO OUT

C

R

/P

R

C

B

/P

B

COMPONENT

VIDEO IN

COMPONENT

VIDEO IN

or

P

R

Y

P

B

C

R

Y

C

B

AUDIO OUT

VIDEO OUT

COMPONENT

VIDEO OUT

COMPONENT 

VIDEO OUT

VIDEO

OUT

AUDIO

OUT

COAXIAL

DIGITAL

AUDIO OUT

C

R

/P

R

R

R

C

B

/P

B

B

B

Y

L

R

AUDIO IN

VIDEO IN

L

R

AUDIO IN

L

R

or

and

video cable

audio cable

component video cable

VIDEO IN

VIDEO

OUT

This unit

TV

Method 1

Method 2

01301746̲E6K0EUD̲E6K0EUH̲MDV2400F7̲EN̲v1.indd   6

2013/01/31   3:39:20

Summary of Contents for MDV2400

Page 1: ...AXIAL DIGITAL AUDIO OUT CR PR CB PB Y L R If your TV only has an Antenna input no A V inputs you will need a RF modulator NOT INCLUDED to connect this player RF modulator AUDIO IN R L VIDEO IN CHANNEL 4 3 TO TV TV ANT IN ANT IN No Antenna RF Output Connecting to RF Modulator Not Supplied Notes RF modulator is not supplied with this unit You need to purchase it at your local store The quality of pi...

Page 2: ... on or pinched particularly at plugs convenience receptacles and the point where they exit from the apparatus 11 Only use attachments accessories specified by the manufacturer 12 Use only with the cart stand tripod bracket or table specified by the manufacturer or sold with the apparatus When a cart is used use caution when moving the cart apparatus combination to avoid injury from tip over 13 Unp...

Page 3: ...pull on the power cord when disconnecting it from an AC outlet Grasp it by the plug Do not put your fingers or objects into the unit Location and Handling Do not install the unit in direct sunlight near strong magnetic fields or in a place subject to dust or strong vibration Avoid a place with drastic temperature changes Install the unit in a horizontal and stable position Do not place anything di...

Page 4: ...Do not use solvents such as benzine thinner commercially available cleaners detergent abrasive cleaning agents or antistatic spray intended for analog records Cleaning the Disc Lens g If this unit still does not perform properly although you refer to the relevant sections and to Troubleshooting Guide in this owner s manual the laser optical pickup unit may be dirty Consult your dealer or an author...

Page 5: ...recorded portion of the disc is too small smaller than 2 3 16 inches 55mm across it may not be played back 9 Do not glue paper or put stickers on to the disc These may damage the disc and the unit may not read it correctly About the Discs Playable Discs Unplayable Discs NEVER play back the following discs as malfunction may result DVD RAM DVD audio CD i photo CD video CD DVD with region codes othe...

Page 6: ... and progressive scanning mode To set the mode set PROGRESSIVE to ON in DISPLAY menu Refer to pages 14 15 for more details When PROGRESSIVE is ON video signals from the unit s VIDEO OUT jack will be distorted or not be output at all If your TV is not compatible with progressive scanning Use this unit in interlace mode and set PROGRESSIVE to OFF either in DISPLAY menu or by pressing and holding B P...

Page 7: ...l decoder for Dolby Digital audio output BITSTREAM Connecting to the other device an MD deck or DAT deck etc without Dolby Digital decoder PCM Connection Setting Digital audio input jack Rear Terminals 3 4 1 2 1 COMPONENT VIDEO OUT jacks Connect optional component video cable here through the Component Video In jacks on a television 2 VIDEO OUT jack Connect a yellow video cable here through the Vi...

Page 8: ...mber in program input To clear the numbers entered incorrectly To cancel the point for A B repeat DISPLAY To display the current disc mode To display the current disc mode REV FWD To search Forward Reverse through a disc To begin Slow Forward playback in the Pause mode To search Forward Reverse through a disc MENU To call up the Menu on a disc MODE To arrange the playing order or play randomly To ...

Page 9: ...PAUSE F during playback To continue playback press PLAY B PAUSE F is pressed in the pause mode To continue playback press PLAY B Notes Slow forward speed is different depending on the disc Approximate speed is 1 1 32x 2 1 16x 3 1 8x 4 1 4x and 5 1 2x Set STILL MODE to FIELD in DISPLAY menu if pictures in the slow playback mode are blurred Refer to pages 14 15 The reverse of slow playback is not av...

Page 10: ...the incorrect input at step 2 For DVD and Audio CD time search is not available for programmed or random playback Notes Depending on the disc being played back this function can also be performed by directly entering the desired chapter number with the Number buttons Refer to the manual accompanying the disc For DVD title chapter search is not available for programmed or random playback PLAY 1 2 3...

Page 11: ...er current chapter number total chapters TT Title current title number total titles remaining time of the current title current play mode setting elapsed time of the current title TR Track current track number total tracks 01 26 00 00 11 OFF 01 26 00 00 12 00 03 20 NORMAL 01 26 00 00 14 01 11 28 NORMAL elapsed time of the current track elapsed time of the current track current repeat setting remai...

Page 12: ...randomly During DVD random playback you can play back chapters in the current title randomly Some DVD will not allow you to set random playback Notes To erase all program at once select ALL CLEAR and press ENTER or press CLEAR at step 2 If the title chapter track number is incorrect the programmed number you entered will be skipped during programmed playback While a program is being played back ST...

Page 13: ...ter pressing SUBTITLE several times the disc may not have that language However some discs allow subtitle language setting on the disc menu Operation varies depending on the disc so refer to the manual along with the disc When appears on the TV screen it means no subtitle is recorded on the scene Some discs will only allow you to change the subtitle from the disc menu Refer to the manual accompany...

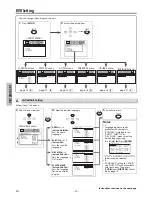
Page 14: ...Y DIGITAL ON OFF DISPLAY_TV ASPECT TV ASPECT STILL MODE PROGRESSIVE 4 3 LETTER BOX 4 3 PAN SCAN 16 9 WIDE LANGUAGE_AUDIO AUDIO SUBTITLE DISC MENU PLAYER MENU ORIGINAL ENGLISH FRENCH SPANISH GERMAN ITALIAN SWEDISH OTHERS You can change the Settings on the unit LANGUAGE menu AUDIO menu DISPLAY menu OTHERS menu LANGUAGE_AUDIO AUDIO SUBTITLE DISC MENU PLAYER MENU ORIGINAL ENGLISH FRENCH SPANISH GERMAN...

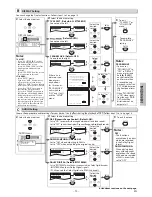
Page 15: ...TER ENTER ENTER ENTER ENTER ENTER 3 Select the desired item AUDIO_DRC DRC DOWN SAMPLING DOLBY DIGITAL ON OFF AUDIO menu Notes DRC This function is available only on discs which are recorded in the Dolby Digital format DOWN SAMPLING When playing back discs with copyright protection the sound will be down sampled at 48kHz even if you set to OFF 5 To exit the menu SETUP ENTER Notes TV ASPECT Select 4...

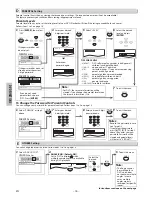
Page 16: ...N ANGLE ICON ON _ ENTER ENTER ENTER TIPS FOR LEVELS 8 ADULT DVD software of any grades adult general children can be played back 7 NC 17 no one under 17 admitted 6 R restricted under 17 requires accompanying parent or adult guardian 5 PGR parental guidance recommended 4 PG13 unsuitable for children under 13 3 PG parental guidance suggested 2 G general audience 1 KID SAFE suitable for children PARE...

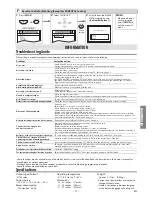
Page 17: ...ints scratches or dusts on its surface If unit moved from cold to warm temp then possible moisture inside unit can cause no playback Let unit set in warm area for 1 2 hours and try again Noreturntostart upscreenwhendiscisremoved Reset the unit by switching Off the unit then On again The unit does not respond to the remote control Aim the remote control directly at the sensor on the front panel Red...

Page 18: ...ítulo o tiempo Para buscar pistas o tiempo SETUP Para llamar el menú de ajustes de DVD Para llamar el menú de ajustes de DVD SKIP Para saltar capítulos o titulo Para saltar canciones STANDBY ON Para encender o para pasar la unidad al modo de espera Para apagar completamente la unidad debe desconectar el cable de alimentacion de CA Para encender o para pasar la unidad al modo de espera Para apagar ...

Page 19: ...ESSORIES EXCEPT REMOTE CONTROL ANY COSMETIC PARTS COMPLETE ASSEMBLY PARTS DEMO OR FLOOR MODELS FUNAI CORP AND ITS REPRESENTATIVES OR AGENTS SHALL IN NO EVENT BE LIABLE FOR ANY GENERAL INDIRECT OR CONSEQUENTIAL DAMAGES ARISING OUT OF OR OCCASIONED BY THE USE OF OR THE INABILITY TO USE THIS PRODUCT THIS WARRANTY IS MADE IN LIEU OF ALL OTHER WARRANTIES EXPRESS OR IMPLIED AND OF ALL OTHER LIABILITIES ...

Reviews: