background image

4

1.

Read these instructions.

2.

Keep these instructions.

3.

Heed all warnings.

4.

Follow all instructions.

5.

Do not use this apparatus near water.

6.

Clean only with dry cloth.

7.

Do not block any ventilation openings. Install in
accordance with the manufacturer´s instructions.

8.

Do not install near any heat sources 

such as

radiators, heat registers, stoves, or other apparatus
(including amplifiers) that produce heat.

9.

Do not defeat the safety 
purpose

of the polarized or

grounding-type plug. A polarized plug
has two blades with one wider than
the other. A grounding type plug has two blades and a third
grounding prong.The wide blade or the third prong are
provided for your safety. If the provided plug does not fit
into your outlet, consult an electrician for replacement of
the obsolete outlet.

10.

Protect the power cord 

from being walked on or

pinched, particularly at plugs, convenience receptacles, and
the point where they exit from the apparatus.

11.

Only use attachments/accessories 

specified by the

manufacturer.

12.

Use only with the cart,

stand, tripod,

bracket, or table specified by the manufacturer
or sold with the apparatus. When a cart is used,
use caution when moving the cart/apparatus
combination to avoid injury from tip-over.

13.

Unplug this apparatus

during lightning storms or when

unused for long periods of time.

14.

Refer all servicing

to qualified service personnel.

Servicing is required when the apparatus has been
damaged in any way, such as power-supply cord or plug is
damaged, liquid has been spilled or objects have fallen into
the apparatus, the apparatus has been exposed to rain or
moisture, does not operate normally, or has been dropped.

15.

Battery usage 

CAUTION

– To prevent battery

leakage which may result in bodily injury, property damage,
or damage to the unit:

Install 

all

batteries correctly,

+

and 

-

as marked on the unit.

Do not mix batteries (

old

and 

new

or 

carbon

and

alkaline

, etc.).

Remove batteries when the unit is not used for a long time.

IMPORTANT SAFETY INSTRUCTIONS

AC Polarized

Plug

I

MPORTANT

 S

AFETY

 I

NSTRUCTIONS

Class II equipment symbol

This symbol indicates that the unit has  

a double insulation system

16

This appliance shall not be exposed to dripping or
splashing water and that no object filled with liquid such
as vases shall be placed on the apparatus.

17

Power Lines

 – 

An outdoor antenna should be located

away from power lines.

18

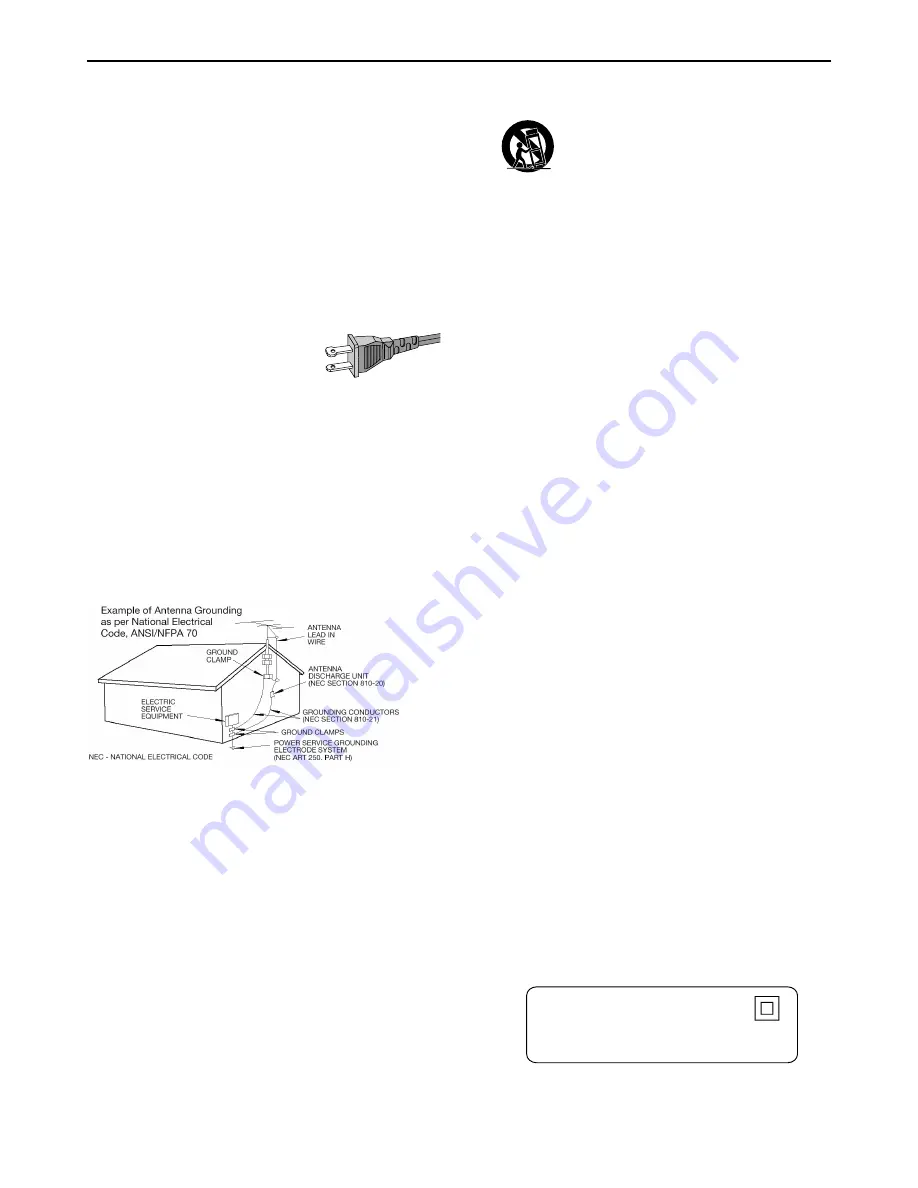
Outdoor Antenna  Grounding

 – 

If an outside antenna

is connected to the product, be sure that the antenna
system is grounded so as to provide some protection
against voltage surges and built up static charges.
Section 810 of the National Electrical Code, ANSI / NFPA
70 provides information with respect proper grounding
of the mast and suppor ting structure, grounding of the
lead-in wire to an antenna discharge unit, size of
grounding conductors, location of antenna-discharge
unit, connection to grounding electrodes, and
requirements for the grounding electrode.

19

WARNING:


To reduce the risk of fire or electric shock,

this apparatus should not be exposed to rain or moisture,
and objects filled with liquids, such as vases, should not be
placed on this apparatus.

NOTE TO CATV SYSTEM INSTALLER


:

THIS REMINDER IS PROVIDED TO CABLE GROUND
SHALL BE CONNECTED TO THE GROUNDING
SYSTEM OF THE BUILDING, AS CLOSE TO THE POINT
OF CABLE ENTRY AS PRACTICAL.”

Summary of Contents for MRD210

Page 1: ...ector A or B If your TV has this video input jack s A B Use this video cable s not supplied S VIDEO IN Component Video ANTENNA IN Do not switch the P SCAN to ON position unless you have connected the DVD system to a Progressive ScanTV using the Component Pr PbY video jacks When listening toTV programs press TV AV button on the remote to set the DVD system toTV AV mode in order for the sound to be ...

Page 2: ...he remote to select features Follow the instructions given in the disc menu 5 To stop playback press STOPÇ Region Codes DVDs must be labeled for ALL regions or Region 1 in order to play on this DVD system ALL 1 1 Press SYSTEM MENU button The icon will be highlighted in the menu bar on theTV screen 2 Press 4 button to select the Picture Setup Menu item 3 Press 2 button to enter the Menu 4 Press 4 b...

Page 3: ...ns about your new product We can guide you through Connections First time Setup or any of the Features We want you to start enjoying your new product right away CALL US BEFORE YOU CONSIDER RETURNING THE PRODUCT 1 800 705 2000 or Visit us on the web at www magnavox com S EE WHY INSIDE I M PORTAN T Return your Warranty Registration Card within 10 days MRD210 ...

Page 4: ...s your right to maximum protection under the terms and conditions of your Magnavox warranty Owner Confirmation Your completed Warranty Registration Card serves as verification of ownership in the event of product theft or loss Model Registration Returning your Warranty Registration Card right away guarantees you ll receive all the information and special offers which you qualify for as the owner o...

Page 5: ...3 English E s p a ñ o l English 6 Español 30 Index INDEX ...

Page 6: ...aratus the apparatus has been exposed to rain or moisture does not operate normally or has been dropped 15 Battery usage CAUTION To prevent battery leakage which may result in bodily injury property damage or damage to the unit Install all batteries correctly and as marked on the unit Do not mix batteries old and new or carbon and alkaline etc Remove batteries when the unit is not used for a long ...

Page 7: ...io noise emissions from digital apparatus as set out in the Radio Interference Regulations of the Canadian Department of Communications Laser Type Semiconductor laser GaAIAs Wave length 650nm Output Power 7mW Beam divergence 60 degree The set complies with the FCC Rules Part 15 and with 21 CFR 1040 1 Operation is subject to the following two conditions 1 This device may not cause harmful interfere...

Page 8: ...U LANG DEFAULTS Contents Disc Operations Playable discs 17 Region codes Basic playback 17 18 Skipping to another track chapter Fast Search within a track chapter Continue playback from the last stop point Repeat play Repeat A B Program favorite tracks 18 Using the display screen Using the menu bar Playing MP3 Picture disc Kodak JPEG 19 Special DVD VCD SVCD features 19 21 Changing subtitle language...

Page 9: ...akers including five speaker cables Passive subwoofer including the cable This instruction booklet and Quick Use Guide If any item is damaged or missing contact your retailer or Philips Environmental information All unnecessary packaging has been omitted We have tried to make the packaging easy to separate into three materials cardboard box polystyrene foam buffer and polyethylene bags protective ...

Page 10: ...CR or other radiation source to prevent unwanted interference Step 2 Connecting the speakers and passive subwoofer Connect the supplied speaker systems and passive subwoofer using the supplied speaker cables by matching the colors of the jacks and speaker cables Press up or down the speaker s jack and fully insert the stripped portion of the speaker cable into the jack then release Speakers Front ...

Page 11: ...AKERS P SCAN OFF ON VIDEO OUT S VIDEO OUT Pr Cr Pb Cb Y COMPONENT VIDEO OUT AUDIO IN R L VIDEO IN TO TV INT IN CH3 CH4 CONNECTIONS Connecting additional equipment IMPORTANT Some DVDs are copy protected You cannot record the disc through aVCR or digital recording device When making connections make sure the color of cables matches the color of jacks Always refer to the owner s manual of the other e...

Page 12: ...UME to adjust the master volume n to connect headphones 1 AM FM ANTENNA connect to the AM loop antenna or FM antenna 2 DIGITAL OUT OPTICAL connect to audio equipment with digital optical audio input 3 DIGITAL OUT COAXIAL connect to audio equipment with digital coaxial audio input 4 AUDIO IN TV AUX connect to the analog audio outputs of a TV or VCR 5 AUDIO OUT connect to the analog audio inputs of ...

Page 13: ...c 7 VOL to adjust the volume level 8 SURROUND to select multichannel surround Dolby Digital or Dolby ProLogic or stereo sound effect 9 SOUND to select the various sound effects CONCERT DRAMA ACTION SCI FI CLASSIC JAZZ ROCK or DIGITAL 0 REPEAT to repeat chapter track or disc REPEAT A B to repeat a specific section on a disc SUBW to adjust the subwoofer s level REAR to adjust the rear surround speak...

Page 14: ...ers and set up the system properly in order to enjoy the Digital Cinema experience at home refer to Connections Connecting the speakers and passive subwoofer You will have the feeling of being in the middle of the action because sound is coming from everywhere around you The subwoofer can enhance the bass performance of your system dramatically IMPORTANT Please sit at your usual listening position...

Page 15: ...ed 1 Press STANDBY ON to switch the system off 2 Slip the P SCAN switch located at back panel to ON position 3 Press STANDBY ON again to switch the system on Helpful Hints The progressive scan video quality is only possible through Pr Cr Pb CbY video output connection You need to switch the system off before changing the progressive scan mode System Setup DVD The system setup is carried out via th...

Page 16: ... Set theVideo Output according to your video connection This setting is not required if you are using theVIDEO OUT jack yellow to connect the DVD system to yourTV PR PBY SCART Select this if you have connected the DVD system to yourTV using the ComponentVideo Out Pr Cr Pb CbY jacks SCART not available for this version S VIDEO Select this if you have connected the DVD system to yourTV using S Video...

Page 17: ...automatically switch to the selected language whenever you load a DVD If the language selected is not available on the disc the original language designated by each disc will be selected Features Setup PARENTAL Enables setting of playback limitation level Some DVDs may have a parental level assigned to the complete disc or to certain scenes on the disc The rating levels are from 1 to 8 and are cou...

Page 18: ...e are also scenes rated at 6 not suitable for children To enable playback of a higher rated disc or scene than the level set Go to PARENTAL and enter the four digit code before resetting the rating level to a higher number If you forget the 4 digit code Press Ç four times when prompted for the password code and the system will change back to the default password 1234 PASSWORD To set a new password...

Page 19: ... tray and load a disc then press OPEN CLOSE 0 again to close the tray Make sure the label side is facing up For double sided discs load the side you want to play face up There will be a short delay while the player identifies the disc and reads the menu from the disc Some discs will start playing automatically and others will display the Disc Contents Menu on theTV screen If the menu is presented ...

Page 20: ...ge will now repeat continuously 3 To resume normal play press REPEAT A B again Helpful Hint The section A and B can be set only within the same chapter track Program favorite tracks You can play the contents of the disc in the order you want by programming the order of the tracks to be played Up to 99 tracks can be stored Helpful Hint Program DVD and MP3 CD is not possible Using the display screen...

Page 21: ...icture files Press ÉÅto pause resume playback If the MP3 CD menu is switched off You can only play the existing selected title by pressing É Åbutton While in playback mode press S T to select the previous next title The title number will appear DISC OPERATIONS Special DVD VCD SVCD features A number of operations can be carried out directly via the multiple menu bars on theTV screen without interru...

Page 22: ...sound will be muted during slow motion play The slow motion playback function is not possible on CD and MP3 CD Searching for a particular passage 1 Select or from the menu bar to select fast reverse search or fast foward search respectively 2 Press 4 key to select the required search speed reverse FR X2 FR X4 FR X6 FR X8 PLAY forward FF X2 FF X4 FF X6 FF X8 PLAY For VCD SVCD 2 Press 4 key to selec...

Page 23: ...ect from the menu bar and press 34 keys to select the desired angle 1 4 2 4 3 4 or 4 4 Playback changes to the selected angle Advancing by frames 1 Select from the menu bar and press 4 key to play the disc step by step one frame each step 2 To resume normal play press É Å Playback Control PBC VCD only PBC playback allows you to playVideo CDs interactively following the menu on the display Select i...

Page 24: ...store other radio stations Helpful Hints If you attempt to program more than 40 preset radio stations FULL is displayed During programming if no key is pressed within five seconds the system will exit the program mode automatically Listening to preset radio stations In tuner mode press 1 or 2 or use the numeric keypad 0 9 to select the desired preset number The preset number radio frequency and wa...

Page 25: ... Front left center and right join two surround speakers to reproduce high mid and bass frequencies in five full range channels of surround Bass rumble explosions and low frequency effects you feel are delivered through the subwoofer A large number of DVD discs have been recorded in Dolby Digital Surround Dolby Pro Logic Surround The Dolby Pro Logic Surround system is a specially encoded two channe...

Page 26: ...ositeVideo Output 1 0Vp p 75 Ω S Video Output Y 1 0Vp p 75 Ω C 0 286Vp p 75 Ω Audio DAC 24 Bits 96 kHz Frequency Response 4 Hz 20 kHz 44 1 kHz 4 Hz 22 kHz 48 kHz 4 Hz 44 kHz 96 kHz Digital Output SPDIF Coaxial Optical MISCELLANEOUS Power Supply Rating 120V 60 Hz Power Consumption 160 W Dimensions w x h x d 435 mm x 78 mm x 360 mm 17 1 x 3 1 x 14 2 inch Weight 7 1 kg 15 62 pounds IR REMOTE CONTROL ...

Page 27: ...nter or rear speakers Check that the center or rear surround speakers are connected correctly Use surround mode The DVD player does not start Insert a readable disc with the playback side facing down playback Check the disc type color system and regional code Check for any scratches or smudges on the disc Press SYSTEM MENU to turn off the setup menu screen Cancel the parental control rating functi...

Page 28: ...nnel DVD is specified to have each sound track constitute one sound field Multichannel refers to a structure of sound tracks having three or more channels Parental control A function of the DVD to limit playback of the disc by the age of the users according to the limitation level in each country The limitation varies from disc to disc when it is activated playback will be prohibited if the softwa...

Page 29: ...l or institutional pur poses WHERE IS EXCHANGE AVAILABLE You may exchange the product in all countries where the prod uct is officially distributed by Magnavox In countries where Magnavox does not distribute the product the local Magnavox service organization will attempt to provide a replacement product although there may be a delay if the appropriate prod uct is not readily available BEFORE REQU...

Reviews: