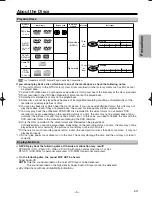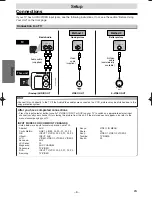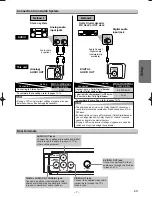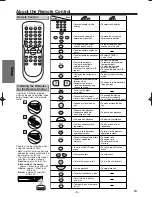
background image

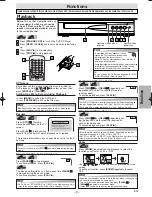
Paused and Step-by-Step Playback

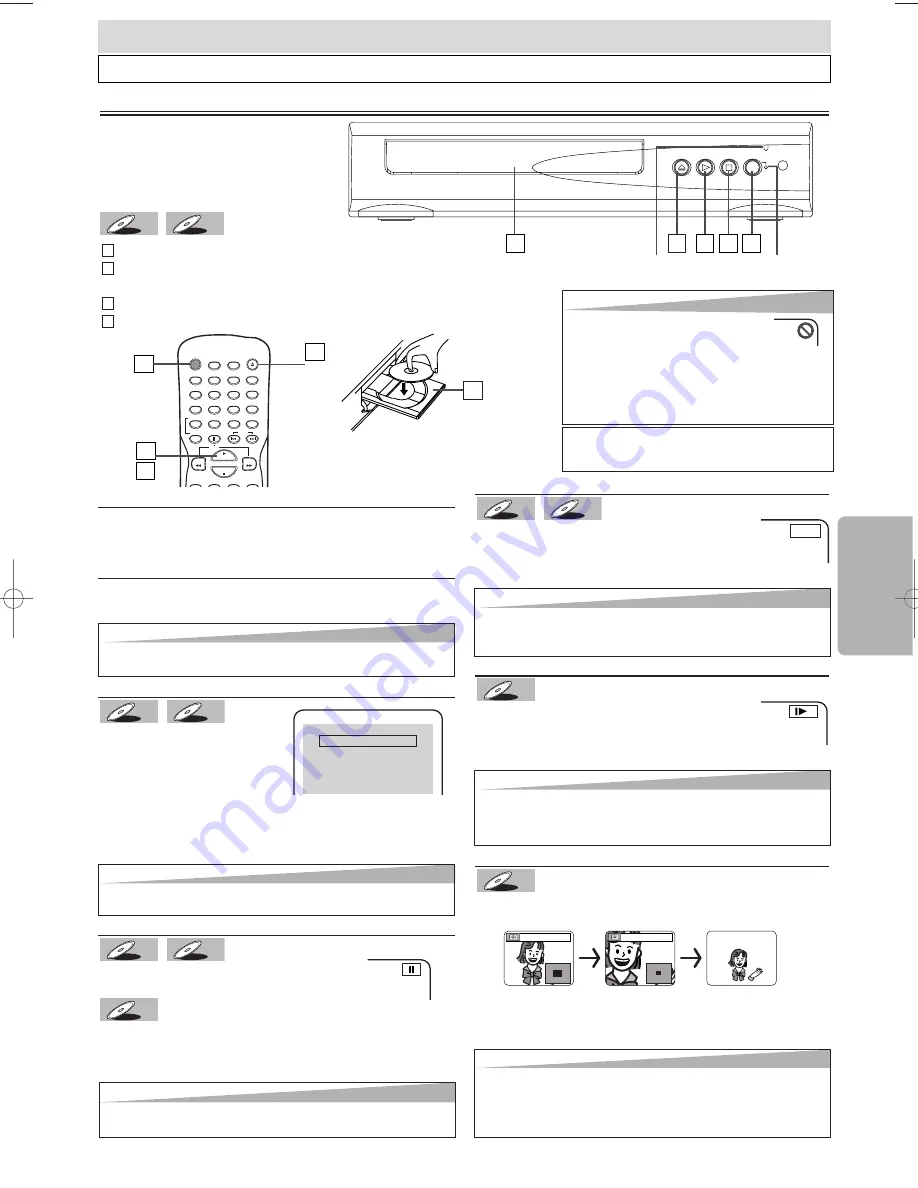
Press 

[PAUSE 

F

F

during playback.

To continue playback, press 

[PLAY 

B

]

.

The disc goes forward by one frame each time 

[PAUSE 

F

F

]

is pressed during the pause mode.
To continue playback, press 

[PLAY 

B

]

.

DVD-V

DVD-V

CD

CD

CD

DVD-V

DVD-V

Hint

Hint

• Slow forward or reverse speed is different depending on the disc.

Approximate speed is 1(1/16), 2(1/8) and 3(1/2).

• Set “STILL MODE” to “FIELD” in the Display menu if pictures in the

slow playback mode are blurred. (Refer to pages 14-15.)

– 9 –

EN

Functions

Fast Forward/Reverse Search

Press 

[FWD 

g

g

or

[REV 

h

h

repeatedly dur-

ing playback to select the required forward or
reverse speed.
To continue playback, press 

[PLAY 

B

]

.

Slow Forward/Slow Reverse

Press 

[FWD 

g

g

or

[REV 

h

h

repeatedly dur-

ing the pause mode to select the required for-
ward or reverse speed.
To continue playback, press 

[PLAY 

B

]

.

DVD-V

DVD-V

CD

CD

CD

DVD-V

DVD-V

Before: Turn on the TV, amplifier and any
other equipments which are connected
to this unit. Make sure the TV and audio
receiver (commercially available) are set

to the correct channel.

Functions

DVD menu

Some discs contain menus which allow you to customize
DVD playback. Use 

[

K

K

L

L

s

s

B

B

to select an item, then

press 

[ENTER]

(or 

[PLAY 

B

B

]

).

Calling Up a Menu Screen during Playback

Press 

[MENU] 

to call up the DVD menu.

Press 

[TOP MENU] 

to call up the title menu.

E


1

1

CD

CD

CD

DVD-V

DVD-V

Hint

Hint

• A “prohibited icon” may appear at the top-

right on the TV screen when the operation
is prohibited by the disc or this unit.

• Some DVDs may start playback from title 2 or 3

due to specific programs.

• During the playback of a two-layered disc, pictures may stop

for a moment. This happens while the 1st layer is being
switched to the 2nd layer. This is not a malfunction.

Operations described in this section are mainly based on the remote control use. Some operations can be carried out on main unit.

2

2

Playback

Hint

Hint

• On DVDs, set “STILL MODE” to “FIELD” in the Display menu if pic-

tures in the pause mode are blurred. (Refer to pages 14-15.)

IR
SENSOR

DISC IN

STANDBY-ON

STOP

OPEN/CLOSE

PLAY

y

2

2

3

3

4

4

1

1

2

2

TIP:

You can change the On-Screen language in “PLAY-
ER MENU” setting. (Refer to page 14.)

Hint

Hint

• Menu operations may vary depending on the disc. Refer to the

manual accompanying the disc for more details.

Resume

Press 

[STOP 

C

C

]

. Resume

message will appear on the TV
screen.

Press 

[PLAY 

B

B

]

, playback will

resume from the point at which playback was stopped.

The resume information stays on even when unit is in stand-
by mode.

CD

CD

CD

DVD-V

DVD-V

Press 'PLAY' to play from here.
To play the beginning, 
press 'STOP' first and then 'PLAY'.

Resume ON

Hint

Hint

• To cancel resume, press 

[STOP 

C

C

]

one more time during the stop

mode.

Zoom

Press 

[ZOOM]

repeatedly during playback to select the

required zoom factor: x2, x4 or OFF.

Use 

[

K

K

L

L

s

s

B

B

]

to slide the zoomed picture across the

screen.
To exit zoom function, press 

[ZOOM]

repeatedly to select

OFF.

DVD-V

DVD-V

x2

x4

Hint

Hint

• For DVDs, fast forward or reverse search speed is different depending on

the disc. Approximate speed is 1(x2), 2(x8), 3(x20), 4(x50) and 5(x100).

• For Audio CDs, approximate speed is 1(x2), 2(x8) and 3(x30).

Lights up when
power is on.

Hint

Hint

• Zooming function does not work while the disc menu is showing up.
• x4 zoom is not available on some discs.
• The picture may be distorted when you press 

[PAUSE

k

k

]

or 

[REV 

h

h

repeatedly in the zoom mode.

• It may take several seconds to slide the zoomed picture.

Lights up when a disc is
inserted.

Press 

[STANDBY-ON]

to turn on the DVD/CD Player.

Press 

[OPEN / CLOSE]

and insert a disc with label facing

up.
Press 

[PLAY 

B

]

to start playback.

Press 

[STOP 

C

]

to stop playback.

4

4

3

3

2

2

1

1

STANDBY–ON

AUDIO

SUBTITLE

ANGLE

REPEAT

CLEAR

A-B

PAUSE

SETUP

TOP MENU

MENU

SLOW

SKIP

OPEN/CLOSE

DISPLAY

SEARCH

MODE

1

2

3

4

5

6

7

8

9

0

+10

PLAY

REV

FWD

STOP

1

1

3

3

4

4

2

2

E6151UD_ENSP.qx33  05.8.9  11:56 AM  Page 9

Summary of Contents for MSD115

Page 1: ...set to the Default Setting except for PARENTAL Setting 17 Information Troubleshooting Guide 17 Specifications 18 Language Code List 18 Limited Warranty 18 Español 19 Quick Use Guide Back Cover Table of Contents Before Using Your Unit If your TV has AUDIO VIDEO input jacks see the section Connections on page 6 If not it is still possible to connect this unit to your TV by using a STEREO AUDIO VIDEO...

Page 2: ...G This equipment may generate or use radio frequency energy Changes or modifications to this equipment may cause harmful interference unless the modifications are expressly approved in the man ual The user could lose the authority to operate this equipment if an unauthorized change or modification is made CAUTION TO PREVENT ELECTRIC SHOCK MATCH WIDE BLADE OF PLUG TO WIDE SLOT FULLY INSERT ATTENTIO...

Page 3: ...e of the polarized plug 13 Power Cord Protection Power supply cords should be routed so that they are not likely to be walked on or pinched by items placed upon or against them paying particular attention to cords at plugs convenience receptacles and the point where they exit from the product 14 Lightning For added protection for this product during a lightning storm or when it is left unattended ...

Page 4: ...may occur inside the unit when it is moved from a cold place to a warm place or after heating a cold room or under conditions of high humidity Do not use this unit at least for 2 hours until its inside gets dry Installation Location About Copyright Symbols Used in This Manual Manufactured under license from Dolby Laboratories Dolby and the double D symbol are trade marks of Dolby Laboratories SERV...

Page 5: ...inalized can be played back Unfinalized discs cannot be played back Depending on the recording status of a disc the disc may not be played back at all or normally the picture or sound may not be smooth etc 9 If there is too much recording space left on a disc the used portion is less than 55 mm across it may not playback properly 10 Do not glue paper or put stickers on to the disc These may damage...

Page 6: ...nected to a VCR pictures may be distorted due to the copy protection system After you have completed connections Press the input selector button usually TV VIDEO INPUT or AUX on your TV to switch an appropriate external input channel usually near channel 0 for viewing the picture from this unit If the picture does not appear also refer to the manual accompanying your TV INPUT MODES FOR COMMON TV B...

Page 7: ...lby Digital decoder To complete these settings refer to pages 14 15 Hint Hint The audio source on a disc in a Dolby Digital 5 1 channel sur round format cannot be recorded as digital sound by an MD or DAT deck By hooking this unit up to a Multi channel Dolby Digital decoder you can enjoy high quality Dolby Digital 5 1 channel surround sound as heard in the movie theaters Playing a DVD using incorr...

Page 8: ...egin slow forward reverse playback during the pause mode To search forward backward through a disc To advance playback one frame at a time To pause disc playback To pause disc playback To stop playback To stop playback To turn the unit on or off To turn the unit on or off To begin disc playback To begin disc playback To skip chapters To skip tracks To move the cursor and determine its position To ...

Page 9: ... control use Some operations can be carried out on main unit 2 2 Playback Hint Hint On DVDs set STILL MODE to FIELD in the Display menu if pic tures in the pause mode are blurred Refer to pages 14 15 IR SENSOR DISC IN STANDBY ON STOP OPEN CLOSE PLAY y 2 2 3 3 4 4 1 1 2 2 TIP You can change the On Screen language in PLAY ER MENU setting Refer to page 14 Hint Hint Menu operations may vary depending ...

Page 10: ...6 0 00 00 0 03 30 1 3 0 00 00 1 23 45 T L1 BIT RATE The amount of audio and video data currently being read ALL Current track number Total tracks Elapsed time of the current chapter Remaining time of the current chapter Elapsed time of the current title Remaining time of the current title Layer numbers appears only when playing a two layered Disc L0 Layer 0 is playing L1 Layer 1 is playing Elapsed...

Page 11: ... Press once for the chapter search Press twice for the title search 1 2 3 4 5 6 7 8 9 0 10 SEARCH MODE SEARCH MODE 1 1 PLAY TR 1 TR 2 TR 3 TR 4 Current Track TR SKIP SKIP Using SKIP Using SKIP H H H H G G G G CH 1 CH 2 CH 3 CH 4 Current Chapter CH or SKIP TT 1 TT2 TT3 TT4 Current Title TT SKIP SKIP SKIP Using SKIP Using SKIP H H H H G G G G SKIP SKIP Hint Hint When there is no need to enter a numb...

Page 12: ...e current track in the random selections press REPEAT repeatedly until TRACK appears during playback To repeat the entire random selections press REPEAT repeatedly until ALL appears during playback Hint Hint Press CLEAR at step 2 to erase the most recently entered track To erase all programmed tracks at once select ALL CLEAR and press ENTER at step 2 While a program is being played back STOP C C w...

Page 13: ... ANGLE ON OFF Black Level Setting Adjust the Black Level Setting to make the dark areas of the TV picture brighter DVD V DVD V Virtual Surround You can enjoy stereophonic virtual world on your existing 2 channel stereo system CD CD CD DVD V DVD V 2 2 OFF ON Makes the dark areas brighter OFF Shows the original picture as recorded 3 3 RETURN SUBTITLE 2 2 1 1 Natural effect 2 Emphasized effect OFF No...

Page 14: ...ON ON SETUP AUDIO DRC DOWN SAMPLING DOLBY DIGITAL ON ON BITSTREAM SETUP DISPLAY TV ASPECT STILL MODE 4 3 LETTER BOX AUTO SETUP LANGUAGE AUDIO SUBTITLE DISC MENU PLAYER MENU ORIGINAL OFF ENGLISH ENGLISH Select the desired item 1 1 SETUP QUICK CUSTOM INITIALIZE SETUP STOP SETUP QUICK PLAYER MENU TV ASPECT DOLBY DIGITAL ENGLISH 4 3 LETTER BOX BITSTREAM Q QUICK SETUP Men UICK SETUP Menu u Refer to the...

Page 15: ...TILL MODE Default AUTO See Hint to the right TV ASPECT 4 3 LETTERBOX STILL MODE AUTO STILL MODE AUTO FIELD FRAME Select the desired setting or 5 5 6 6 To exit the menu SETUP SETUP DRC Dynamic Range Control Default ON Set to ON to compress the range between soft and loud sounds DOLBY DIGITAL Default BITSTREAM Set to BITSTREAM when the unit is connected to a Dolby Digital receiver BITSTREAM Outputs ...

Page 16: ...nt password Enter your desired four digit password except for 4737 or SETUP PARENTAL PASSWORD Please enter a 4 digit password PARENTAL menu 5 5 OTHERS Setting You can change the other functions Follow steps 1 to 3 in the CUSTOM Menu section on page 14 4 4 Select the desired item E OTHERS menu 6 6 To exit the menu ANGLE ICON Default ON Set to ON to show the angle icon when multiple camera angles ar...

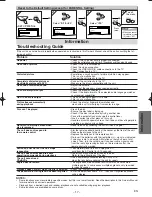
Page 17: ...ries in the remote control Re insert the batteries with their polarities signs as indicated Tune your radio to an empty AM station so that you hear a lot of noises Then turn the volume up If you hear some signal sound from the radio by pressing buttons on the remote control the remote control is working Buttons do not work or the unit stops To completely reset the unit unplug the AC responding cor...

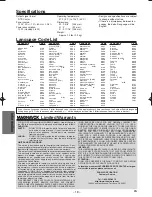
Page 18: ... of charge in the USA in the event of defect in materials or workmanship as follows DURATION PARTS FUNAI CORP will provide parts to replace defective parts without charge for one 1 year from the date of original retail purchase Certain parts are excluded from this warranty LABOR FUNAI CORP will provide the labor without charge for a period of ninety 90 days from the date of original retail purchas...

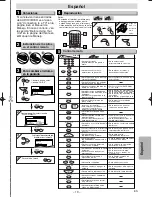
Page 19: ...ente un capítulo o título Para reproducir repetidamente una canción o disco Para activar desactivar el nivel del negro Para disponer el orden de reproducción o la reproducción aleatoria Para llamar el Menú en un disco Para llamar el menú inicial en un disco Para ampliar la imagen de vídeo en DVD x2 x4 Para activar desactivar el ambiental virtual Para activar desactivar el ambiental virtual Para vo...

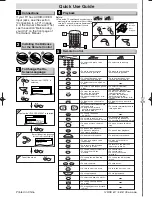
Page 20: ...time To set or search the markers To set black level on off To set virtual surround on off To arrange the playing order or play randomly To set virtual surround on off To call up the Menu on a disc To call up the Top Menu on a disc To magnify part of a picture x2 x4 To search chapter title or time To set or search the markers To call up the DVD setup menu To clear the markers To cancel the point f...

Reviews: