– 6 –
EN
Setup
AUDIO OUT
COAXIAL
VIDEO
OUT
CB/PB
CR/PR
R
L
Y
DIGITAL
AUDIO OUT
COMPONENT
VIDEO OUT
S-VIDEO
OUT
AUDIO OUT
COAXIAL
R
L
DIGITAL
AUDIO OUT
R
L
AUDIO IN
VIDEO IN
VIDEO
OUT
C
R
/P
R
COMPONENT
VIDEO OUT
S-VIDEO IN
C
B
/P
B
S-VIDEO
OUT
C
R
C
B
Y
COMPONENT
VIDEO IN
VIDEO
OUT
C
B
/P
B
C
R
/P
R
Y
COMPONENT
VIDEO OUT
(Analog) AUDIO OUT
VIDEO OUT
TV
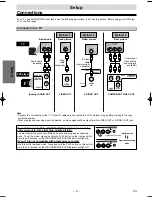
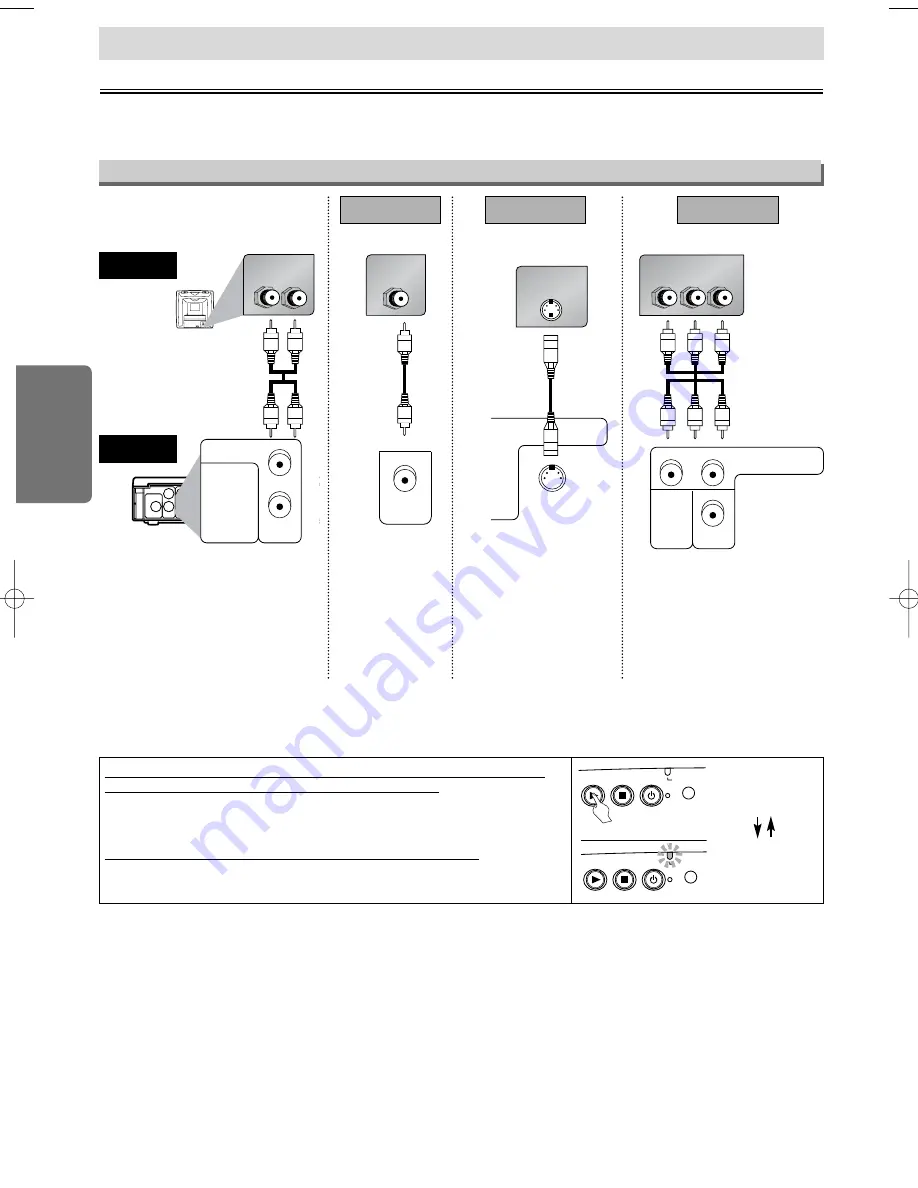
Method 1
Good picture
Basic Audio
Method 2
Method 3
Better picture
Best picture
S-VIDEO OUT
COMPONENT VIDEO OUT
Video
cable
(supplied)
Audio cable
(supplied)
S-Video
cable
(commercially
available)
Component
Video cables
(commercially
available)
Note
• Connect this unit directly to the TV. If the A/V cables are connected to a VCR, pictures may be distorted due to the copy
protection system.
• When progressive scanning mode is selected, no video signal will be output from the VIDEO OUT or S-VIDEO OUT jack.
DVD player
Connection to a TV
Connections
If your TV has AUDIO/VIDEO input jacks, see the following instructions. If not, see the section “Before using your DVD play-
er” on the front page.
Setup
If your TV is compatible with 525p (480p) progressive scanning
and you want to enjoy that high quality picture;
You must select the connection Method 3 above and progressive scanning
mode. To set the mode, press and hold the PLAY button on the front panel for
more than 5 seconds, so that PROGRESSIVE SCAN indicator will light up.
If your TV is not compatible with progressive scanning;
Use this unit in interlace mode. Press and hold the PLAY button on this unit for
more than 5 seconds, so that PROGRESSIVE SCAN indicator will light off.
PLAY
STOP
POWER
PROGRESSIVE
PLAY
STOP
POWER
PROGRESSIVE
Interlace mode
Progressive scanning
mode
more than 5 seconds
E5950UD_V3.qx33 05.4.19 5:24 PM Page 6

