(E)
13
MG10-P1 / MG10-P2
4-2. Details of Functions
For details on the settings and inputs, refer to chapters 5 and 6.
4-2-1. Peak-hold
The MG10 holds the peak values at all times.
The peak values are checked by switching between the measuring
modes.
The start function makes it possible to restart measurement from
an optional position.
4-2-2. Preset
When the reference point is not used (factory setting)
When the preset value recall input is supplied, the preset value which
has been set is set to the current value.
When the reference point is used
In this case, the function uses the master preset value (refer to the
reference point specifications). When the master value is supplied
as the preset value input after the reference point has been loaded
for the first time, the distance from the master value (preset value)
to the reference point is calculated, and the reference point offset
value is generated internally and stored.
After the reference point has been loaded for the second and
subsequent times, the reference point offset value is automatically
loaded, which means that the preset value need not be input for the
second and subsequent times.
4-2-3. Reference Point
When the reference point is not used (factory setting)
After the power is turned on, the measuring mode is established
automatically.
(Incremental operation)
When the reference point is used
After the power is turned on, the unit automatically enters the
reference point signal input wait status, and then automatically enters
the measuring mode when the reference point is passed.
This can be used only when using a measurement unit with a
reference point.
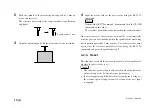
[How to set the reference point (For DK series)]
1
Turn on the power.
The reference point lamp of the counter module starts flashing.
Summary of Contents for MG10-P1
Page 3: ...J 1 MG10 P1 MG10 P2...
Page 4: ...2 J MG10 P1 MG10 P2 DC AC...
Page 6: ...MG10 P1 MG10 P2 ii J Microsoft Windows Windows 7 35 8 36 8 1 36 8 2 37 8 3 37 9 38...
Page 9: ...MG10 P1 MG10 P2 J 3 1 3 BCD DG DT DL DK PLC 16 RS 232C...
Page 10: ...MG10 P1 MG10 P2 4 J 2 6 7 4 5 8 2 9 10 11 12 13 14 1 3...
Page 12: ...MG10 P1 MG10 P2 6 J 3 3 1 16 1 2...
Page 13: ...MG10 P1 MG10 P2 J 7 3 4 2 3 1 1 4 3 2 I F I F 1 1...
Page 14: ...MG10 P1 MG10 P2 8 J 2 I F I F 3 1 3...
Page 15: ...MG10 P1 MG10 P2 J 9 2 DIN DIN DIN 3 3 DIN DIN DIN 35 mm 1 DIN...
Page 16: ...MG10 P1 MG10 P2 10 J 3 5 1 3 I O 3 GND 2 Vin DC 12 V 24 V 1 FG 2 3 3 4 1...
Page 17: ...MG10 P1 MG10 P2 J 11 3 6 1 LZ61 CE08 RS 232C I F 3 7 1 RS 232C DZ252 RS 232C...
Page 19: ...MG10 P1 MG10 P2 J 13 4 2 3 DK 1 1 mm 2 1 mm 3...
Page 20: ...MG10 P1 MG10 P2 14 J 4 2 5 P P 4 RS 232C SETUP P CLOSE 1 mm RS 232C 1 4 2 4 0...
Page 21: ...MG10 P1 MG10 P2 J 15 4 2 6 RS 232C MG30 B BCD 4 RS 232 NG U GO G GO G GO G NG L...
Page 22: ...MG10 P1 MG10 P2 16 J ON P P OFF 4 2 7...
Page 24: ...MG10 P1 MG10 P2 18 J 5 2 5 2 1 1 0 F...
Page 28: ...MG10 P1 MG10 P2 22 J 7 ASCII ASCII ASCII OK 8 R...
Page 32: ...MG10 P1 MG10 P2 26 J 6 RS 232C I O I F I F I F 4 2 3 OFF RS 232C I O...
Page 40: ...MG10 P1 MG10 P2 34 J 6 2 3 RS 232C MIN 25 ms MIN 1 ms RS RS MIN 2 ms MAX 2 ms MIN 2 ms...
Page 44: ...MG10 P1 MG10 P2 38 J q 12 V 24 V w RS 232C MG10 MG10 e MG10 9 r MG10 t...
Page 52: ...4 E MG10 P1 MG10 P2 6 7 4 5 8 2 9 10 11 12 13 14 1 3 2 Name and Function of Each Part...
Page 94: ...4 G MG10 P1 MG10 P2 6 7 4 5 8 2 9 10 11 12 13 14 1 3 2 Teilebezeichnungen und Funktionen...


