7
CALIBRA
TION (cont.)
CALIBRATION PROCEDURE B
1.
Set the material level in the vessel to L1, some point
above 0%. Record the L1 level in mm, cm, inches, feet
or percent of span.
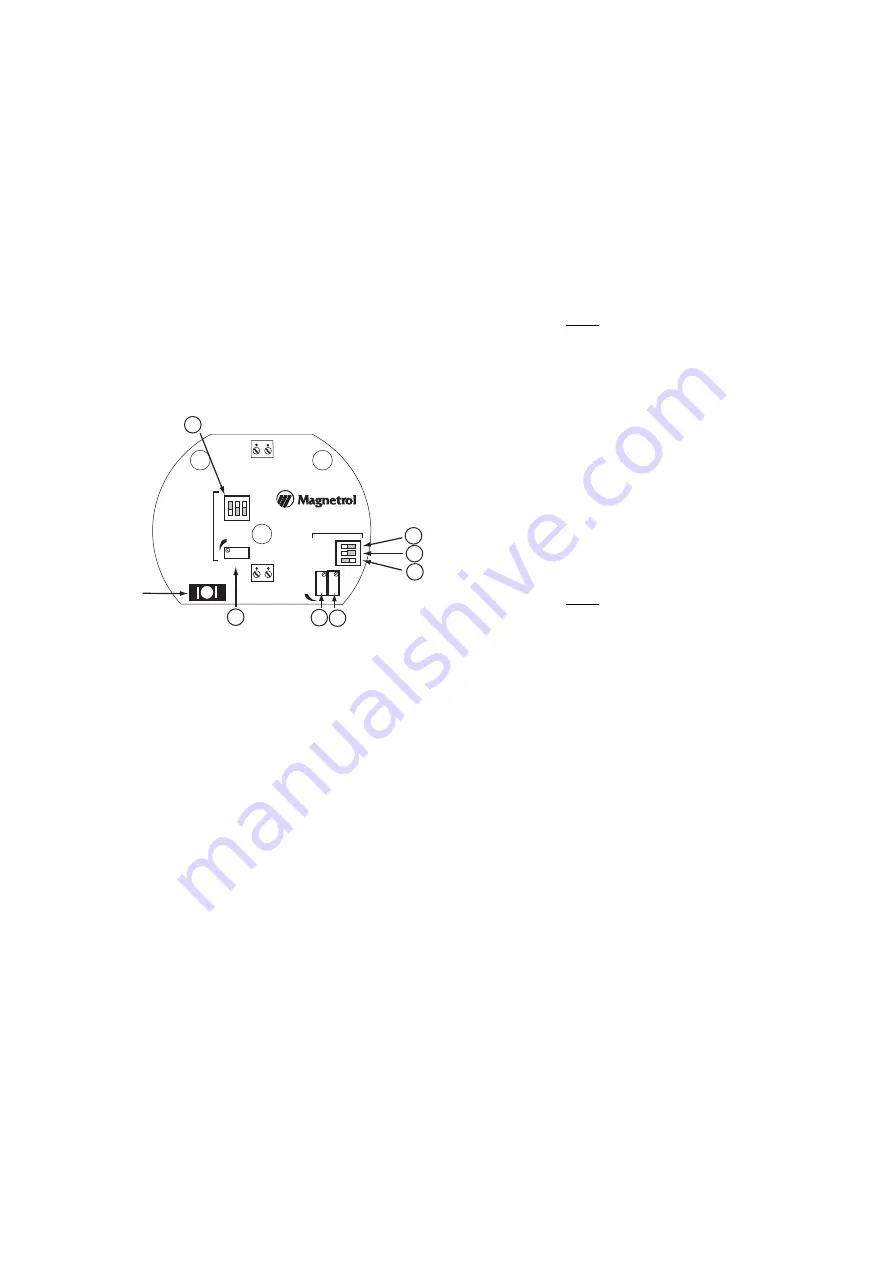
2. Turn the coarse zero
➀
, zero fi
ne
➁
and the fi
ne span
➂
calibration controls clockwise (CW) twenty full turns or
until ratcheting is heard. Set all the coarse span DIP
switches in their OPEN (down) position
➃
.
Ensure that the ZERO dip switches 2 and 3 are in open
position and ZERO dip switch 1 is in closed position
➄
.
See
Figure 9
.
3. To determine the correct output level at this point, use
the following formula:
L
1
mA
=
(
(
L
1 -
L
0
)
x 16) + 4
(
L
3 -
L
0)
4. Turn the Zero Coarse potentiometer counterclockwise
until the loop output is between L1
mA
and L1
mA
+
0.5 mA.
5. If the loop current output cannot be decreased to at least
L1
mA
+ 0.5 mA, turn the Zero Coarse potentiometer fully
clockwise, close Zero Coarse DIP switch positions
“Med” and “High” sequentially (ONLY ONE SWITCH
POSITION SHOULD BE CLOSED AT A TIME—THE
OTHER TWO POSITIONS MUST REMAIN OPEN).
Repeat Step 4.
6. Turn potentiometer Zero Fine counterclockwise until the
loop output reads exactly L1
mA
.
7. Move the media level in the vessel to the highest level
you can set.
8. To determine the correct output level at this point, use
the following formula:
L
2
mA
=
(
(
L
2 -
L
0
)
x 16) + 4
(
L
3 -
L
0)
9. In sequence, individually close Span Coarse DIP switch-
es “Low”, “Med”, and “High”, until the loop current is as
close to (and not less than), L2
mA
. (ONLY ONE SWITCH
POSITION SHOULD BE CLOSED AT A TIME—THE
OTHER TWO POSITIONS MUST REMAIN OPEN).
10. Turn the Span Fine potentiometer counterclockwise until
the loop current is exactly L2
mA.
Calibration is now complete.
CALIBRA
TION PROCEDURE A
1.
Move the material in the vessel to its L0 (0%) level.
2. Turn the zero coarse
➀
, zero fi
ne
➁
and the fi
ne span
➂
calibration controls clockwise (CW) twenty full turns or
until ratcheting is heard. Set all the coarse span DIP
switches in their OPEN (down) position
➃
.
Ensure that the ZERO dip switches 2 and 3 are in open
position and ZERO dip switch 1 is in closed position
➄
.
3. Turn the coarse zero control
➀
CCW until the meter
reads close to 4 mA without going under.
4. If the loop current can not be decreased to at least
4.50 mA, turn the Zero Coarse potentiometer fully clock-
wise, close DIP switch positions “Med” and “High”
sequentially (ONLY ONE SWITCH POSITION SHOULD
BE CLOSED AT A TIME – THE OTHER TWO POSI-
TIONS MUST REMAIN OPEN). Repeat Step 3.
5. Turn potentiometer Zero Fine
➁
counterclockwise until
the loop output reads exactly 4.00 mA.
6. Fill the vessel to the desired L3 (100%) level. Ensure
that the SPAN DIP switches are still in open position.
NOTE:
The loop current may not rise in proportion to the
rising material level in the vessel. Instead, the loop current
may rise rapidly ahead of the material level.
7. After the vessel has been filled to L3 (100%), in
sequence, individually move SPAN COARSE
➃
DIP
switches 1, 2 and 3 to the CLOSED (up) position until
the current output is as close to 20 mA as possible with-
out going under. Only one DIP switch should be
CLOSED at any time - the others are to remain OPEN
(down).
8. Turn the span fine
➂
calibration control CCW until the
meter reads exactly 20 mA. Calibration is now complete.
+ –
POWER
30-9012-001
+ –
PROBE
COARSE
1 2 3
– OPEN –
1 2 3
– OPEN –
5a
5b
5c
4
3
1
2
SPAN
FINE
COARSE
HIGH
MED
LOW
L
O
W
M
E
D
H
I
G
H
FINE
ZERO
Figure 9
4-20 mA
test points


