50-605 Kotron RF Point Model 80/81 Level Switches
14
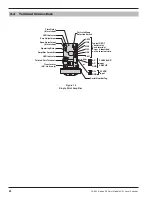
4. Turn the zero adjustment counterclockwise until the LED
indicator goes off (the relay will change state), then turn
the control slowly in the clockwise direction until the indi-
cator again comes on. Repeat this on-off operation several
times and
leave the LED indicator OFF
. This completes
the zero calibration of the wide differential point.
Prior to increasing the level of material in the tank to the
span point,
turn the span control twenty full turns CCW
.
THE LED CALIBRATION INDICATOR WILL
REMAIN OFF.
6. Raise the level of the material in the vessel to the desired
high level set point.
7. Slowly rotate the span adjustment in a CW direction until
the LED calibration indicator turns ON. The relay will
change state and the wide differential span is now
calibrated. Do not change setting after LED is ON.
NOTE: A second span adjustment check can be made by moving the
span adjustment two (2) turns CCW, then removing the probe
(P) wire momentarily to break the contact. With the probe
reconnected, slowly turn the span adjustment screw in CW
direction until the LED calibration indicator again comes ON.
2.8.6 Time Delay Adjustment
2.8.6.1 Narrow Differential Only
Narrow differential amplifiers are equipped with an
adjustable (0 to 3 sec) time delay. With the time delay
calibration fully CCW, the delay is at minimum and in
the fully CW position, it is at maximum. On standard
units, the delay is effective on rising level, i.e., as the
material level goes above the set point, a time delay will
occur between the LED indicator coming ON and the
relay operating and will eliminate contact chatter in
agitated fluids.


