© 2016 Sensata Technologies
3
Installation
2.0 Installation
2.1 Pre-Installation
Carefully remove the MagWeb GT from its shipping container and
inspect all contents. Verify the following items are included:
• MagWeb GT
• MagWeb GT Owner’s Manual
• Power cable (115 VAC) • CAT5 Network cable (RJ45)
Make sure you have access to the following before attempting to
install the MagWeb GT:
• A dedicated standard AC electrical outlet.
• An available broadband Internet connection.
• A broadband router with a CAT5 Ethernet, or wireless router.
• A pre-programmed MagWeb GT unit.
2.2
Selecting a Location to Install the MagWeb GT
Find a location that is located as electrically close to the solar sub-
panel as possible on a dedicated circuit—this enhances the Power
Line Communications (PLC) signal.
Note: Locating the MagWeb GT at or very near the solar sub-panel
may not be the most convenient location, but it ensures a clean PLC
signal and a stable data stream.
The MagWeb GT is NOT rated for outdoor use, so if installing outdoors
near a junction box or breaker panel make sure that you enclose it
in an appropriate weatherproof NEMA electrical box (PN: MP-ODE).
2.2.1 Using an Electrical Mounting DIN Rail
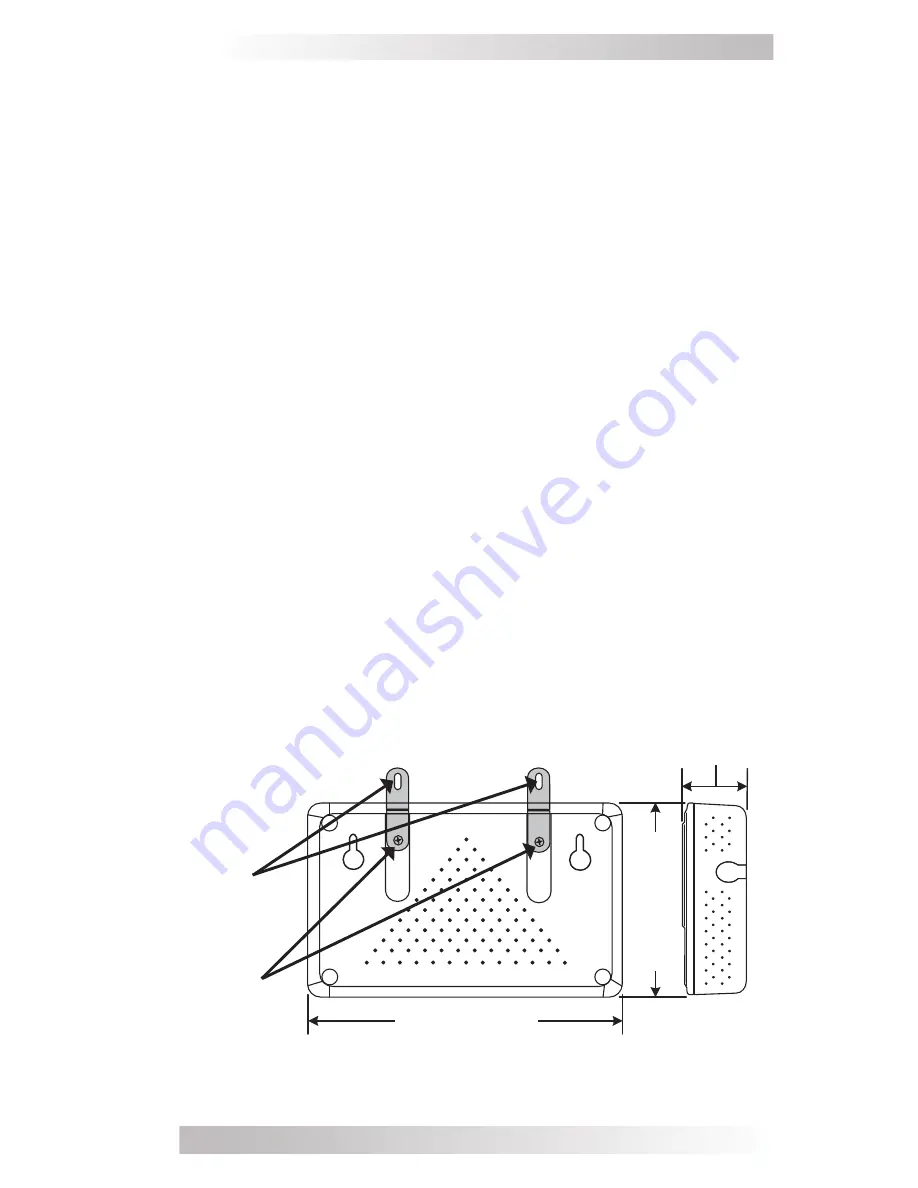
1. Loosen the two M3 mounting screws on the back of the MagWeb
GT, and then rotate the two rail holders so that the holders are
above the unit (Figure 3).
Holders
M3 Screws
1.6”
(42 mm)
Figure 3, MagWeb Mounting Screws and DIN Rail Holders
4.4” (113 mm)
7.2” (182 mm)
Summary of Contents for MagWeb GT
Page 1: ...Owner s Manual MagWeb GT ...


