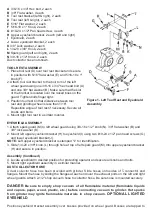
3. Note the orlginal bevel angle on the item to be sharpened and try to maintain that angle.
Sharpening a cutting edge requires removing burrs from edge.
4. Deburring edge is done best by using the grinder to pull burr from edge across the bevel angle.
5. The grinding wheel should rotate into object being sharpened.
6. Dip work into a coolant regularly to prevent overheating. Overheating can weaken metals.
Maintenance
1. As wheels wear, tool rests should be positioned closer to the face of the wheels.
2. The gap between the wheel and the tool rest should not be greater than 1/16". When the wheels
are worn to the extent that the 1/16" maximum gap cannot be maintalned, the wheels should
beaced.
3. Models MI-15300 and MI-15350 : acement wheels should have a minimum rated speed of at least
3600 RPM. Model MI-15450 : acement wheels must have a minimum rated speed of 1800 RPM.
4. Maximum wheel diameter is 8" for MI-15300 / MI-15350. and 10“ for MI-15450.
Troubleshooting Chart
Symptom
Possible Cause(s)
Corrective Action
Grinder won’t start
1. Blown line fuse or tripped circuit breaker
2. Low line voltage
3. Material wedged between wheel and guard
4. Defective switch
5. Defective, blown capacitor
1. If fuse is blown, ace with fuse of
proper size. If breaker tripped, reset it
2. Check power supply for voltage and
correct as needed
3. Turn grinder off and remove material
4. Replace switch
5. Replace capacitor
Excessive vibration
1. Improper mounting of grinder or accessories
2. Grinding wheel out of balance
3. Improper wheel mounting
1. Remount
2. Dress wheels or replace wheels
3. Remount wheels, but rotate one wheel
90° with respect to its previous
position. Other wheel should remain in
its original position
Motor overheating
1. Excess pressure required to grind material
2. Grinding on side of wheel
3. Motor not turning freely
(without power)
1. Dress wheel or replace wheel with one
of proper grit
2. Grind only on face of wheel
3. Clean around wheels and shaft and/or
replace bearings
Fuses are being or circuit
breakers are being tripped
1. Overloading due to binding
2. Defective plug
3. Defective cord
4. Defective switch
5. Motor wired for different line voltage
6. Faulty internal wiring
1. Clean around wheels and shaft and/or
replace bearings
2. Replace plug
3. Replace cord
4. Replace switch
5. Rewire motors as per line voltage
(See Electrical Connections, page 4)
6. Contact authorized MAGNUM Service
Center
Summary of Contents for MI-15300
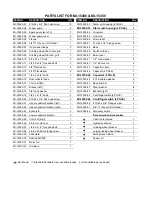
Page 8: ...PARTS LIST FOR MI 15300 MI 15350...
Page 10: ...PARTS LIST FOR MI 15450...


