11
BASIC CONTROLS
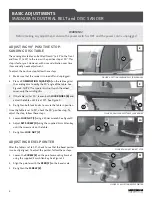
MAGNUM INDUSTRIA
L
BELT and DISC SANDER
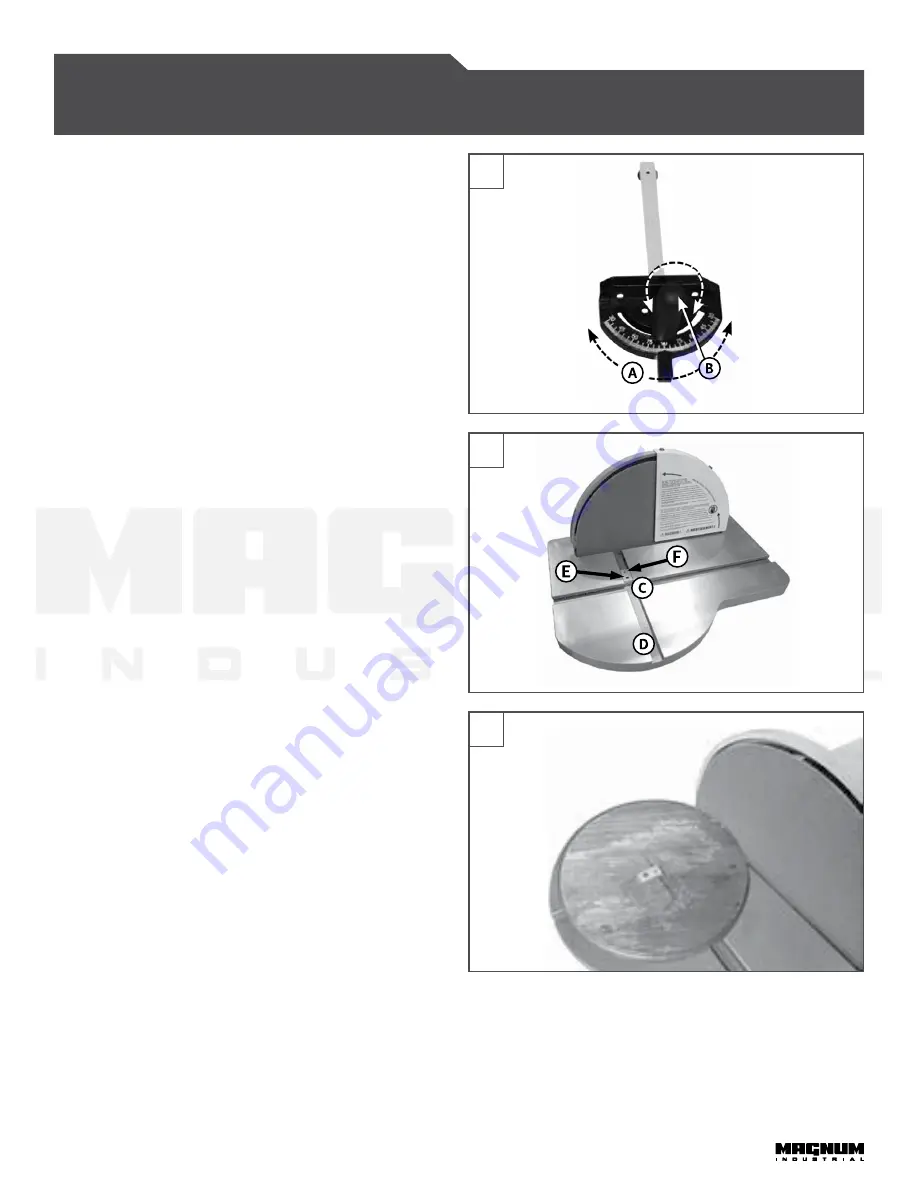
MITRE GAUGE
The mitre gauge provides support when sanding straight (90°)
or angled ends (0° to 30°), making sanding safer and easier.
Both tables have slots for the mitre gauge.
To set the mitre gauge to an angle other than 90°, loosen
the
HANDLE (B)
by turning it counter-clockwise. Rotate the
MITRE HEAD (A)
to your desired angle as indicated on the
scale. Then tighten the
HANDLE (B)
by turning it clockwise.
See Figure 24.
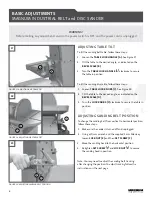
CENTRE POINT
The sander includes a
CENTRE POINT (C)
for sanding circular
workpieces. See Figures 25 and 26.
It fits into the
MITRE SLOT (D)
perpendicular to the sanding
disc. Follow these steps to use the
CENTRE POINT:
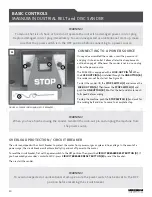
1. Position the
CENTRE POINT
in the
MITRE SLOT
at a
distance that matches the radius of the workpiece.
2. Using the supplied 3 mm Allen key, secure the
CENTRE
POINT
in position by tightening the
SET SCREW (E)
.
3. Place the centre of the workpiece on the centre point’s
PIN (F)
.
4. Turn the sander on, and manually rotate the workpiece
against the sanding disc until you achieve the desired
results.
MAINTENANCE
Before performing any maintenance, make sure the sander is
turned OFF and unplugged from the power source.
•
Keep the machine clean. Vacuum or brush off any loose
debris and wipe down the machine and the tables
occasionally with a damp rag.
•
Keep the rollers clean. Dirt on rollers will cause poor
tracking and belt slippage.
•
Periodically inspect the ON/OFF switch, power cord, plug
and other parts for damage.
•
Do not operate the sander with a damaged switch,
power cord, plug, or other parts. Replace damaged parts
immediately.
25
26
FIGURE 24: MITRE GAUGE
FIGURE 25: CENTRE POINT
FIGURE 26: CENTRE POINT PLACEMENT
24


