Use and installation manual for a MAGNUM sauna stove
16.06.2015 12
Starsauna Oy
Technical support:
Pistotie 4
info@magnumkiuas.fi
15860 Hollola, Finland
6.
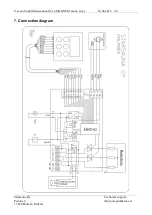
Connect the thermostat sensor according to Section 3.2.
7.
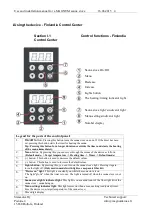
Connect the control panel according to Section 3.3.
8.
Close the hatch at the lower part of the sauna stove.
9.
Connect the other end of the feed cable to the outlet. (Note: the upper edge of the
outlet should be at most 400 cm from the floor)
10.
Test the functioning of the resistors by turning the sauna stove on. If all the
resistors do not heat or there is some other problem, contact the retailer or the
manufacturer.
11.
Install the lower part of the sauna stove vertically using the adjustment feet.
12.
Pile the stones in the lower part of the sauna stove. (Leave 4-5 cm of free space for
the upper edge in order to install the upper part of the sauna stove.) Do not wedge
the resistors. Ensure that the resistors travel vertically where they have been
attached to the bottom plate throughout the entire section where the stones have
been installed.
13.
Install the stainless steel frame of the upper part of the sauna stove.
Chapter 4.3,
image 3
14.
Pile the stones in the upper part of the sauna stove in a way that ensures that no
resistors are visible. Cover the resistors entirely with stones. Place stones that
cannot fall to the benches or to the floor from between the vertical profiles in the
outer edge. (NOTE: a freely glowing resistor may cause an combustion hazard
even outside the protective distance.)
Chapter 4.3 Piling the stones on the sauna
stove
15.
Use stones with a diameter of 5-10 cm, such as olivine diabase, olivine or
peridotite, for the sauna stove.
16.
The use of ceramic stones other than (KERKES) is forbidden. Other ceramic
stones may cause the resistors to break down prematurely.
17.
The stones of the sauna stove need to be installed again, the stone area of the sauna
stove cleaned and the broken stones replaced with new ones once a year. We
recommend that you change the stones every 2 years, depending on use.
18.
The sauna stove’s stones decrease in size due to the stainless steel frame's thermal
expansion and the weathering of stones while in use, so ensure that no resistors
become visible. Add stones when necessary.


