Repair
Model TE100
Electronic Small Bagging Scale
7-16 Revision
001
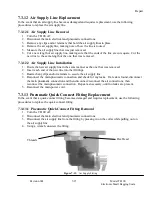
7.3.13.2 Pneumatic Quick Connect Fitting Installation
1. Using
Teflon
®
tape, wrap the threads of the new fitting, starting at the bottom of the thread
working toward the hex head in the same direction as the threads.
2. Screw the new fitting into the threads and use a wrench to carefully tighten the fitting.
CAUTION
Over tightening the fitting can damage the fitting, or the component
that it is being threaded into.
3. Reconnect the air supply line to the fitting.
4. Reconnect the main pneumatic connection and check for any leaks. If a leak is found, disconnect
the main pneumatic connection and then disconnect/reconnect the air connections, then
reconnect the main pneumatic connection. Repeat as necessary, until no leaks are present.
5. Reconnect the main electrical connection.
6. Turn the TE100 on and test for proper operation.
7.3.14 Main Circuit Board Replacement
In the event of a main circuit board failure, use the steps below to replace it.
7.3.14.1 Main Circuit Board Removal
1. Turn the TE100 off.
2. Disconnect the main electrical and pneumatic connections.
3. Unlatch the control enclosure and swing it to the full open position. This will expose the main
circuit board.
4. Use a ¼-inch nut driver to remove the nuts that secure the main circuit board. There is one nut
on each corner of the circuit board.
5. Label and disconnect the wires for the relay board connections, power supply, IP 1-5 load cell
connections, and TP 2-9 control connections.
6. Remove the main circuit board.
7.3.14.2 Main Circuit Board Installation
1. Position the new circuit board on the four mounting studs.
2. Connect the wires for the relay board connections, power supply, IP 1-5 load cell connections,
and TP 2-9 control connections.
3. Use a ¼-inch nut driver to install the nuts that secure the main circuit board. There is one nut on
each corner of the circuit board. DO NOT over tighten the nuts.
4. Close the control enclosure and latch it closed.
5. Connect the main electrical and pneumatic connections.
6. Turn the TE100 on and test for proper operation.
Summary of Contents for TE100
Page 1: ...Taylor Products Model TE100 Electronic Small Bagging Scale Operation and Maintenance Manual ...
Page 6: ...Model TE100 Electronic Small Bagging Scale iv Revision 001 This Page Intentionally Left Blank ...
Page 86: ......
Page 88: ......
Page 90: ......
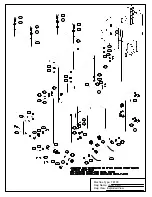
Page 91: ...Machine Type TE100 Dwg Name ISO 4 dwg Dwg View Scale Cabinet Exploded View ...
Page 92: ......
Page 95: ...Machine Type TE100 Dwg Name ECT146ASY dwg Dwg View Controller Circuit Board ...

