39
Basic Circuit Board Functions (expanded)/Diagnostics Operation
The ON/OFF button initiates the start of the circuit board and the shut down of the board. Pushing the ON/OFF
button momentarily will engage the start up sequence. The ON/OFF button also is used to re-set the board when the
vacuum switch or proof of fire switch is tripped. Pushing the ON/OFF button until the
board re-sets (usually 3-5 seconds) will re-establish the system and the fire will continue
unless there is a failure in the electrical components.
When you push the ON/OFF button to start the unit, the green light will flash until the
start up sequence is complete (app. 10-15 min.). During the start up sequence, the fuel
level setting will be over ridden and the unit will feed at the #2 fuel rate setting. After the
start up sequence has been established (app. 10-15 min.) the unit will run at whatever fuel
level setting you selected. The number #2 or #3 heat level setting is recommended.
The auger light will flash when the auger is running. After the first (1) minute of startup,
you can hold the auger button down to override the system and manually prime the auger.
The room fan button will override the # 1 heat level setting fan speed and go to high
speed. This will not change the fan speed on the #2 - #5 heat level settings.
The auger trim button allows for a low fuel setting fine tune adjustment on the # 1 heat
level setting ONLY. When pushing the auger trim button, if the #1 and # 4 heat level
setting light is on this indicates the lowest fuel feed setting, when pushing the auger trim
button again, if the #1 and #5 heat level setting light is on this indicates the highest fuel
setting. If no light is on, this indicates the normal programmed # 1 low heat level setting.
Your MagnuM comes with the ability to use three (3) separate programming features. This programming
must be done by a qualified factory trained technician. Contact your local dealer to set up an appointment
to have this done. The unit also has three (3) separate modes of operation (switch located on top of board).
The manual setting allows the operator to choose heat level setting changes. The T-STAT setting allows the
operator to set the high heat level setting and when the thermostat is satisfied, the unit will automatically go
to the low heat level setting. The AUTO setting allows the unit to shut completely off when the thermostat is
satisfied and re-start when the thermostat calls for heat. This setting can only be used with wood pellets.
The heat level setting button is a manual heat adjustment. Pushing the heat level
setting button will advance the heat settings one level each time that it is pushed. The
LED light will show which heat level setting the unit is on. At start up, regardless of
where the heat level setting button is set, the unit will feed on the #2 heat level setting.
Once the start up sequence has been established, the fuel feed rate setting will run at
whatever fuel level setting you selected.
During a short power outage, the board will detect if the proof of fire switch is
engaged. If it is still engaged (closed) the unit will auto re-start.
DIAGNOSTICS:
If the proof of fire switch does not close after 15 minutes, the board will shut the igniter
and auger feed motor off then it will put the unit into a shut down mode. The # 3 heat
level setting led light will flash indicating the proof of fire switch did not close. If the
air pressure switch, opens during operation at any time, the system will auto disable the
auger motor and/or the igniter. If the switch does not reset during start up, the # 2 heat
level setting led light will flash indicating that the air pressure switch is not closed.
This will initiate the shut down mode. As of 5/1/07 the following error lights have
been added to the DC control panel. Bad auger motor the #1 led light will flash and
shut down the system, igniter drawing to many ohms the #4 led light will flash, the
system will continue to work but must be checked, high limit switch opens the #5 led
light will flash and shut down the unit. If the start up mode fails during the AUTO T-
STAT mode, the unit will shut down and require toggling (on/off) of T-STAT to
restart.
Summary of Contents for Winchester WINACI
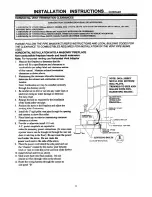
Page 21: ...21 MAGNUM WIN INSERT INSTALLATION ...
Page 25: ...25 ...
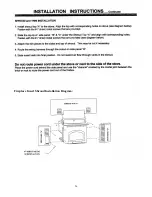
Page 26: ...Fireplace Insert Shroud Installation Diagram 26 ...
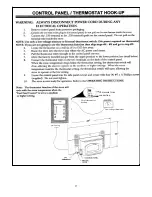
Page 27: ...27 Thermostat wire connection Low voltage thermostat Molex Plug 24 volt thermostat hookup ...
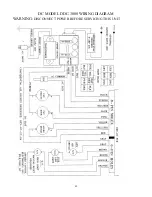
Page 42: ...42 DC MODEL DDC 3000 WIRING DIAGRAM WARNING DISCONNECT POWER BEFORE SERVICING THIS UNIT ...

