


12
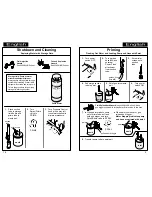
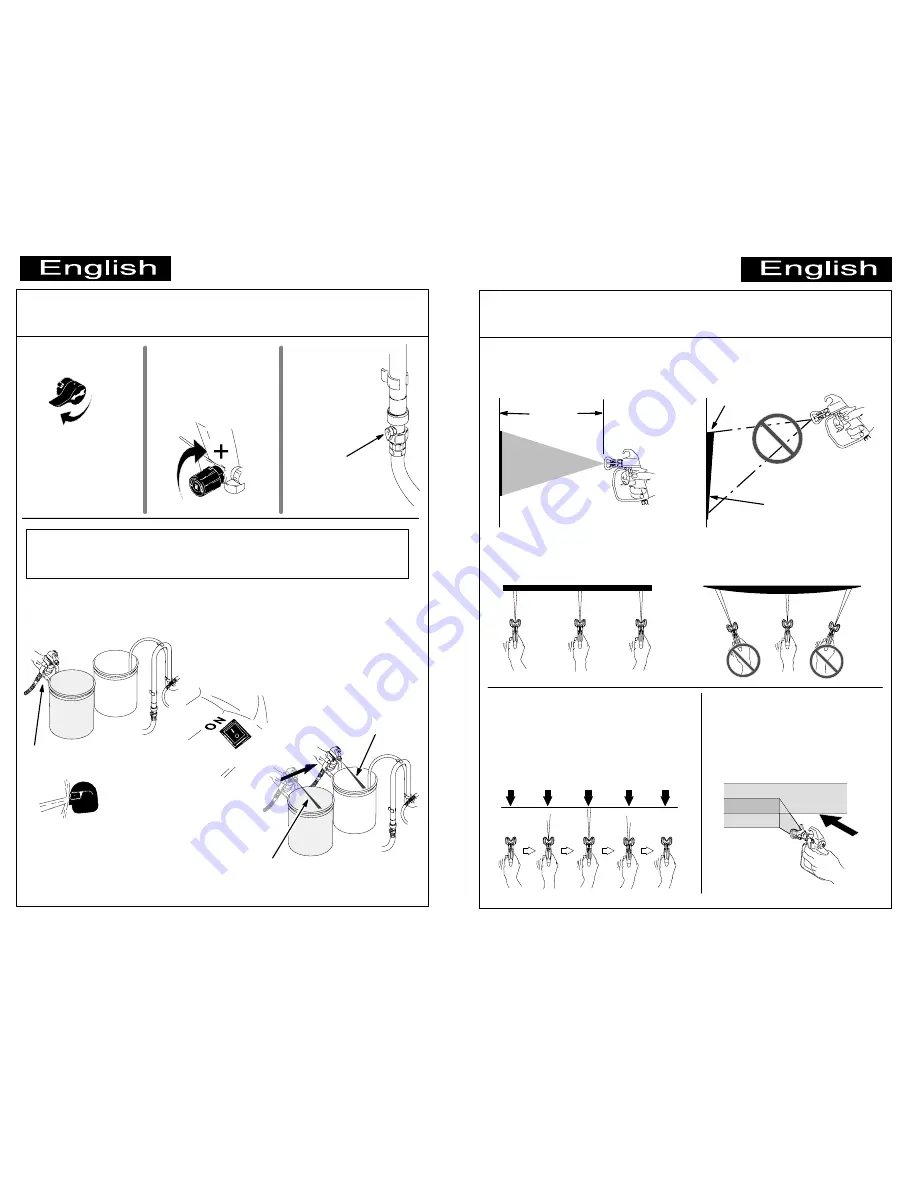
10. Turn Spray/Prime
valve to SPRAY.
SPRAY
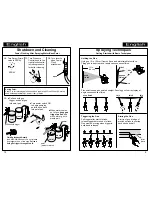
Shutdown and Cleaning
Saving Paint:
Step 13 is for returning paint in hose back to paint pail. One 50-foot (15-meter)
hose holds approximately 1 quart (1 liter) of paint.
Power Flushing After Spraying Water-Base Paint
open
Fluid Splashback Hazard
(see WARNINGS sheet): Do not release
gun trigger at end of this step. Pull and
hold gun trigger through Step 14.
13.
D
Pull and hold gun
trigger, and point gun
into paint pail.
D
When water comes
out of gun, keep gun
trigger pulled, and
move aim of gun to
waste pail.
D
Turn power switch ON
to begin pumping
paint in hose back
into paint pail.
WASTE
water
PAINT
WASTE
PAINT
paint
(watch for water)
pull and hold trigger
11. Turn Pressure
Control knob to the
right (clockwise) to
increase pressure
for better cleaning.
12. Turn lever to
open Power
Flush
attachment.
9
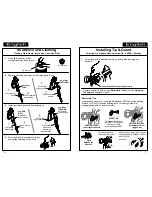
Spraying Techniques
Getting Started with Basic Techniques
Holding the Gun
12 in.
(30 cm)
even
finish
Hold gun 12 in. (30 cm) from surface, and aim straight at surface.
Tilting gun to direct spray at angle causes uneven finish.
thin
uneven
finish
thick
Flex wrist to keep gun pointed straight. Fanning gun to direct spray at
angle causes uneven finish.
even finish
thin
thin
thick
Pull trigger after start of stroke,
release trigger before end of stroke.
Gun must be moving when trigger is
pulled and released.
Triggering the Gun
aim
here
Aim tip of gun at edge of
previous stroke to overlap
each stroke by half.
Aiming the Gun


