8
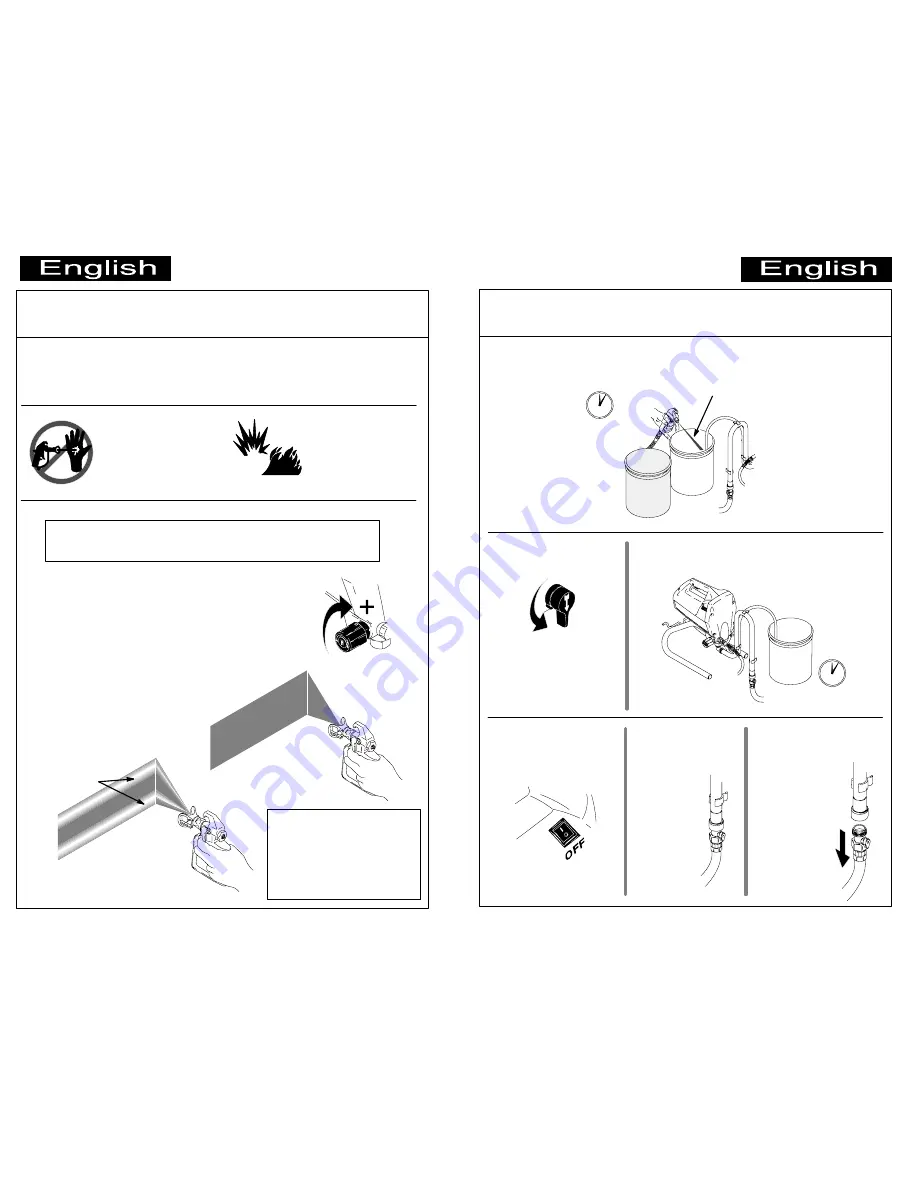
Spraying Techniques
Sprayer is set up for most airless spraying applications. For details on tip
selection, tip wear, coat thickness, and so on, see Spraying Techniques
in enclosed Operating Instructions.
Motor runs ONLY when gun is triggered.
Sprayer is designed to stop pumping when gun trigger is released.
Fluid Injection
Hazard
See WARNINGS sheet.
Fire and Explosion
Hazard
See WARNINGS sheet.
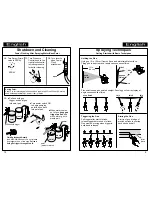
Adjusting Pressure to Optimum Setting
Adjust the Pressure
Turn Pressure Control knob to the right (clockwise)
to increase pressure at gun. Turn it to the left
(counterclockwise) to decrease pressure.
good
spray pattern
pressure
too low
gaps at edges
Prevent Excessive Tip Wear
Spray should be atomized (evenly distributed,
no gaps at edges). Start at low pressure
setting, and increase pressure a little
at a time until paint is atomized.
To prevent excessive tip wear,
spray at lowest pressure
that atomizes paint.
If maximum pressure of
sprayer is not enough for
good spray pattern, tip is too
large or too worn. See
Reversible Tip Selection
Chart in enclosed Operating
Instructions.
1 to 2 minutes
13
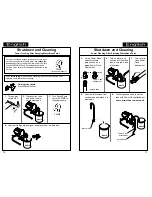
Shutdown and Cleaning
15. Turn Spray/Prime
valve to PRIME.
WASTE
20 seconds
PRIME
14. Keep gun triggered and aimed into waste pail for 1 to 2 minutes until
relatively clear water comes out of gun.
Power Flushing after Spraying Water-Base Paint
17. Turn power switch
OFF.
garden hose
(turn off)
WASTE
relatively clear water
PAINT
16. Let water flow through sprayer into waste
pail for 20 seconds.
18. Turn off garden
hose.
19. Unscrew Power
Flush attachment
from suction
tube.


