THE PASSION PEOPLE
www.magura.com
16
6.
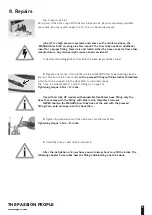
Remove O
ON
NL
LY
Y the bleed plug of the reservoir with a 2,5mm Allen key that you insert
into the plug before turning it slightly. The reservoir cover and the membrane underneath
remain on the brake lever!
7.
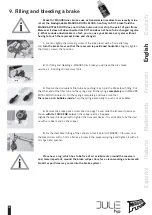
Put the second syringe of the service kit
WITHOUT PLUNGER
into the opened drill
of the reservoir cover. Push oil from the brake caliper upwards until the oil column arrives in
the syring on the reservoir. You will see air bubbles now.
8.
Now suck the oil carefully back with the filling syringe on the brake caliper. Make
sure that there is always enough oil in the reservoir syringe when you suck back the oil with
the filling syringe! You will see air bubbles again.
9.
Actuate in addition
CAREFULLY
the lever blade to chase tiny air bubbles that might
hide within the system. The job is done when no air bubbles can be seen after having follo-
wed the steps above several times.
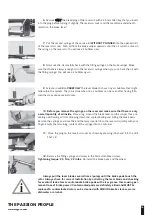
10. Before you remove the syringe on the reservoir make sure that there is only
a small quantity of oil inside.
Place a rag around the brake lever and the caliper thus pre-
venting overflowing oil from dropping down and contaminating and killing the brake pads.
Remove the syringe and close the end that was inserted into the reservoir quickly with your
finger. Empty the remaining content of the syringe into an container.
11.
Close the plug on the reservoir cover as shown by pressing it by hand into the drill.
That’s it!
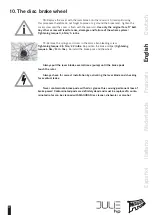
12.
Remove the filling syringe and screw in the 5mm allen bleed screw.
Tightening torque: 2,5 Nm/ 22 in.lbs.
Re-install the brake pads and the wheel.
Always pull the lever blade several times (pump) until the brake pads touch the
rotor. Always check for correct installation by activating the lever blade and checking
for eventual leaks. Never contaminate brake pads with oil or grease this causing per-
manent loss of brake power! Contaminated pads are definitely killed and MUST be
replaced! A contaminated rotor can be cleaned with MAGURA brake cleaner, warm
dishwater or alcohol.


