Español Italiano Nederlands Français
English
Deutsch
9
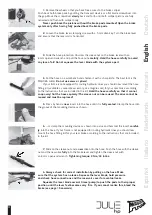
3. Mounting on forks and frames that meet the International Standard:
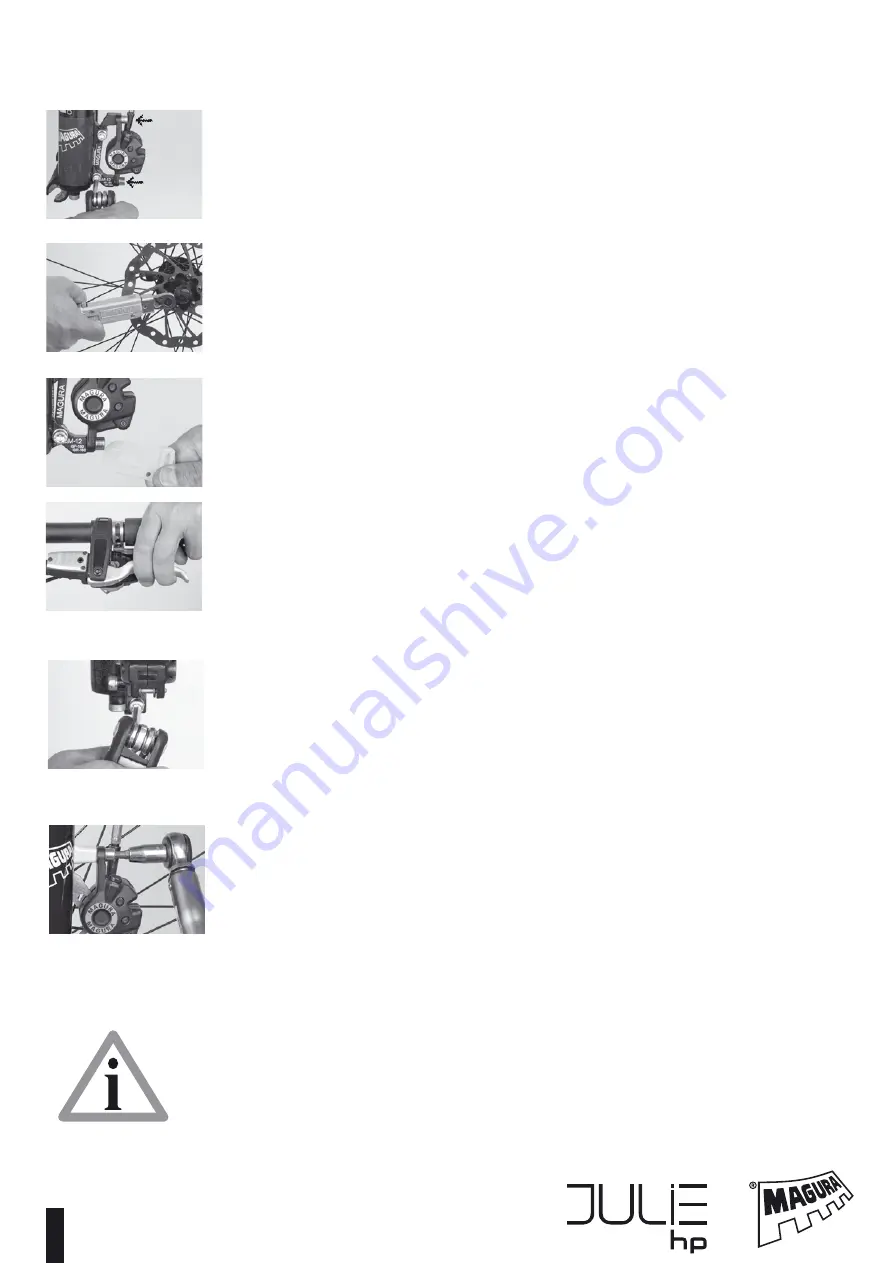
Mount the
calliper onto the fork or the frame (bolts “A”). Use a 5 mm allen key.
Tightening torque: 6
Nm/ 51 in.lbs. Do not tighten yet the bolts “B”
4.
Mount the rotor with the 6 Torx T25 bolts onto the hub. Watch out for the correct
rotation direction of the rotor (laser arrow). Use only new original bolts or thread lock if you
use old bolts.
Tighten the bolts in a crossed pattern! Tightening torque: 4 Nm/ 34
in.lbs.
5.
Remove the transport device shortly before installing the wheel and mount
the wheel. Install the wheel by positioning the rotor between the brake pads and fixing the
wheel in the dropouts. Close the quick release of your wheel
which you should mount on
the opposite side of the brake calliper
and tighten it sufficiently. As to thru-axle hubs or
wheels consult the manual of the respective fork manufacturer.
6.
Squeeze now the brake lever, hold the pressure.
7
7. Tighten the fitting bolts “B”.
Tightening torque: 6 Nm/ 51 in.lbs.
8. Mounting on forks with Postmount:
For Postmount 6” installation in combination
with a 160mm rotor, Postmount 7” with 180mm rotor or Postmount 8” with a 203mm rotor
on the front you do not need an adaptor. Mount the caliper DIRECTLY onto the fork with
MOUNTED wheel and rotor. For a better understanding the mounted wheel is not shown on
this picture. Do not tighten the caliper bolts yet! Squeeze the lever blade and keep the pres-
sure. Tighten now the bolts.
Tightening torque: 6 Nm/ 51 in.lbs. Further mounting alter-
natives cf. page 21 of this manual.
The transport device prevents the brake pads from being pushed out too far by
unintended lever squeeze. It is impossible then to install the wheel with the rotor. So
never throw away the transport device. Keep it and always clip
it between the brake pads when the wheel is removed.
B
B
A
A
B


