Operation
8.4 Control Box initializ ation
1.
Make sure the master on/off switch (see “Component
identification” section) on each lift unit and the Touch
Screen Controller is set to the
OFF
position
.
2.
Turn the master on/off switch of the first lift unit to the
ON
position. The green colored touch screen power
indicator light located just below the screen should turn
on once the master on/off switch is turned
ON.
It will
take 15-20 seconds for the touch screen to completely
start up and be ready to use. The Main Menu screen will
be shown with a series of icons on the screen. Select
the Lift Program button to start program used to lift a
vehicle.
After completing startup, the screen may automatically
change to the Lift Program screen. If this occurs, the
step of selecting the Lift Program button can be
skipped
.
3.
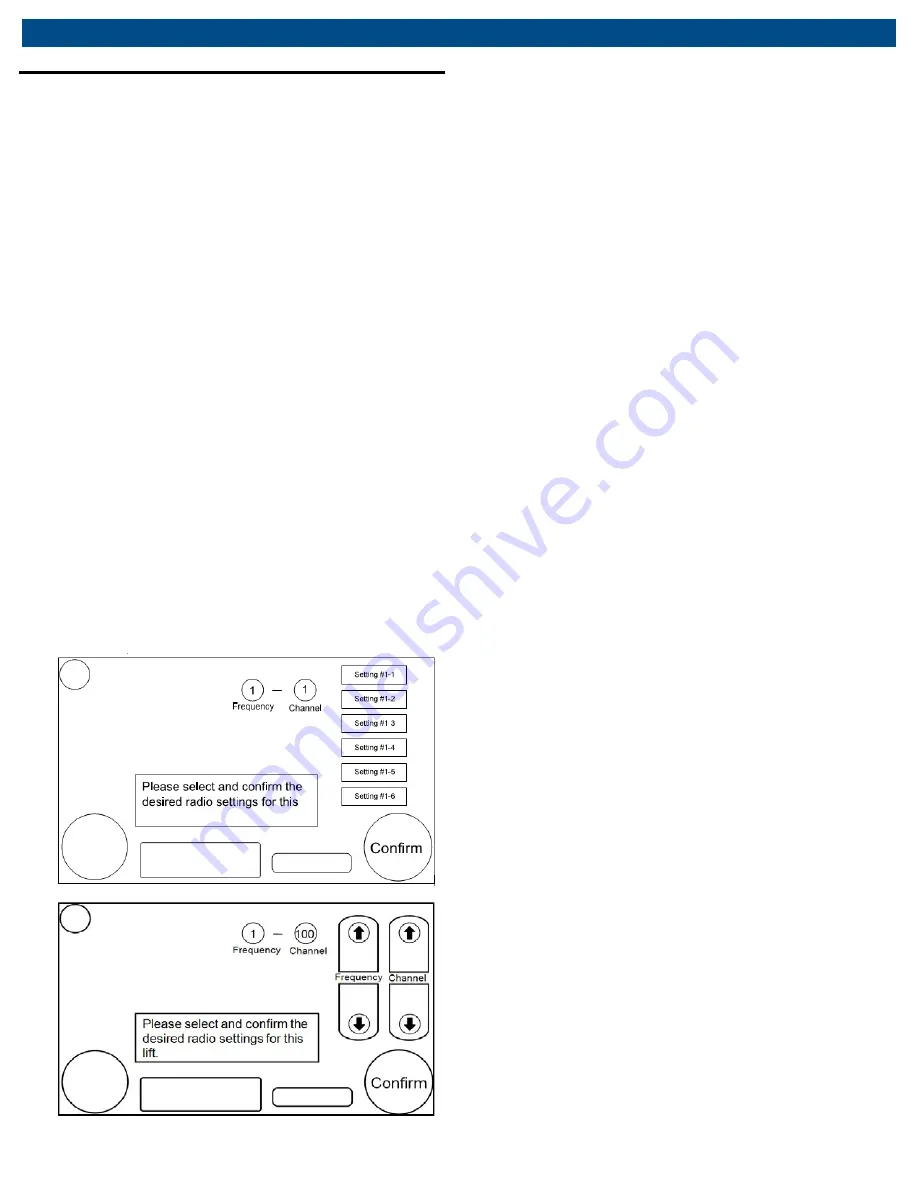
The control box will initialize, and the screen shown
below will appear on the touch screen
.
All screens shown in this manual are simplified versions
of what is actually shown on the display to help clarify
button locations/functions
.
Fig. 7: Selecting screen communication channel
CML Series | 13 | en
4.
Select the desired radio settings. The default radio
settings will be the settings selected the last time the
unit was used. Touch the screen on top of the Settings
on the right side of the screen and then slide up or down
to scroll through the settings. Then, touch to select the
desired radio setting. All units that will be used together
as a lift system to lift a vehicle must be set to the same
radio setting. There are 12 radio frequencies available
for use and 20 different channels that can be used for
each frequency. When the desired radio settings are
shown, push the
CONFIRM
button to advance to the
next screen.
Do not rush and push the
CONFIRM
button before the
control box has completely initialized. Wait until the
radio settings update to show the previously used
settings before pushing the
CONFIRM
button
.
5.
Read through the Notice that is displayed on the next
screen. If the operator agrees with and acknowledges
the statements made on the screen, push the
ACCEPT
button to continue setting up the lift system.
6.
The display then changes to ask how many lift units will
be used in the lift system. Push the button that matches
the total number of lift units that will be used in the
current lifting system.
7.
A screen will now appear asking which operating mode
will be used. Select the desired operating mode from the
list of modes displayed. If the vehicle is being lifted by
the tires using the standard lift arms select
NORMAL
MODE
.
Only select one of the adapter modes if using a
manufacturer supplied adapter. See the Owner’s
Manual supplied with the adapter for complete
operating instructions
.
Use of the wrong operating mode can result in serious
injury, death, and/or property damage due to a vehicle
tipping or falling from the lift system. Only use one of
the adapter modes when the correct manufacturer
supplied adapter is properly installed on the lift unit.
Summary of Contents for CML-7
Page 38: ...Maintenance Chart CML Series 38 en Action Date Details Person responsible...
Page 39: ...en 39 CML Series Notes 16 Notes...
Page 40: ...Notes CML Series 37 Notes CML Series 40 en...
Page 41: ...en 41 CML Series Notes...
Page 42: ...en 42 CML Series Notes...
Page 43: ...en 43 CML Series Notes...


