32
Maxuum III Digital Electronic Indicator 2239028 Rev D
CAUTION: DO NOT REMOVE THE SCREWS FROM THE DOOR!
Do not tamper with the screw design (captive screws) as this
can potentially cause difficulty in removing the door next time.
5.1.1.2 Reassembly
1.
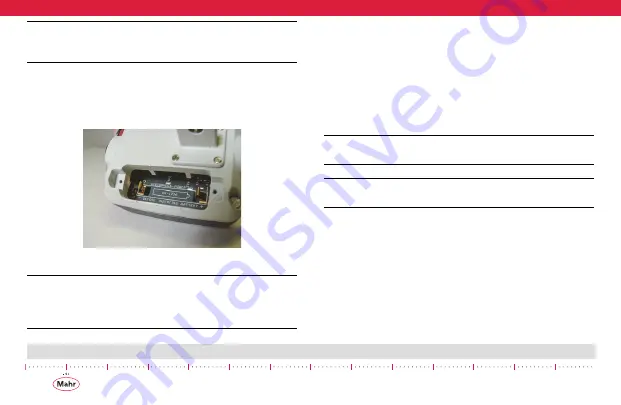
Carefully replace the old battery with a new battery,
observing polarity symbols.
Figure 21 - Battery polarity shown inside
NOTE: All Maxum III Indicators and Indicating Units use a 3.0
volt commercially available lithium battery. See Section, ’6.0
of these instructions for battery
part numbers and ordering information.
2.
Replace the battery door cover to the rear case. Make
sure that the o-ring is aligned and in place during reas-
sembly to insure proper seal of the battery compart-
ment. For Indicating Units, reconnect the Digital
Transducer. Pick up Indicator or Indicating Unit and
observe display; some or all of the display elements will
be On. Immediately depress and slowly release the
measuring spindle to return the Indicator or Indicating
Unit to its Power Down mode.
NOTE: Whenever the battery is removed and replaced, the
Indicator or Indicating Unit will lose its previous zero setting.
NOTE: Maxum III indicators do not need to have the rear case
removed and doing so will void the warranty.
5.2 Checking Accuracy
Accuracy is checked at zero, both ends of the digital range, and
approx. halfway between zero and both ends of the digital
range. Use a heavy-duty comparator stand with fine adjustment
and five gage blocks as listed in Table A.
1.
Mount the Indicator (or Digital Transducer) securely on
the comparator stand and place the Zero gage block
under the measuring spindle.


