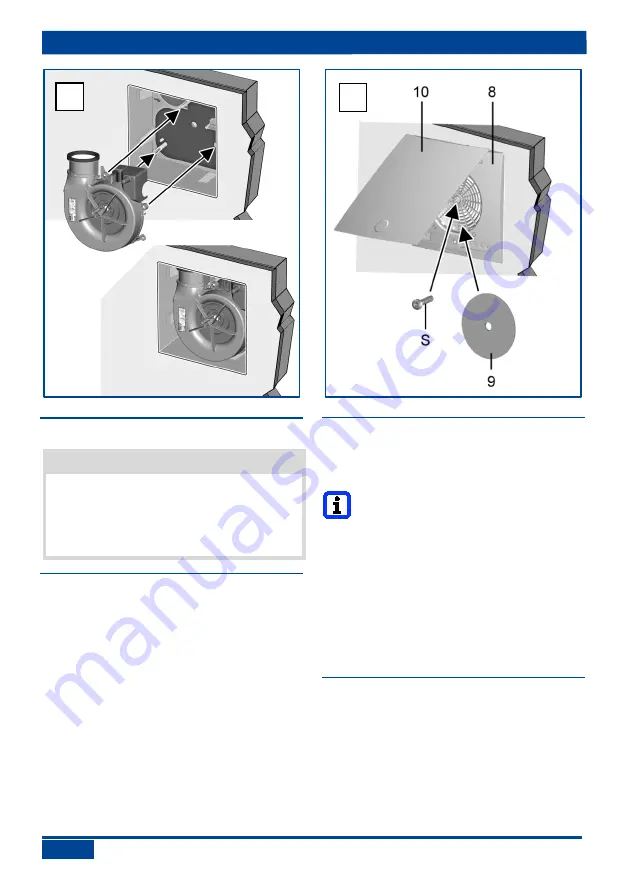
13. Final assembly
26
13. Final assembly
NOTICE
Malfunction in case of incorrect instal-
lation.
For installation conditions and
detailed information regarding final installa-
tion of the ER EC fan insert and ER-A..
cover
Observe “ER covers” manual.
13.1 Attaching fan insert
No tools are needed for the final assembly
of the fan insert.
1. Plug the fan insert directly into the 3 studs
in the interior of the recess-mounted
housing. Make sure that the fan insert
audibly clicks into all 3 snap-fit fasteners.
2. Check for firm seating of the fan insert.
13.2 Attaching cover ER-A, ER-AK,
ER-AH or ER-AB
1. Screw cover to the fan insert with the
central screw [S].
The covers ER-AK, ER-AH and
ER-AB are electrically connected
automatically when installed. The
setting values can be changed on
these covers.
2. Insert the air filter [9] and fold down the
upper part of the cover (upper part must
audibly engage).
3. Run function test: Test all unit functions
(overrun time, interval, humidity control
etc.).
13.3 Key lock
If a key lock is desired,
activate
the key lock
on the cover ER-AK, ER-AH or ER-AB (it is
deactivated in the factory). To do so, push
button
“+”
and
“-”
at the same time for
5 seconds
. The 5 LEDs flash briefly 3x. To
cancel the key lock, repeat the procedure.
14
15
Summary of Contents for ER GH
Page 2: ...2 1 ...
Page 31: ...31 ...


