background image

1-800-892-3986     IS8444

Pg 25 of 28

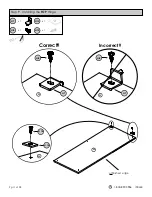
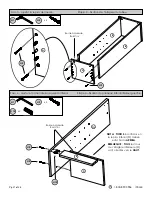
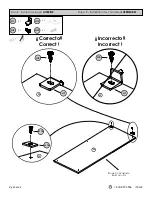
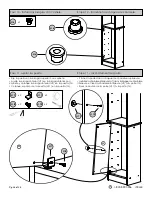
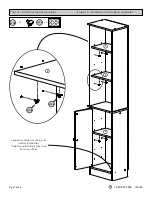
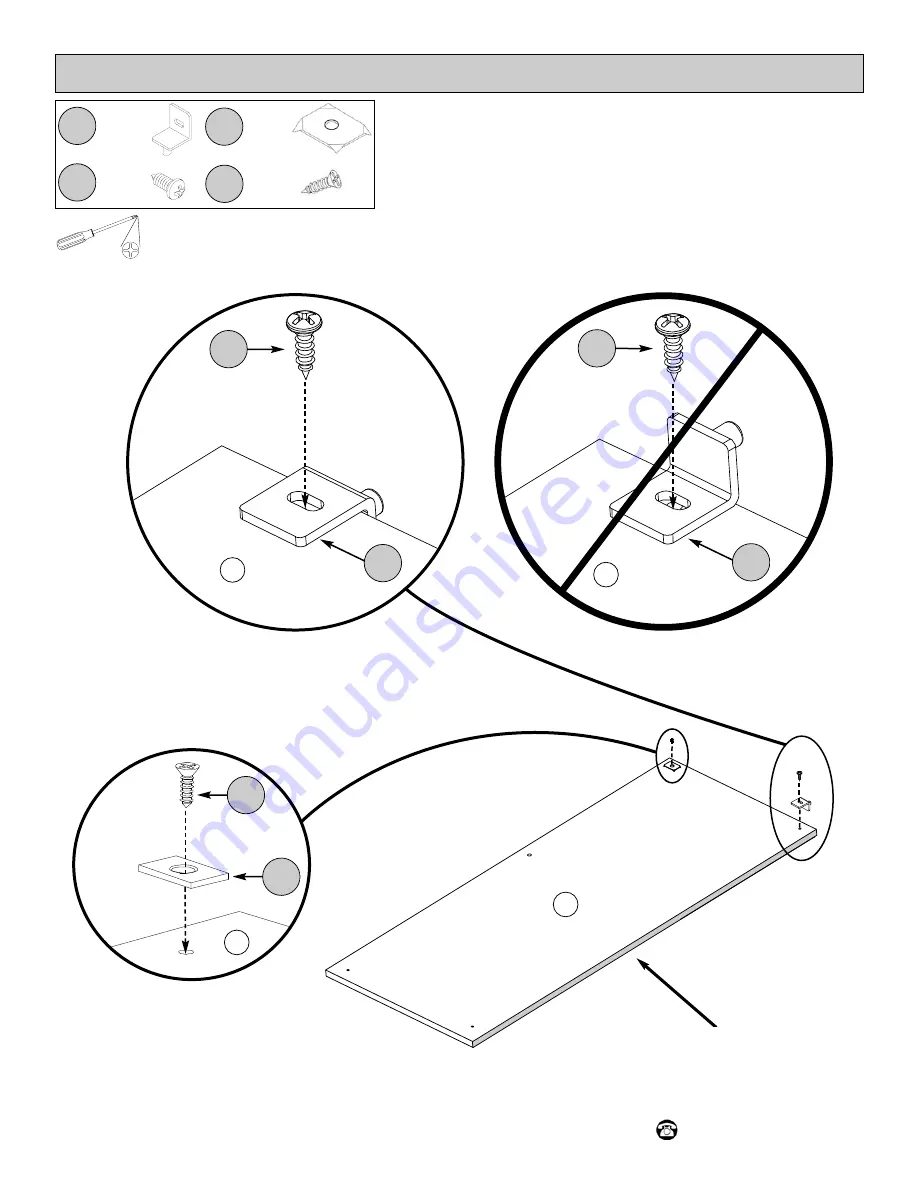
Paso 9 - Instalar la bisagra 

SUPERIOR

.

Étape 9 – Installation des charnières 

SUPÉRIEURES

.

H 14

H 13

H 7

H 8

x 1

x 1

x 1

x 1

G

G

Borde Sin Acabado

Bord non fini

H 14

H 13

¡¡Incorrecto!!

Incorrect !

¡¡Correcto!!

Correct !

G

H 8

H 7

G

H 8

H 7

Summary of Contents for 9448WWWM

Page 1: ...03 2019 Assembly Instructions Model 9448WWWM White For Spanish and French instructions start on page 15 Para instrucciones en espa ol y franc s comience en la p gina 15 Pour les instructions espagnol...

Page 2: ...ur Toll Free Number 1 800 892 3986 between 8 00AM 5 00PM EST Monday through Friday Cleaning Note Cleaning with a dry cloth may be sufficient but for other stains or marks wipe gently with a damp cloth...

Page 3: ...44 Pg 3 of 28 A Top and Middle Shelf 2 B Top Side Panel 2 C Bottom Side Panel 1 right and 1 left 2 D Bottom Shelf 1 List of Parts E Trim Piece 1 F Adjustable Shelf 3 G Door 1 H Back Panel 1 A H B C R...

Page 4: ...Wrench for use with Large Screws H2 x 1 x 24 Nail x 40 H 1 H 2 H 3 List of Hardware Cambolt x 2 Plastic Snap Cam x 2 H 4 H 5 Hinge Screw Hinge Bushing Hinge x 4 x 4 x 4 H 6 H 7 H 8 Magnet Magnet Screw...

Page 5: ...86 IS8444 Pg 5 of 28 List of Hardware continued Magnet Strike Magnet Strike Screw x 2 x 2 H 13 H 14 Dowel x 8 H 15 Sheet of 6 stickers x 3 H 16 Screw Cap x 8 H 17 Shelf Clip x 12 H 18 Wall Mount Kit W...

Page 6: ...44 Pg 6 of 28 Step 1 Attaching the Top Shelf Step 2 Installing the Cambolts and Dowels x 4 x 12 H 4 H 15 H 2 H 2 A B B A finished edge H 15 H 4 H 15 H 4 H 15 x 4 H 1 H 2 finished edge NOTE DO NOT OVER...

Page 7: ...7 of 28 Step 3 Attaching the Middle Shelf Step 4 Attaching the Bottom Left Side Panel A B B A x 4 H 1 H 2 H 2 finished edge H 2 x 2 H 1 H 2 finished edge NOTE ALL holes on bottom shelf D face UP H 2 H...

Page 8: ...800 892 3986 IS8444 Pg 8 of 28 Step 5 Installing the Magnet Step 6 Attaching the Bottom Right Side Panel x 1 x 2 H 10 H 9 finished edge C R H 9 H 10 finished edge C R H 2 H 15 H 2 x 2 H 1 H 2 x 2 H 1...

Page 9: ...refully place the top assembly onto the bottom assembly NOTE Be sure to align the cambolts H4 with the holes in bottom side panels C Insert snap cams H5 into the holes in the bottom side panels C NOTE...

Page 10: ...arefully lay the unit face down on floor with the unfinished edges facing up Fasten back panel E to back of unit Helpful Hint With the seam side of back panel facing up align the back panel properly f...

Page 11: ...1 800 892 3986 IS8444 Pg 11 of 28 Step 9 Installing the TOP Hinge H 14 H 13 H 7 H 8 x 1 x 1 x 1 x 1 G G unfinished edge H 14 H 13 Incorrect Correct G H 8 H 7 G H 8 H 7...

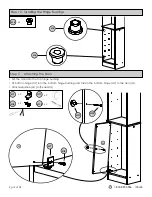
Page 12: ...s H 7 H 8 x 2 x 2 H 11 H 12 x 2 x 2 Set the door into the top hinge bushing Fit bottom hinge H7 into the bottom hinge bushing and fasten the bottom hinge H7 to the door G Attach door knob H11 to the d...

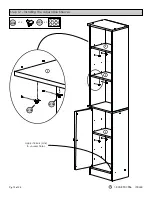
Page 13: ...1 800 892 3986 IS8444 Pg 13 of 28 Step 12 Installing the Adjustable Shelves H 18 x 12 F F F F H 18 H 18 Apply stickers H16 to unused holes x 3 H 16...

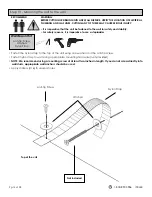
Page 14: ...l for safety and stability For safety reasons it is imperative to use a stepladder Fasten the nylon strap to the top of the unit using one washer and the anti tip screw Fasten nylon strap to wall usin...

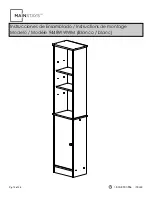
Page 15: ...1 800 892 3986 IS8444 Pg 15 of 28 Instrucciones de Ensamblado Instructions de montage Modelo Mod le 9448WWWM Blanco blanc...

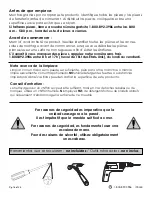
Page 16: ...re 8 h et 17 h heure de l Est des tats Unis du lundi au vendredi Nota acerca de la limpieza Limpiar con un trapo seco puede ser suficiente pero para otras manchas o marcas limpie suavemente con un tra...

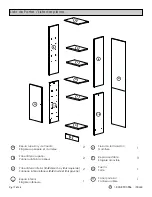
Page 17: ...rieur 2 C Panel lateral inferior C R derecho y C L izquierdo Panneau lat ral inf rieur C R droite et C L gauche 2 D Repisa inferior tag re inf rieure 1 Lista de Partes Liste des pi ces E Pieza de ter...

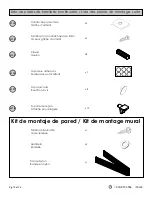
Page 18: ...aci n de lista de partes Liste des pi ces suite Perno para leva Boulon came x 2 C mara de pl stico Came snap en plastique x 2 H 4 H 5 Tornillo para bisagras Vis pour charni re Cojinete para bisagras D...

Page 19: ...G che d aimant Tornillos para Contrachapa de im n Vis pour g che d aimant x 2 x 2 H 13 H 14 Clavija Goujon x 8 H 15 Hoja de 6 adhesivos Feuille de 6 autocollants x 3 H 16 Tapa roscada Bouchon vis x 8...

Page 20: ...2 Instalar las levas de fijaci n y los tarugos tape 2 Installation des Boulons came et des Goujons x 4 x 12 H 4 H 15 H 2 H 2 A B B A Borde Acabado Bord fini H 15 H 4 H 15 H 4 H 15 x 4 H 1 H 2 Borde Ac...

Page 21: ...izquierdo inferior tape 4 Fixation du panneau lat ral inf rieur gauche A B B A x 4 H 1 H 2 H 2 Borde Acabado Bord fini H 2 x 2 H 1 H 2 Borde Acabado Bord fini NOTA TODOS los orificios en la repisa inf...

Page 22: ...im n tape 5 Installation de l aimant Paso 6 Ajustar el panel lateral derecho inferior tape 6 Fixation du panneau lat ral inf rieur droit x 1 x 2 H 10 H 9 Borde Acabado Bord fini C R H 9 H 10 Borde Aca...

Page 23: ...cios de los paneles laterales inferiores C NOTA si es necesario golpee levemente las c maras con un martillo Aplique las tapas roscadas H17 a los tornillos H2 en la parte exterior de la unidad Placez...

Page 24: ...on la costura lateral del panel posterior hacia arriba alinee el panel posterior adecuadamente y coloque un clavo en cada una de sus esquinas Posez soigneusement l appareil face vers le bas sur le sol...

Page 25: ...of 28 Paso 9 Instalar la bisagra SUPERIOR tape 9 Installation des charni res SUP RIEURES H 14 H 13 H 7 H 8 x 1 x 1 x 1 x 1 G G Borde Sin Acabado Bord non fini H 14 H 13 Incorrecto Incorrect Correcto...

Page 26: ...bisagra inferior con cojinete y coloque la bisagra inferior H7 en la puerta G Coloque el pomo de la puerta H11 en la puerta G Placez la porte dans la bague de charni re sup rieure Installez la charni...

Page 27: ...28 Paso 12 Instalar las repisas ajustables tape 12 Installation des tag res ajustables H 18 x 12 F F F F H 18 H 18 Aplique los adhesivos H16 a los orificios inutilizados Collez les autocollants H16 a...

Page 28: ...arte superior de la unidad utilizando una junta y el tornillo antivuelco Sujete el cintur n de nylon a la pared utilizando las herramientas de montaje apropiadas no est n incluidas NOTA recomendamos e...

Reviews: