background image

11 

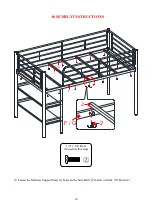
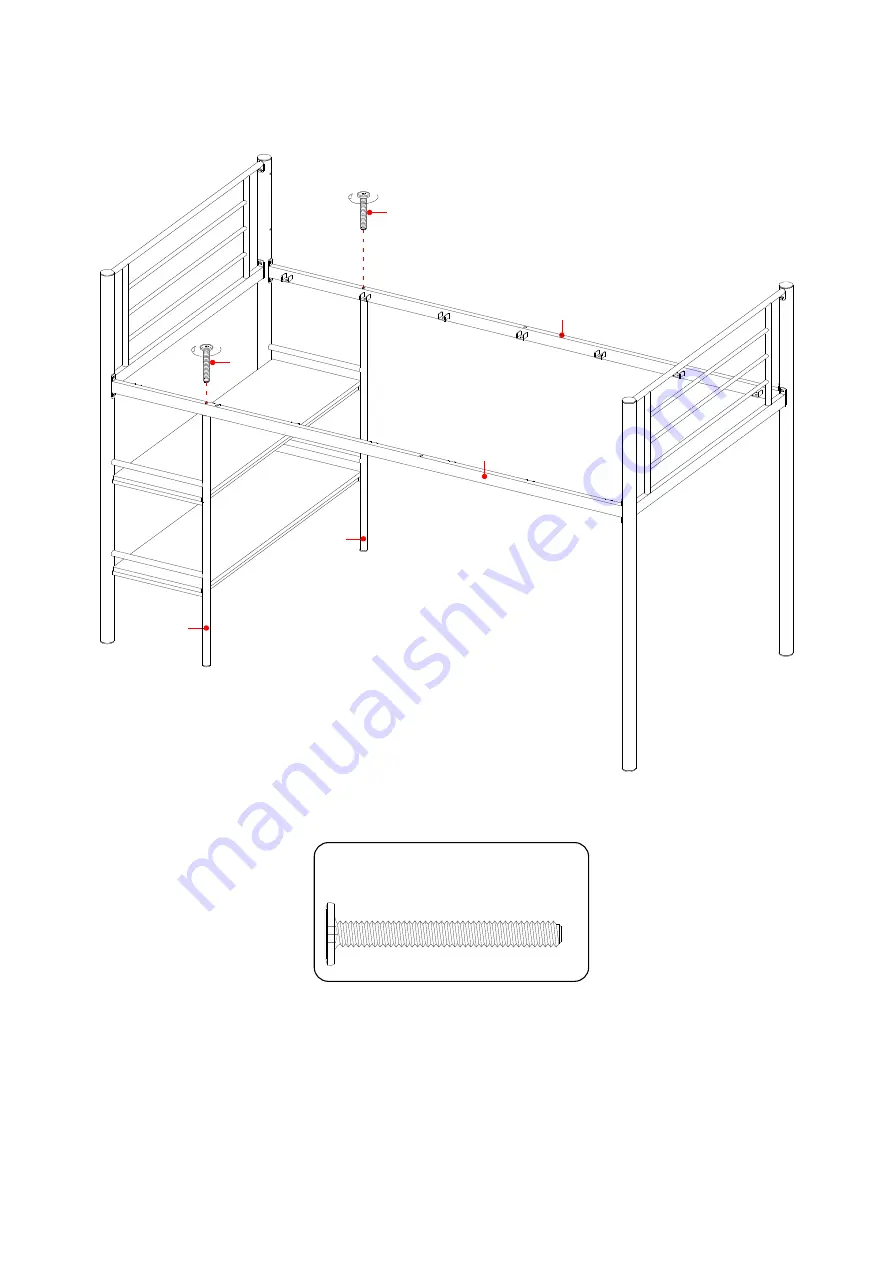
ASSEMBLY INSTRUCTIONS 


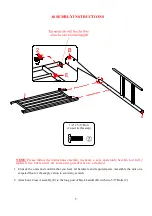
9.


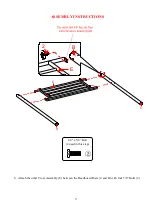
Fasten the Mattress Side Rails (F and G) to the short posts of Ladders (A and B) with two 2-1/8” Bolts 
(3). 

F

G

A

B

3

3

1/4" x 2-1/8” Bolt  

(2 used in this step) 


Summary of Contents for MS18-D2-1011-04

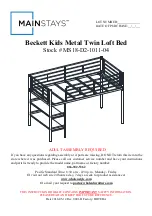
Page 1: ...or if parts are missing DO NOT return this item to the store where it was purchased Please call our customer service number and have your instructions and parts list ready to provide the model name p...

Page 2: ...esigned for use with the bed for example but not limited to hooks belts and jump ropes Prohibit more than one person on upper bunk Maximum mattress thickness must not exceed 5 in 12 70 cm for the uppe...

Page 3: ...bed and prohibit jumping on the bed Always use the ladder for entering and leaving the upper bunk Do not use substitute parts Contact the manufacturer or dealer for replacement parts Use of a night li...

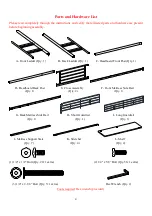
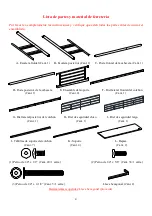
Page 4: ...Headboard Front Post Qty 1 D Headboard Back Post E Cross Assembly F Front Mattress Side Rail Qty 1 Qty 2 Qty 1 G Back Mattress Side Rail H Short Guardrail I Long Guardrail Qty 1 Qty 1 Qty 1 J Mattress...

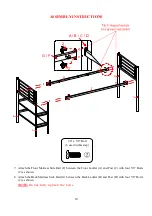
Page 5: ...s until all rails and guardrails are attached 1 Unpack the units and confirm that you have all hardware and required parts Assemble the unit on a carpeted floor or the empty carton to avoid any scratc...

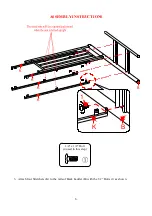
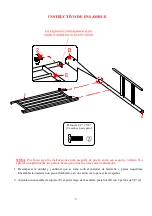
Page 6: ...6 ASSEMBLY INSTRUCTIONS 3 Attach four Stretchers K to the rails of Back Ladder B with the 1 2 Bolts 1 as shown K K K K B 1 K B 1 4 x 1 2 Bolt 4 used in this step...

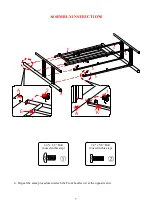
Page 7: ...7 ASSEMBLY INSTRUCTIONS 4 Repeat the same procedure to attach the Front Ladder A at the opposite end 1 K A K K K K E A 2 E A 1 4 x 1 2 Bolt 4 used in this step 1 4 x 5 8 Bolt 2 used in this step...

Page 8: ...UCTIONS 5 Ask for help to slide two Shelves L onto the rails of Ladders A and B and the Stretchers K and fasten them in place with the 1 2 Bolts 1 1 K K K K A B L L K K K K L L K L 1 4 x 1 2 Bolt 12 u...

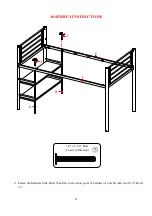
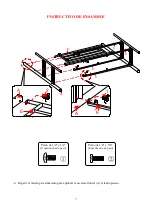
Page 9: ...9 ASSEMBLY INSTRUCTIONS 6 Attach the other Cross Assembly E between the Headboard Posts C and D with four 5 8 Bolts 2 D C E 2 E B 1 4 x 5 8 Bolt 4 used in this step...

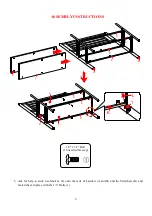
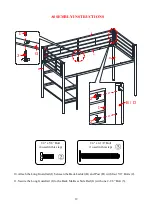
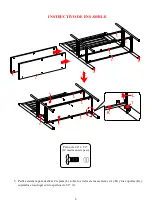
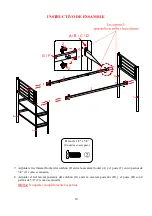
Page 10: ...en the Front Ladder A and Post C with four 5 8 Bolts 2 as shown 8 Attach the Back Mattress Side Rail G between the Back Ladder B and Post D with four 5 8 Bolts 2 as shown NOTE Do not fully tighten the...

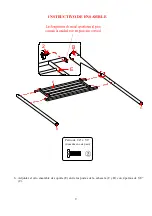
Page 11: ...11 ASSEMBLY INSTRUCTIONS 9 Fasten the Mattress Side Rails F and G to the short posts of Ladders A and B with two 2 1 8 Bolts 3 F G A B 3 3 1 4 x 2 1 8 Bolt 2 used in this step...

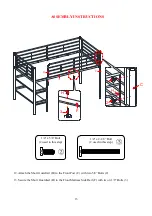
Page 12: ...drail I between the Back Ladder B and Post D with four 5 8 Bolts 2 11 Secure the Long Guardrail I to the Back Mattress Side Rail G with one 2 1 8 Bolt 3 G I D B 2 2 I B D I G 3 1 4 x 2 1 8 Bolt 1 used...

Page 13: ...Short Guardrail H to the Front Post C with two 5 8 Bolts 2 13 Secure the Short Guardrail H to the Front Mattress Side Rail F with two 2 1 8 Bolts 3 1 4 x 2 1 8 Bolt 2 used in this step 1 4 x 5 8 Bolt...

Page 14: ...14 ASSEMBLY INSTRUCTIONS 14 Fasten the Mattress Support Slats J between the Side Rails F and G with the 5 8 Bolts 2 1 4 x 5 8 Bolt 14 used in this step F G J J 2 F G...

Page 15: ...Furniture Care It is best to keep your furniture in a climate controlled environment Continual exposure to damp and wet environment can cause corrosion It is advised to keep furniture away from direct...

Page 16: ......

Page 17: ...a parte est faltante no retorne est producto a la tienda donde lo compr Por favor llame a nuestro departamento de ayuda al cliente teniendo su instructivo y lista de partes para proveer el modelo nomb...

Page 18: ...do a garfios cinturones y cuerdas para saltar Proh ba que este m s de una persona en la litera superior El grosor m ximo del colch n no debe de exceder 5 pulgadas 12 70 cm para la litera superior La s...

Page 19: ...h bales brincar sobre la misma Siempre utilice la escalera para entrar y salir de la litera superior No use partes sustitutas Contacte al productor o distribuidor para obtener repuestos El uso de una...

Page 20: ...or de la cabecera E Ensamble del soporte F Riel lateral frontal del colch n Cant 1 Cant 2 Cant 1 G Riel lateral posterior del colch n H Riel de seguridad chico I Riel de seguridad largo Cant 1 Cant 1...

Page 21: ...s los rieles est n adjuntados 1 Desempacar la unidad y confirmar que se tiene todo el material de ferreter a y partes requeridas Ensamblar la unidad en un piso alfombrado o en un cart n vac o para evi...

Page 22: ...6 INSTRUCTIVO DE ENSAMBLE 3 Adjuntar 4 soportes K a los rieles de la escalera posterior B con los pernos de 1 2 1 como se muestra K K K K B 1 K B Perno de 1 4 x 1 2 4 usados en este paso...

Page 23: ...CTIVO DE ENSAMBLE 4 Repetir el mismo procedimiento para adjuntar la escalera frontal A al lado opuesto 1 K A K K K K E A 2 E A Perno de 1 4 x 1 2 4 usados en este paso Perno de 1 4 x 5 8 2 usados en e...

Page 24: ...5 Pedir asistencia para deslizar 2 repisas L sobre los rieles de las escaleras A y B y los soportes K y sujetarlos en su lugar con los pernos de 1 2 1 1 K K K K A B L L K K K K L L K L Perno de 1 4 x...

Page 25: ...9 INSTRUCTIVO DE ENSAMBLE 6 Adjuntar el otro ensamble de soporte E entre los postes de la cabecera C y D con 4 pernos de 5 8 2 D C E 2 E B Perno de 1 4 x 5 8 4 usados en este paso...

Page 26: ...tal A y el poste C con 4 pernos de 5 8 2 como se muestra 8 Adjuntar el riel lateral posterior del colch n G entre la escalera posterior B y el poste D con 4 pernos de 5 8 2 como se muestra NOTA No apr...

Page 27: ...11 INSTRUCTIVO DE ENSAMBLE 9 Sujetar los rieles laterales del colch n F y G a los postes chicos de las escaleras A y B con 2 pernos de 2 1 8 3 F G A B 3 3 Perno de 1 4 x 2 1 8 2 usados en este paso...

Page 28: ...la escalera posterior B y el poste D con 4 pernos de 5 8 2 11 Asegurar el riel de seguridad largo I al riel lateral posterior del colch n G con un perno de 2 1 8 3 Perno de 1 4 x 2 1 8 1 usados en es...

Page 29: ...d chico H al poste frontal C con 2 pernos de 5 8 2 13 Asegurar el riel de seguridad chico H al riel lateral frontal del colch n F con 2 pernos de 2 1 8 3 Perno de 1 4 x 2 1 8 2 usados en este paso Per...

Page 30: ...14 INSTRUCTIVO DE ENSAMBLE 14 Sujetar las tablillas de soporte del colch n J entre los rieles laterales F y G con los pernos de 5 8 2 Perno de 1 4 x 5 8 14 usados en este paso F G J J 2 F G...

Page 31: ...mantener la unidad en un rea de clima controlado Temperatura extrema y cambios de humedad pueden causar cambios como partes pandas molduras que se contraigan o que la madera se raje Es recomendable ma...

Page 32: ......

Reviews: