background image

ASSEMBLY INSTRUCTIONS 


6.


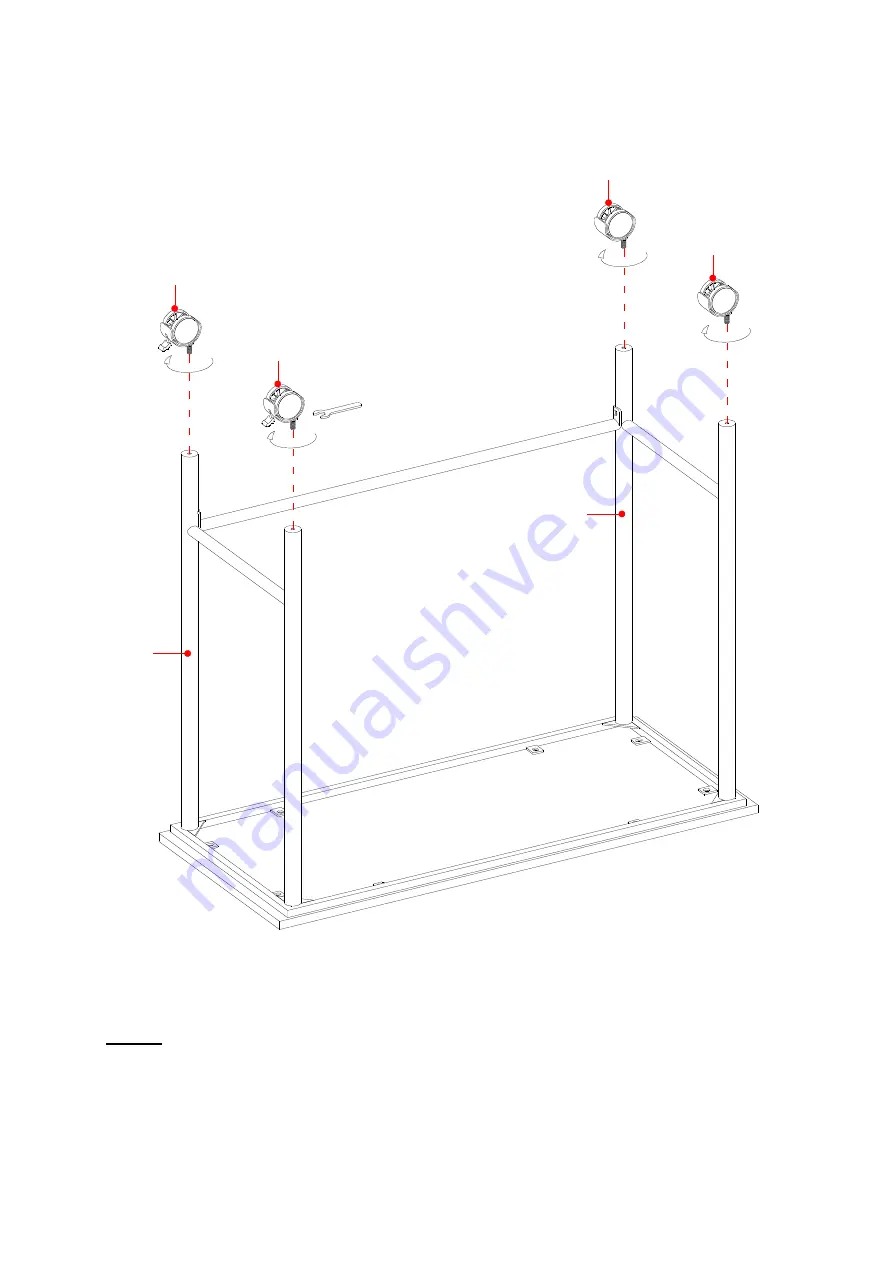
Securely fasten the Casters (F and G) onto the bottom of Legs (C and D). Be sure the Locking Casters 
(F) are located on the same short end. 

NOTE: Set the brake on the locking casters unless you are moving the desk. 

7.


Ask for assistance to stand the assembled unit upright and position it at the desired location. 

D

C

G

G

F

F

Summary of Contents for MS18-D2-1011-05

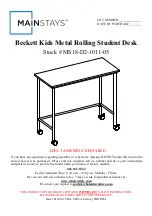
Page 1: ...mbly or if parts are missing DO NOT return this item to the store where it was purchased Please call our customer service number and have your instructions and parts list ready to provide the model name part name or factory number 866 942 5362 Pacific Standard Time 8 30 a m 4 30 p m Monday Friday Or visit our web site 24 hours a day 7 days a week for product assistance at www whalenstyle com Or e ...

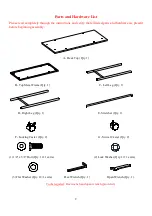
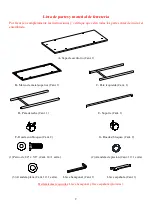
Page 2: ...ore beginning assembly A Desk Top Qty 1 B Top Metal Frame Qty 1 C Left Leg Qty 1 D Right Leg Qty 1 E Stretcher Qty 1 F Locking Caster Qty 2 G Swivel Caster Qty 2 1 1 4 x 5 8 Bolt Qty 14 1 extra 2 Lock Washer Qty 12 1 extra 3 Flat Washer Qty 12 1 extra Hex Wrench Qty 1 Open Wrench Qty 1 Tools required Hex wrench and open wrench provided ...

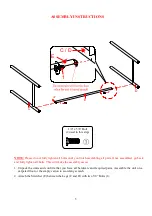
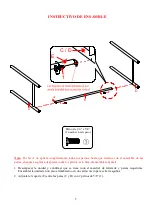
Page 3: ...lly tighten all bolts This will make the assembly easier 1 Unpack the units and confirm that you have all hardware and required parts Assemble the unit on a carpeted floor or the empty carton to avoid any scratch 2 Attach the Stretcher E between the Legs C and D with two 5 8 Bolts 1 UP 1 C D C D E E 1 4 x 5 8 Bolt 2 used in this step ...

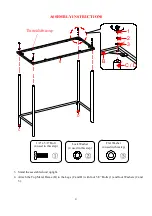
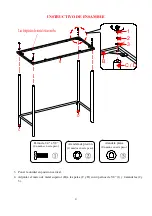
Page 4: ...assembled unit upright 4 Attach the Top Metal Frame B to the Legs C and D with four 5 8 Bolts 1 and four Washers 2 and 3 C D B 1 2 3 C D B Lock Washer 4 used in this step Flat Washer 4 used in this step 1 4 x 5 8 Bolt 4 used in this step ...

Page 5: ...ip last assembly and attach the Top Metal Frame B to the Desk Top A with eight 5 8 Bolts 1 and eight Washers 2 and 3 1 2 3 A B B A Lock Washer 8 used in this step Flat Washer 8 used in this step 1 4 x 5 8 Bolt 8 used in this step ...

Page 6: ...e bottom of Legs C and D Be sure the Locking Casters F are located on the same short end NOTE Set the brake on the locking casters unless you are moving the desk 7 Ask for assistance to stand the assembled unit upright and position it at the desired location D C G G F F ...

Page 7: ... Furniture Care It is best to keep your furniture in a climate controlled environment Continual exposure to damp and wet environment can cause corrosion It is advised to keep furniture away from direct sunlight as it may damage the finish Indoor furniture is not recommended for outdoor use Proper care and cleaning at home will extend the life of your purchase Following these important and helpful ...

Page 8: ......

Page 9: ...está faltante no retorne esté producto a la tienda donde lo compró Por favor llame a nuestro departamento de ayuda al cliente teniendo su instructivo y lista de partes para proveer el modelo nombre de parte o el número de fábrica 866 942 5362 Hora estándar del Pacífico 8 30 a m 4 30 p m de Lunes a Viernes O visite nuestra página de Internet 24 horas al día 7 días a la semana para asistencia www wh...

Page 10: ...rio Cant 1 B Marco de metal superior Cant 1 C Pata izquierda Cant 1 D Pata derecha Cant 1 E Soporte Cant 1 F Rueda con bloqueo Cant 2 G Rueda s bloqueo Cant 2 1 Perno de 1 4 x 5 8 Cant 14 1 extra 2 Arandela de presión Cant 12 1 extra 3 Arandela plana Cant 12 1 extra Llave hexagonal Cant 1 Llave española Cant 1 Herramientas requeridas Llave hexagonal y llave española provistas ...

Page 11: ...r todos los pernos esto hará el ensamble más fácil 1 Desempacar la unidad y confirmar que se tiene todo el material de ferretería y partes requeridas Ensamblar la unidad en un piso alfombrado o en un cartón vacío para evitar rasguños 2 Adjuntar el soporte E entre las patas C y D con 2 pernos de 5 8 1 UP 1 C D C D E E Perno de 1 4 x 5 8 2 usados en este paso ...

Page 12: ...ición vertical 4 Adjuntar el marco de metal superior B a las patas C y D con 4 pernos de 5 8 1 y 4 arandelas 2 y 3 C D B 1 2 3 C D B Arandela de presión 4 usados en este paso Arandela plana 4 usados en este paso Perno de 1 4 x 5 8 4 usados en este paso ...

Page 13: ... previo y adjuntar el marco de metal superior B a la tapa de escritorio A con 8 pernos de 5 8 1 y 8 arandelas 2 y 3 1 2 3 A B B A Arandela de presión 8 usados en este paso Arandela plana 8 usados en este paso Perno de 1 4 x 5 8 8 usados en este paso ...

Page 14: ...nferior de las patas C y D Asegúrese que las ruedas de bloqueo F estén el mismo extremo corto NOTA Poner el freno en las ruedas de bloqueo a menos de que mueva el escritorio 7 Pedir asistencia para poner la unidad en posición vertical y en el lugar deseado D C G G F F ...

Page 15: ...tener la unidad en un área de clima controlado Temperatura extrema y cambios de humedad pueden causar cambios como partes pandas molduras que se contraigan o que la madera se raje Es recomendable mantener la unidad lejos del sol directo ya que puede dañar el acabado Cuidados adecuados y limpieza pueden extender la vida útil de su unidad Siga estas recomendaciones y mantendrá su mueble en buenas co...

Page 16: ......

Reviews: