2
Majestic
®
Fireplaces Power Venting System
51810
Installation Instructions
General information and instructions for the power vent
system model No. PVS-1.
NOTE: The PVS-1 will only
work in conjunction with a VN Gas Valve P/N 57588
or VP Gas Valve P/N 57587.
1. This power vent system must be installed by a quali-
fied installer in accordance with all applicable local
codes and with the current installation codes for gas
burning appliances CSA-B149.1 in Canada or ANSI
Z223.1/NFPA 54 in the U.S.A.
Electrical connections and grounding must be in ac-
cordance with the Canadian Electrical Code, C22.1
Part 1 and in U.S.A., National Electrical Code ANSI/
NFPA70 and/or local codes where applicable.
2. This device must be installed by a qualified profes-
sional installer in accordance with these instructions.
If improperly installed, a hazardous condition such
as an explosion or carbon monoxide poison could
result.
3. The Power Vent System #PVS-1 has been certified
by CSA to be installed as a component part and is
for use only with fireplace models listed in the front
page of this manual. Certification is cancelled if
used with other than listed products.
4. Plan the vent system so that code required distanc-
es are maintained from plumbing and wiring.
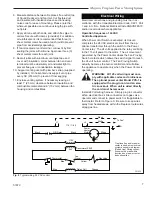
5. The Power Venter motor shaft must be mounted
horizontally to ensure proper operation of the fan
pressure proving switch and to prevent motor bear-
ing wear.
6. Flue gas temperatures must not exceed 470ºF at
Power Venter inlet. Ambient temperature must not
exceed 104ºF.
7. Disconnect power supply when making wiring con-
nections or when working around the fan blade and
motor. Failure to do so may result in severe personal
injury and equipment damage.
8. Make certain the power source is adequate for the
fan motor requirements. Do not add the Power Ven-
ter to a circuit where the total load is unknown.
9. This Power Venter System #PVS-1 shall be installed
with Sound Reducer Kit Nos. SR 4 for fireplaces with
a 4” (102 mm) flue collars and SR 5 for fireplaces
with 5” (127 mm) flue collars. See INSTALLATION
RESTRICTIONS Page 5.
Power Vent System Parts and Description
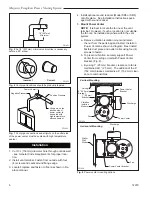
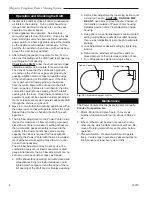
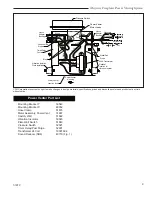
1. Fan Assembly - comes complete with 6’ (1.8 m)
power cord for plugging into a standard house
receptacle. The system is completely pre-wired and
includes the pressure switch and 24 volt transformer.
2. 24 Volt Wiring Harness - a 40’ (12m) wiring harness
with plug-in connectors. Eliminates costly time con-
suming electrical installations.
3. Vent Terminal - the device which exhausts flue
gases into the atmosphere.
4. Fan Mounting Bracket - to secure the fan in a vibra-
tion-free mode so as to reduce vibration through the
pipes.
5. Flex-Connector - an additional device to reduce
vibration and noise through the pipes. It is mounted
to the negative inlet side of the fan.
6. Approved 4” (102 mm) diameter insulated aluminum
flex liner, 4” (102 mm) diameter B-Vent* or 4” (102
mm) diameter single wall metal vent connector.
7. Assorted clamps, connectors and wall mounting
brackets.
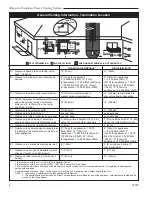
General Venting Information
Always consult your local codes and authorities, in
the absence of such codes, follow the current installa-
tion codes for gas burning appliances CSA-B149.1 in
Canada or ANSI Z223.1/NFPA 54 in the US.
1. Clearance to Combustible Materials:
•
1” (25 mm) for insulated single wall vent or
flexible vent pipe.
•
6” (152 mm) for single wall fan housing.
•
1” (25 mm) for fan motor.
•
1” (25 mm) for B-Vent.*
•
6” (152 mm) for single wall vent or flexible vent
pipe.
* B-Vent can only be used on the negative side of
the power venter - between the appliance and
the power venter - and insulated flexible liner or
single wall vent on the outlet side of the power
venter. To reduce fan noise or condensation,
CFM Corporation recommends all venting pipes
be insulated with a minimum of 1” (25 mm) fiber-
glass insulation.
2. Total allowable system length is 100’ (30 m) of
straight pipe. Minimum allowable system length is 5’
(1.5 m).
NOTE:
Deduct 10’ (3 m) for each 90° elbow and 5’
(1.5 m) for each 45° elbow.
Example:
An installation requires 30’ (9 m) of
straight pipe with 45° and three (3) 90° elbow.
Straight pipe
30’ (9 m)
45º Elbow (1) 5’ (1.5 m)
90º Elbow (3) 30’ (9 m)
TOTAL
65’ (19.5 m)
Total equivalent pipe length = 65’ (19.5 m)

