


3. Premere ripetutamente il tasto
FF
/
o
FB
/
per impostare le ore.
4. Premere il tasto
PROGRAM
/
per confermare.
I minuti inizieranno a lampeggiare
5. Premere ripetutamente il tasto
FF
/
o
FB
/
per impostare i minuti.
6. Premere il tasto
PROGRAM
/
per confermare.
I minuti non lampeggiano più e lora è impostata.
7. Premere il tasto
PROGRAM
/
per selezionare tra 12 e 24 ore, visualizzato come segue
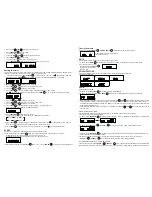
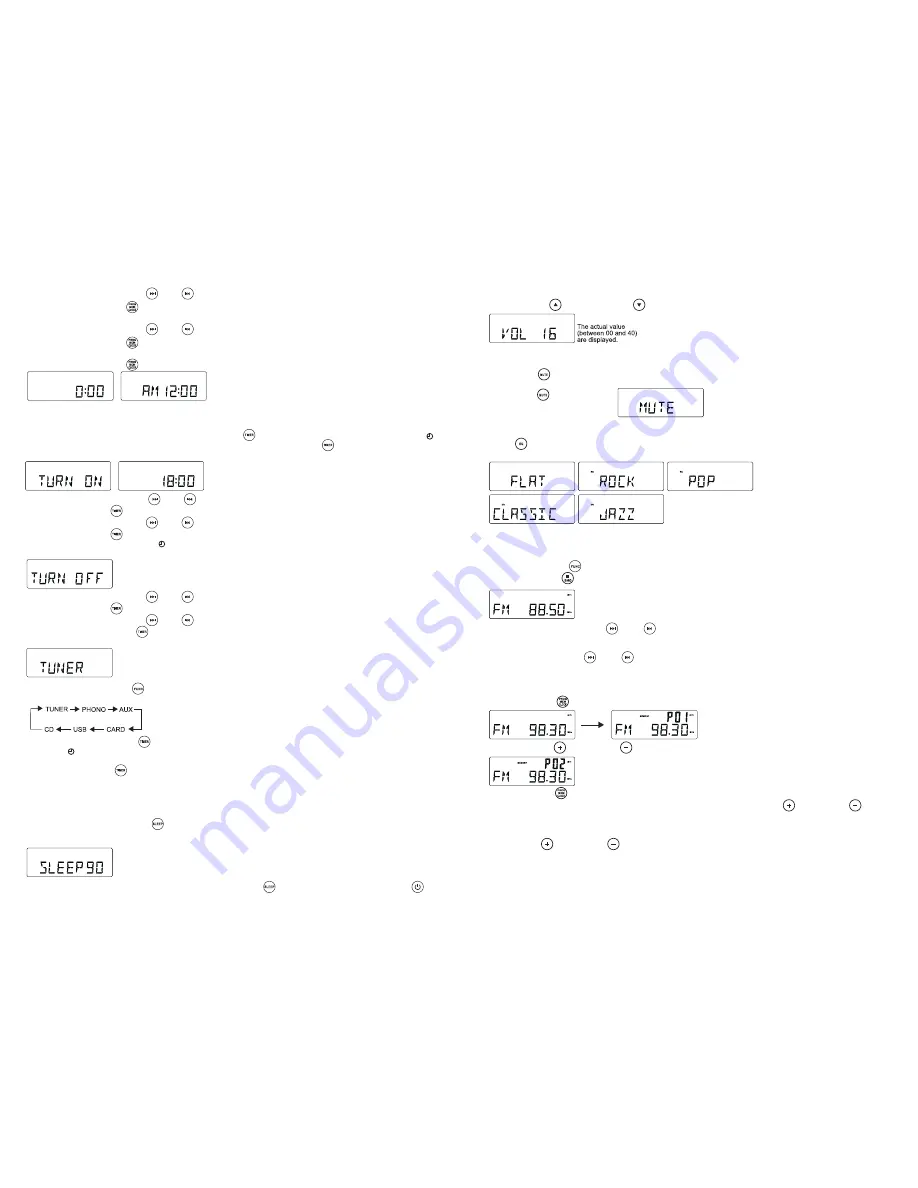
Impostare il timer
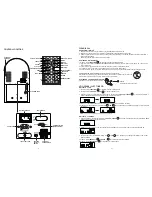
Lunità può essere utilizzata come sveglia: la fonte selezionata (CD, RADIO, USB, CARD SD O GIRADISCHI) inizierà la
riproduzione allora prestabilita. Assicurarsi che lora sia impostata prima di utilizzare la funzione timer.
1. In modalità standby, premere e tenere premuto il tasto
TIMER
/
sul telecomando per più di 1 secondo, il simbolo " "
ed il messaggio TURN ON inizieranno a lampeggiare. Premere ancora il tasto
TIMER
/
sul telecomando per impostare
l accensione della funzione timer (SYSTEM POWER ON).
2. Premere ripetutamente il tasto
FF
/
o
FB
/
per impostare le ore.
3. Premere il tasto
TIMER
/
sul telecomando per entrare nella modalità imposta minuti.
4. Premere ripetutamente il tasto
FF
/
o
FB
/
FF
o
FB
per impostare i minuti.
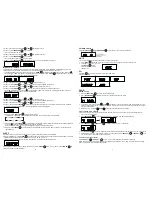
5. Premere il tasto
TIMER
/
sul telecomando per impostare lo spegnimento della funzione timer
(SYSTEM POWER OFF). Il simbolo " " ed il messaggio TURN OFF inizieranno a lampeggiare. Premere ancora il
tasto
TIMER
sul telecomando per iniziare limpostazione.
6. Premere ripetutamente il tasto
FF
/
o
FB
/
per impostare le ore.
7. Premere il tasto
TIMER
/
sul telecomando per entrare nella modalità imposta minuti.
8. Premere ripetutamente il tasto
FF
/
o
FB
/
per impostare i minuti.
9. Premere ancora il tasto
TIMER
/
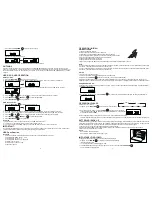
sul telecomando per impostare la fonte che inizierà la riproduzione allora stabilita.
E pre impostata la modalità RADIO. Il messaggio TUNER inizierà a lampeggiare.
10. Premere il tasto
FUNCTION
/
per selezionare la fonte.
Lunità inizierà a riprodurre lultima stazione radio ascoltata se viene selezionata la fonte RADIO.
11. Premere ancora il tasto
TIMER
/
sul telecomando per completare le impostazioni del timer di accensione/spegnimento.
Il simbolo " " verrà visualizzato sul display se il timer è impostato.
Nota: Il livello del volume della sveglia sarà leggermente più alto di quello impostato.
12. Premere il tasto
TIMER
/
sul telecomando per attivare/disattivare la funzione timer. Il simbolo " " apparirà/sparirà
rispettivamente.
SLEEP
Potete impostare un intervallo di tempo trascorso il quale lunità si metterà in modalità standby.
Premere ripetutamente il tasto
SLEEP /
sul telecomando per selezione le diverse opzioni di intervallo di tempo (in minuti):
- Il display visualizzerà in sequenza: SLEEP 90, 80, 70, 60, 50, 40, 30, 20, 10
- Il display visualizzerà brevemente lopzione selezionata è tornerà nella modalità precedente.
Per disattivare a funzione sleep, premere ripetutamente il tasto
SLEEP /
fino a 00 o premere il tasto
POWER
/
per
posizionare lunità in modalità standby.
18
RADIO
AM/FM Tuning
1. Press the
FUNCTION
/
to set the unit to TUNER mode.
2. Press
STOP/BAND
/
repeatedly to select your desired waveband. FM or AM
3. Auto Tuning Press and hold
FF
/
or
FB
/
until frequency begins to scroll the radio automatically tunes to a
station with sufficient reception. If a station in received in stereo, (ST) is shown. Repeat step 3 if necessary until you
find the desired station.
4. Manual Tuning Press
FF
/
or
FB
/
briefly and repeatedly until found a station.
Programming radio stations
You can store up to a total of 40 radio stations (FM and AM) in the memory, manually or automatically (Autostore)
1. Tune to your desired station
2. Press
PROGRAM
/
to activate programming, icon MEMORY and P01 will start flashing.
3. Press
PRESET
+
/
or
PRESET
/
to allocate a number from 1 to 20 stations.
4. Press
PROGRAM
/
to confirm, display shows the preset number waveband and the frequency of the preset station.
5. Repeat steps 1-4 to store other stations to listen to a preset station. Press
PRESET
+
/
or
PRESET
/
once
or more until the desired preset station in displayed.
To listen to a preset station
Press
PRESET
+
/
or
PRESET
/
once or more until the desired preset station in displayed.
Automatic programming radio stations Automatic programming will station preset 1, from this preset number upwards,
former programmed tuner stations will be erased.
Volume control
Press
VOLUME
UP
/
/
VOLUME
DOWN
/
on the remote control to adjust the volume.
MUTE
You can temporarily switch off the sound without switching off the unit.
1. Press
MUTE
/
on the remote control to switch off the sound, playback continues without sound.
2. To switch on the sound , you can:
- press
MUTE
/
again;
- adjust the volume controls;
- change source
EQ
Press
EQ
/
on the remote control to select desired EQ mode.
5 modes preset EQ:
7


