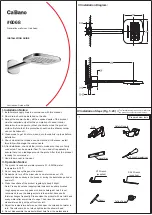
Monaco Installation Guide - Surface Profiles
2
The Majestic Shower Company Limited
Unit 17, Flitch Industrial Estate, Chelmsford Road, Dunmow, CM6 1XJ
Tel44 (0) 8448 001 500
Fac44 (0) 1279 635 074 info@majesticshowers.com www.majesticshowers.com
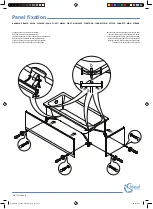
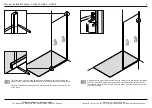
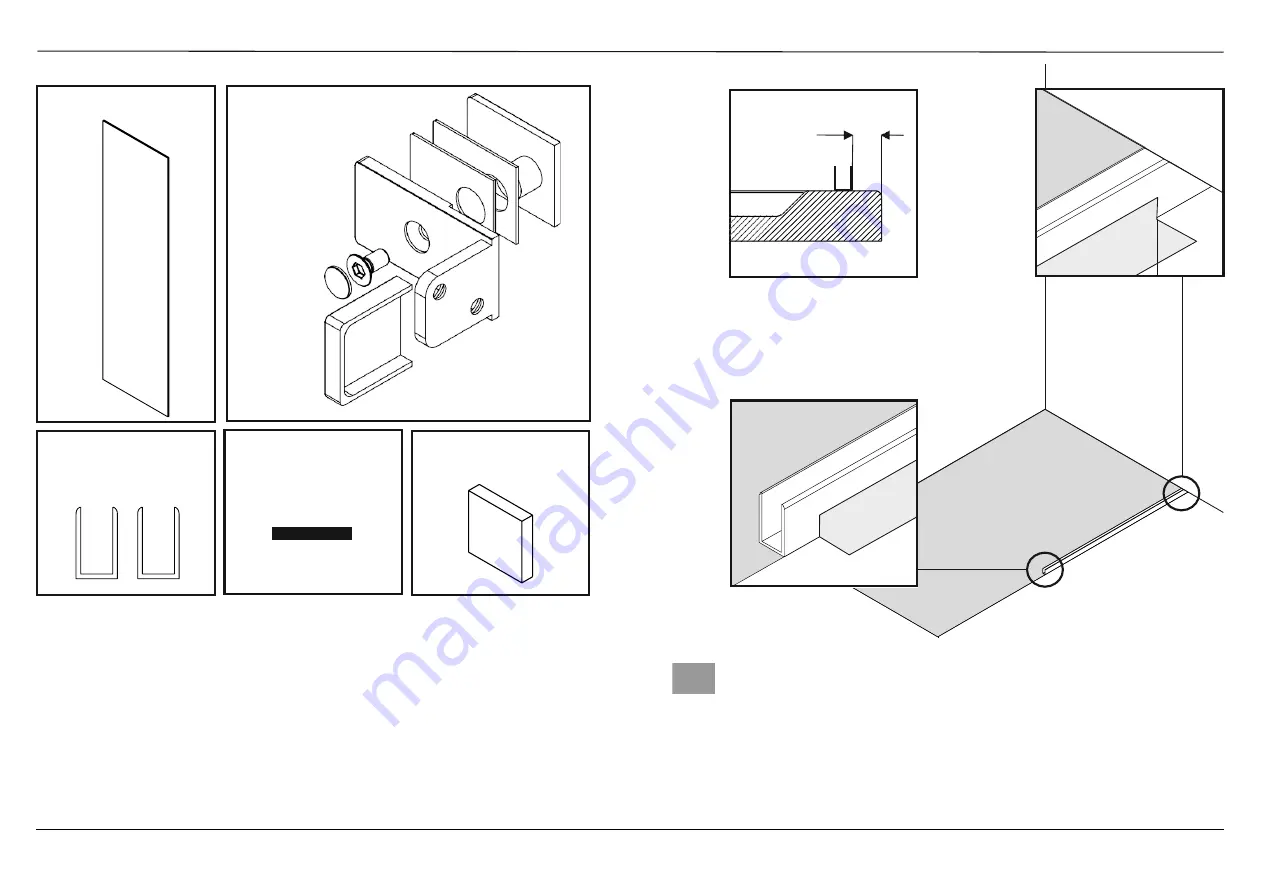
Place the floor channel in the required position for the fixed panel. If a tray is used,
preferably position it about 10mm inboard of the edge.
Ensure that the mitred end is pushed into the corner, tape the channel in place and
mark its position.
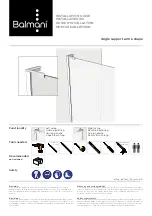
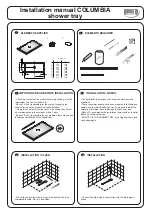
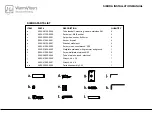
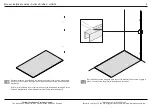
1 x Glass Panel
2 x Wall Bracket assemblies
including screws
and gaskets
Wall fixing screws and
wall plugs also supplied.
2 x Surface Profile
- one for the wall and one
for the floor.
Rubber cushioning
strip
1 x 10mm Spacer for
alignment of profiles
~10 mm
1