background image

ANUFACTURING, INC.  (714) 772-5202  FAX (714) 772-2302 

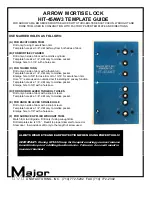
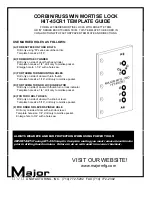
CORBIN/RUSSWIN MORTISE LOCK 

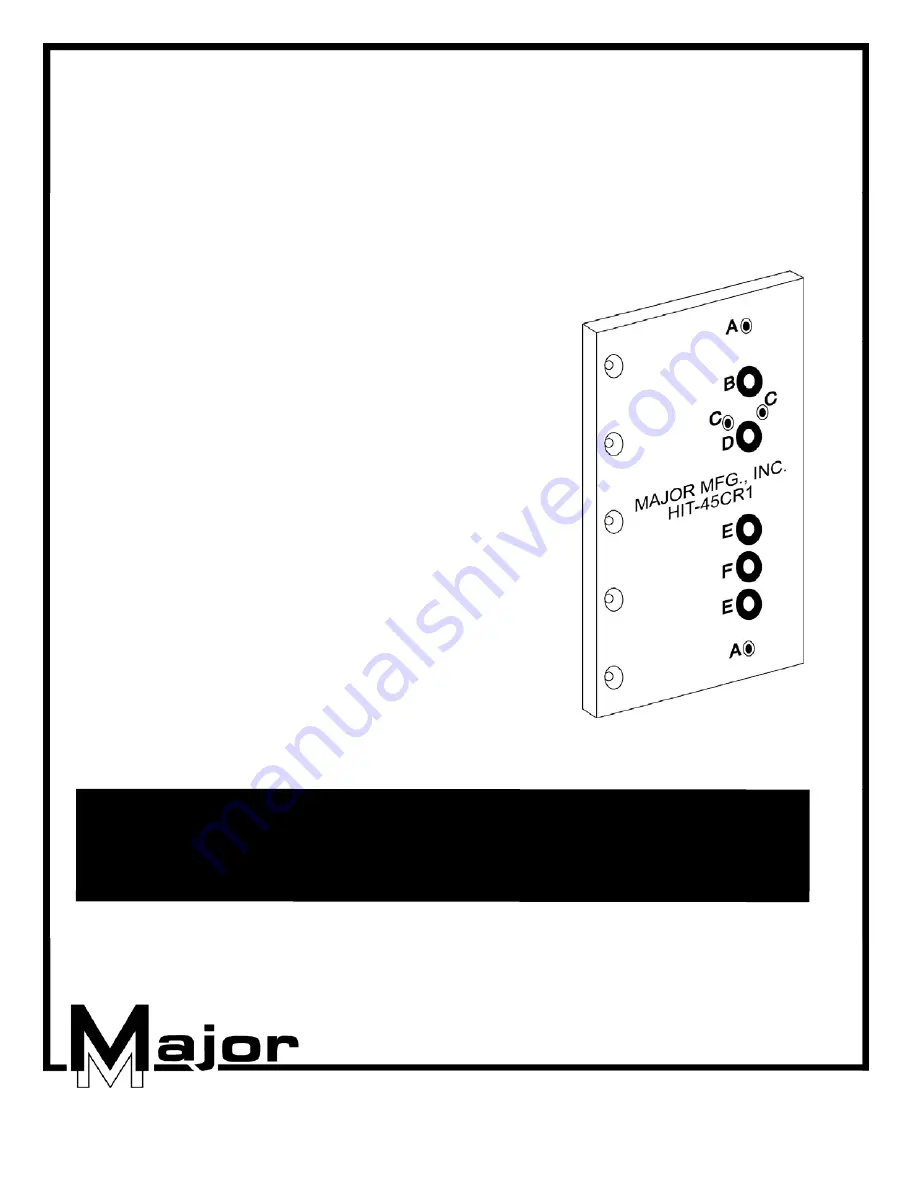
HIT-45CR1 TEMPLATE GUIDE 


FOR ML220 SERIES MORTISE LOCKS WITH ROSETTE TRIM  

OR “M” SERIES ESCUTCHEON TRIM.  THIS TEMPLATE TO BE USED IN  

CONJUNCTION WITH FACTORYPAPER TEMPLATE AND DIRECTIONS. 

USE MARKED HOLES AS FOLLOWS: 


(A) FOR ESCTECEON THRU BOLTS  

      Drill only using “M” series escutcheon trim. 
      Template hole size: 3/16”. 
 

(B) FOR MORTISE CYLINDER 

      Drill only on side of door that has cylinder 
      Template hole size: 1/4”, drill only to mortise pocket. 
      Enlarge hole to 1-1/4” with a hole saw.  
 

(C) FOR THUMB TURN MOUNTING HOLES  
      

Drill only on side of door with turn thumb.   

      Template hole size: 1/16”, drill only to mortise pocket. 
       

(D) FOR THUMB TURN OR LOCK INDICATOR 

      Drill only on side of door with thumb turn or lock indicator. 
      Template hole size: 1/4”, drill only to mortise pocket.     
 

(E) FOR THRU BOLT HOLES  

      Drill only on side of door with a knob or lever. 
      Template hole size: 5/16”, drill only to mortise pocket.  
 

(F) FOR KNOB OR LEVER SPINDLE HOLE 

     Drill only on side of door with a knob or lever. 
     Template hole size: 1/4”, drill only to mortise pocket.  
     Enlarge hole to 3/4” with a hole saw. 
 

ALWAYS WEAR EYE AND EAR PROTECTION WHEN USING POWER TOOLS! 


IMPORTANT: If using HIT-45 Clamp for faceplate routing you must remove bevel blocks 

prior to drilling function holes.  Failure to do so will result in incorrect backset. 

VISIT OUR WEBSITE!


        www.majormfg.com 

Summary of Contents for HIT-45

Page 1: ...A 92806 714 772 5202 FAX 714 772 2302 EMAIL MAIL MAJORMFG COM WEB WWW MAJORMFG COM INSTRUCTIONS FOR HIT 45 MORTISE LOCK INSTALLATION WHEN USING POWER TOOLS ALWAYS WEAR EYE AND EAR PROTECTION Copyright...

Page 2: ...Use the HIT 45 clamp system to route faceplate openings in wood doors...

Page 3: ...to release the spring pressure Loosen the black plastic knob until you can ro tate the vise block 180 degrees this will allow it to rotate freely Repeat this procedure with the other end of the clamp...

Page 4: ...LES LATER OR IF USING THIS CLAMP ON ALUMUNUM DOORS FAILURE TO REMOVE THEM WILL CAUSE THE LOCK BACKSET TO BE MIS DRILLED Install the HIT 45AR5 template using the supplied 10 32 x 1 2 long flat head soc...

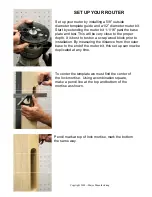
Page 5: ...s best to test on a scrap wood block prior to installation By measuring the distance from the router base to the end of the router bit this set up can now be duplicated at any time To center the templ...

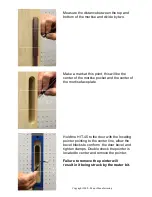
Page 6: ...nter of the mortise faceplate Hold the HIT 45 to the door with the locating pointer pointing to the center line allow the bevel blocks to conform the door bevel and tighten clamps Double check the poi...

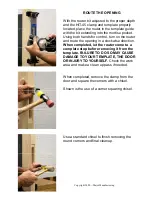
Page 7: ...kwise direction When completed let the router come to a complete stop before removing it from the template FAILURE TO DO SO MAY CAUSE DAMAGE TO YOUR TEMPLATE THE DOOR OR INJURY TO YOURSELF Check the w...

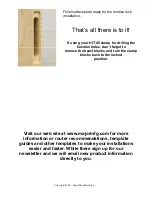
Page 8: ...he bevel blocks and turn the clamp blocks back to the locked position Visit our web site at www majormfg com for more information or router recommendations template guides and other templates to make...

Page 9: ...regardless of the door type of the door edge encountered flat beveled or radius door edge With the appropriate templates installed the HIT 45 can be used to route lock openings in aluminum frames or i...

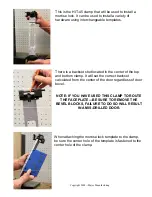
Page 10: ...clamp It will set the correct backset calculated from the center of the door regardless of door bevel NOTE IF YOU HAVE USED THIS CLAMP TO ROUTE THE FACEPLATE BE SURE TO REMOVE THE BEVEL BLOCKS FAILURE...

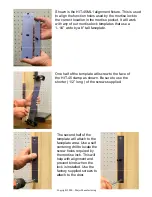
Page 11: ...One half of the template will screw to the face of the HIT 45 clamp as shown Be sure to use the shorter 1 2 long of the screws supplied The second half of the template will attach to the faceplate ar...

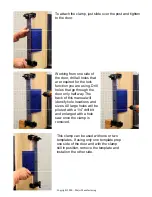
Page 12: ...only half way The back of this manual will identify hole locations and sizes All large holes will be piloted with a 1 4 drill bit and enlarged with a hole saw once the clamp is removed This clamp can...

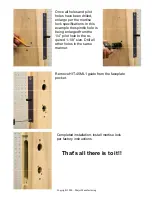
Page 13: ...the spindle hole is being enlarged from the 1 4 pilot hole to the re quired 1 1 8 size Drill all other holes in the same manner Remove HIT 45ML1 guide from the faceplate pocket Completed installation...

Page 14: ...SE CYLINDER HOLE DRILL ONLY ON OUTSIDE OF DOOR Drill to mortise pocket only Template hole size 1 4 Enlarge hole to 1 1 4 with a hole saw after all holes are drilled and HIT 45 has been removed from do...

Page 15: ...tcheon trim Hole C is also used on outside door if installing 02 privacy function Template hole size 1 4 drill only to mortise pocket Enlarge hole to 5 8 with a hole saw D FOR KNOB OR LEVER THRU BOLT...

Page 16: ...ob or lever Template hole size 1 4 drill only to mortise pocket Enlarge hole to 7 8 with a hole saw 5 FOR THRU BOLT HOLES Drill only on side of door with a knob or lever Template hole size 13 8 drill...

Page 17: ...se pocket Enlarge hole to 5 8 with a hole saw 4 FOR KNOB OR LEVER SPINDLE Drill to mortise pocket from both sides of door Template hole size 1 4 Enlarge to 3 4 with a hole saw 5 THUMB PIECE HOLE Drill...

Page 18: ...TO 13 THROUGH BOLT HOLES FOR PULLS Determine center To center distance by using blue trim chart supplied by Baldwin or By measuring the distance on the actual lock Template hole size 9 64 drill drill...

Page 19: ...n side of door with turn thumb Template hole size 1 16 drill only to mortise pocket D FOR THUMB TURN OR LOCK INDICATOR Drill only on side of door with thumb turn or lock indicator Template hole size 1...

Page 20: ...4 with a hole saw C FOR THUMB TURN OR LOCK INDICATOR Drill only on side of door with thumb turn or lock indicator Template hole size 1 4 drill only to mortise pocket Enlarge hole to 1 2 D FOR THRU BO...

Page 21: ...4 with a hole saw to the same depth after all holes are drilled and HIT 45 has been removed from door Using the 3 4 saw hole as a guide remove all wood inside with a chisel to form a pocket D FOR THRU...

Page 22: ...hole to 3 4 with a hole saw to the same depth after all holes are drilled and HIT 45 has been removed from door Using the 3 4 saw hole as a guide remove all wood inside with a chisel to form a pocket...

Page 23: ...to 7 8 for escutcheon trim D FOR ROSE MOUNTED THUMB TURN Drill only on side of door with a rose mounted thumb turn Template hole size 1 16 drill to a depth of 1 4 Not required if using escutcheon trim...

Page 24: ...n Template hole size 1 4 drill only to mortise pocket Enlarge hole to 9 16 with a hole saw after all holes are drilled and HIT 45 has been removed from the door D TURNPIECE OR EMERGENCY TURNPIECE MOUN...

Page 25: ...NCE HOLE Drill only on side of door with thumb turn Template hole size 20 drill drill to depth of 1 8 E FOR THUMB TURN Drill only on side of door with thumb turn Template hole size 1 14 drill only to...

Page 26: ...ll only on side of door with thumb turn Template hole size 1 4 drill only to mortise pocket Enlarge hole to 5 8 with a hole saw D FOR THRU BOLT HOLES Drill only on side of door with a Knob or Lever Te...

Page 27: ...le saw after all holes are drilled and HIT 45 has been removed from door D FOR GUIDING POSTS FOR 710 850 950 ONLY Drill holes only if using trim that requires mounting holes Not required on 710 11 to...

Page 28: ...oth sides of door Enlarge hole to 2 1 8 with a hole saw after all template holes have been drilled and HIT 45 has been removed from door This hole will accept lock spindle and thru bolts OPTION 2 D LO...

Page 29: ...f door F THUMBTURN PLATE ATTACHING SCREWS Drill holes only if using sectional trim that requires a thumbturn plate Template hole size 1 16 in wood door If installing in metal door enlarge to 32 drill...

Page 30: ...ANUFACTURING INC 714 772 5202 FAX 714 772 2302...

Page 31: ......

Reviews: